
Screen Recording Made Easy with Windows Administration Tools
Step-by-step guide to Screen Recording Made Easy with Windows Administration Tools, including configuration, deployment, troubleshooting and practical
Useful external reference: Microsoft Learn.
Useful external reference: Microsoft Learn.
Useful external reference: Microsoft Learn.
Useful external reference: Microsoft Learn.
Screen Recording Made Overview
One of the simplest ways to record your screen on Windows is by using the Snipping Tool. While traditionally used for screenshots, the updated version of this tool allows for easy screen recording.
Useful external reference: Microsoft Learn.
Screen Recording Made Overview
To record your screen, follow these steps:
Useful external reference: Microsoft Learn.
- Open the Snipping Tool from the start menu.
- Select the video camera icon to switch to recording mode.
- Click on “New” and select the area you want to record.
- Once you’re ready, press the “Start” button to begin recording.
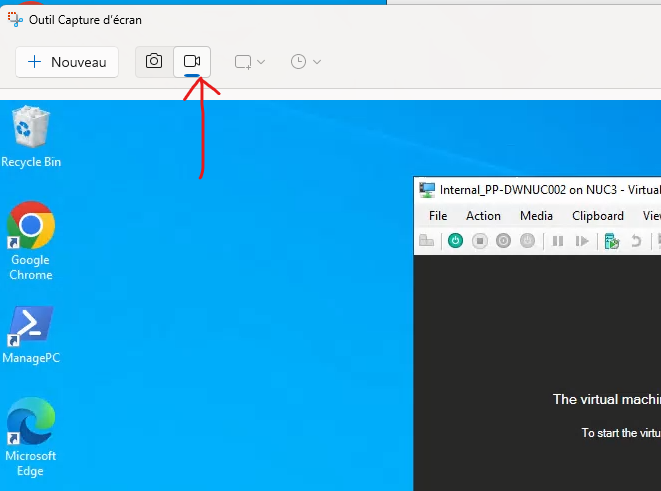
Screen Recording Made Overview
Besides the Snipping Tool, Windows offers other built-in options like the Xbox Game Bar, which is ideal for screen recording with a variety of settings and shortcuts.
Useful external reference: Microsoft Learn.
Useful external reference: Microsoft Learn.
Screen recording tools like Snipping Tool and Xbox Game Bar make it easy to capture videos directly from your Windows desktop. These tools offer quick and straightforward methods for recording your screen without needing additional software.
Useful external reference: Microsoft Learn.