Install Tanium Client on Windows On-Premises
Install Tanium Client – This guide explains how to install the Tanium Client on Windows in an on-premises Tanium environment. It covers the Windows client package, the tanium-init.dat bootstrap file, silent installation with Install.bat, installation validation, and common troubleshooting checks.
Useful external reference: Tanium documentation.
Introduction
Install Tanium Client – Installing the Tanium Client on Windows is straightforward once you have the installer package and the bootstrap file used for registration. This guide shows how to download the required files from the Tanium Console, update the installation command, and validate that the endpoint is correctly registered.
Useful external reference: Tanium documentation.
Install Tanium Client – This workflow is useful for manual installation, packaging, lab validation, or preparing a deployment process before a larger rollout.
Useful external reference: Tanium documentation.
Prerequisites
- Access to the Tanium Console.
- Permission to download client installation files.
- Local administrator rights on the target Windows endpoint.
- The Tanium server names, IP addresses, or ports used in your environment.
- A working folder where the installer files will be stored.
Install Tanium Client – The key file to understand here is tanium-init.dat. This bootstrap file is required for the client to register correctly with the Tanium environment.
Useful external reference: Tanium documentation.
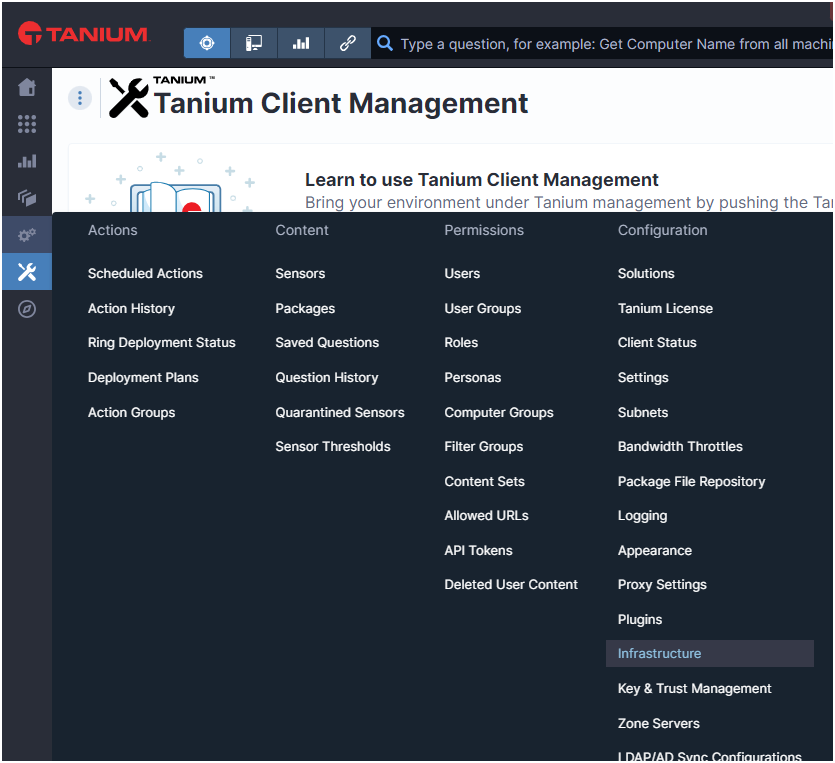
Download the Windows Client Package
- Open the Tanium Console.
- Go to Administration -> Client Management.
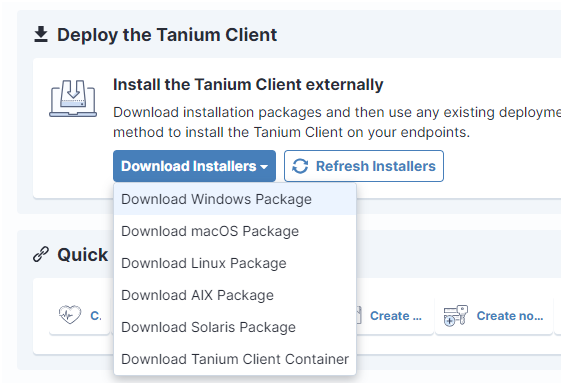
- Click Download Installers.
- Select Download Windows Package.
- Extract the ZIP archive into your working folder.
Install Tanium Client – The archive typically contains the following files:
Useful external reference: Tanium documentation.
SetupClient.exe: the Tanium Client installer.Install.bat: a wrapper script used to launch the installation with the expected parameters.
Download tanium-init.dat
- In the Tanium Console, go to Administration -> Infrastructure.
- Download the generic
tanium-init.datfile. - Copy
tanium-init.datinto the same folder asSetupClient.exe.
Install Tanium Client – Important: if tanium-init.dat is missing or invalid, the client might install but fail to register in the console.
Useful external reference: Tanium documentation.
Update Install.bat
Install Tanium Client – Edit Install.bat and update the command line to match your environment.
Useful external reference: Tanium documentation.
Install Tanium Client – The server names above are sample values. Replace them with the values used in your own Tanium environment.
Useful external reference: Tanium documentation.
Command Options
/S: runs the installation in silent mode./ServerAddress=...: defines the Tanium Server addresses used during registration. You can use FQDNs or IP addresses depending on your design./D=...: defines the installation path for the client./InitFile=...: points to thetanium-init.datfile used during bootstrap.
Install Tanium Client – In most cases, keeping the command inside Install.bat is the easiest way to standardize the installation on multiple machines.
Useful external reference: Tanium documentation.
Optional: Customize tanium-init.dat
Install Tanium Client – If you need environment-specific bootstrap settings, you can generate or download a customized tanium-init.dat from the Tanium Console instead of using the generic file.
Useful external reference: Tanium documentation.
- Open Tanium Client Management.
- Go to Client Deployment.
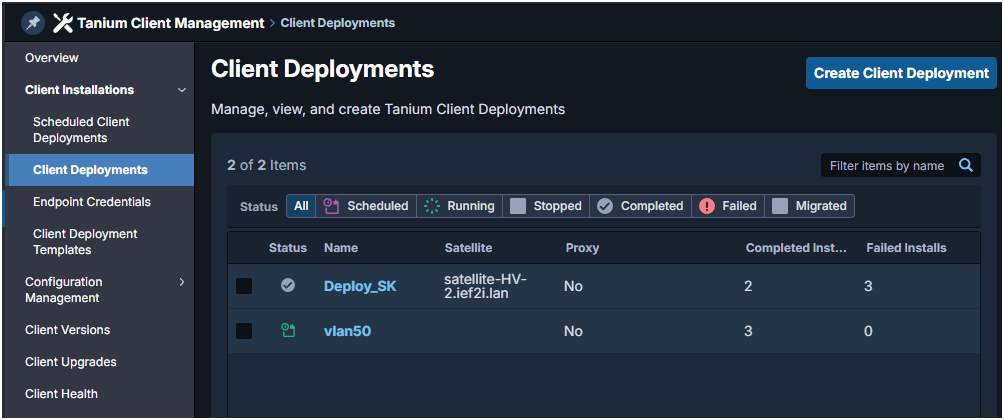
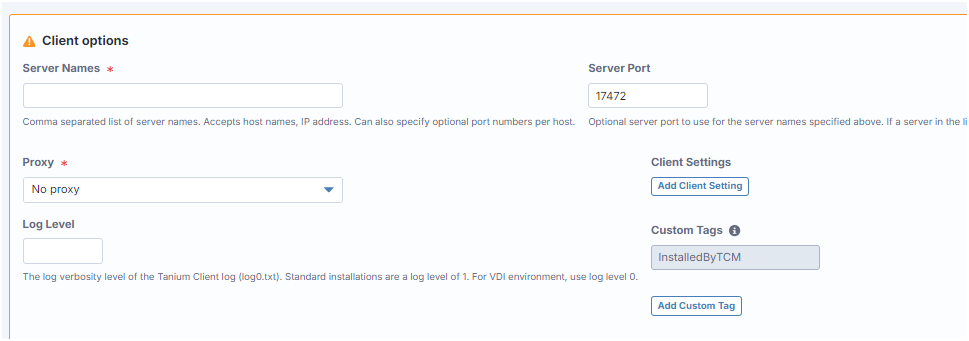
- Create or edit the deployment settings that define the server name, IP address, or port you want the client to use.
- Download the generated
tanium-init.datfile and use it with the installer.
Install Tanium Client – This is useful when you want to standardize bootstrap settings for a specific network zone, site, or deployment scenario.
Useful external reference: Tanium documentation.
Install Tanium Client – Recommendation: do not publish or reuse real customer server names, internal IP addresses, or ports in shared documentation. Use examples or documentation-only values instead.
Useful external reference: Tanium documentation.
Run the Installation
- Open an elevated Command Prompt on the target endpoint.
- Run
Install.bat. - Wait for the silent installation to complete.
Install Tanium Client – If needed, you can also execute SetupClient.exe directly with the same parameters.
Useful external reference: Tanium documentation.
Validate the Installation
Install Tanium Client – After installation, verify the following:
Useful external reference: Tanium documentation.
- The Tanium Client service is installed.
- The service is running on the endpoint.
- The endpoint appears in the Tanium Console.
- The endpoint registers against the expected Tanium infrastructure.
Install Tanium Client – If the client is installed locally but does not appear in the console, re-check the bootstrap file and the server address used in the installation command.
Useful external reference: Tanium documentation.
Troubleshooting
The Client Installs but Does Not Register
- Confirm that
tanium-init.datis in the same folder asSetupClient.exe. - Confirm that the
/InitFilepath is correct. - Confirm that the
/ServerAddressvalue is valid for your environment.
The Installer Does Not Run Correctly
- Run the command with local administrator rights.
- Confirm that the installation path is valid.
- Check whether another security control is blocking the installer.
The Endpoint Is Still Missing in the Console
- Verify that the Tanium Client service is running.
- Confirm that the endpoint can reach the Tanium servers.
- Review the local Tanium Client logs if registration or connectivity still fails.
Summary
Install Tanium Client – To install the Tanium Client on Windows, download the client package, retrieve tanium-init.dat, update the install command with your environment values, run the installer, and validate that the endpoint is correctly registered. Once this process works in a lab or manual test, it can be reused as the base for a larger deployment package.
Useful external reference: Tanium documentation.