Introduction
In SCCM 2007, applications were deployed using packages. Since SCCM 2012, applications are deployed using the “Application” model, which offers several advantages. For example, an application can contain multiple deployment types, such as 32-bit and 64-bit versions of 7zip. SCCM agents can then use defined criteria to determine the appropriate installation source.
Pre-requisites
It is recommended to set up a Data Management Library (DML) for managing applications. The computer account of the SCCM server must have read permissions on this share (Authenticated Users is sufficient).
Deploying an MSI Application
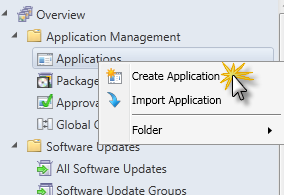
- In the “System Center Configuration Manager” console, click on “Software Library”.
- Select “Overview” > “Application Management” > “Applications”.

- Right-click on “Applications” and select “Create Application”.
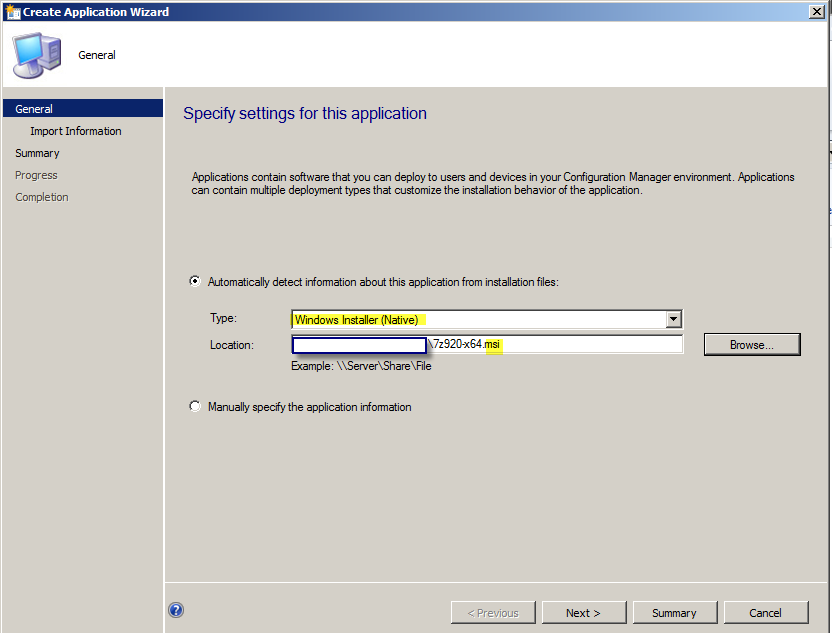
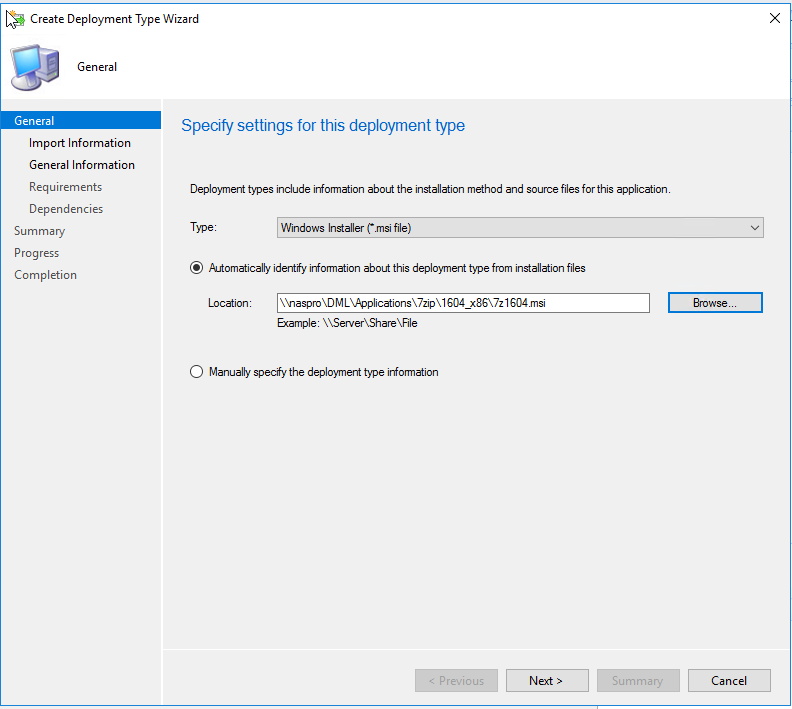
- Select “Windows Installer (Native)”, choose the MSI file, and click “Next”. Use a UNC path for the file.
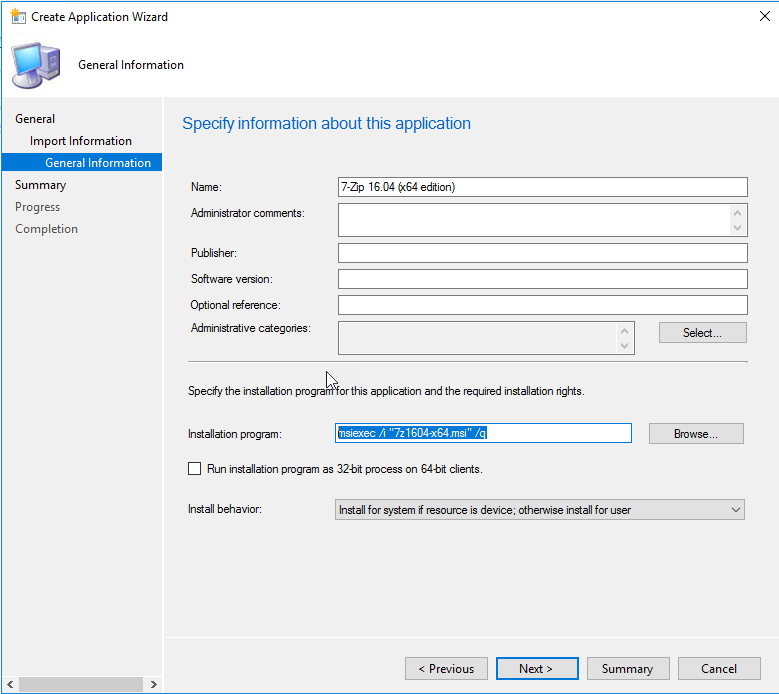
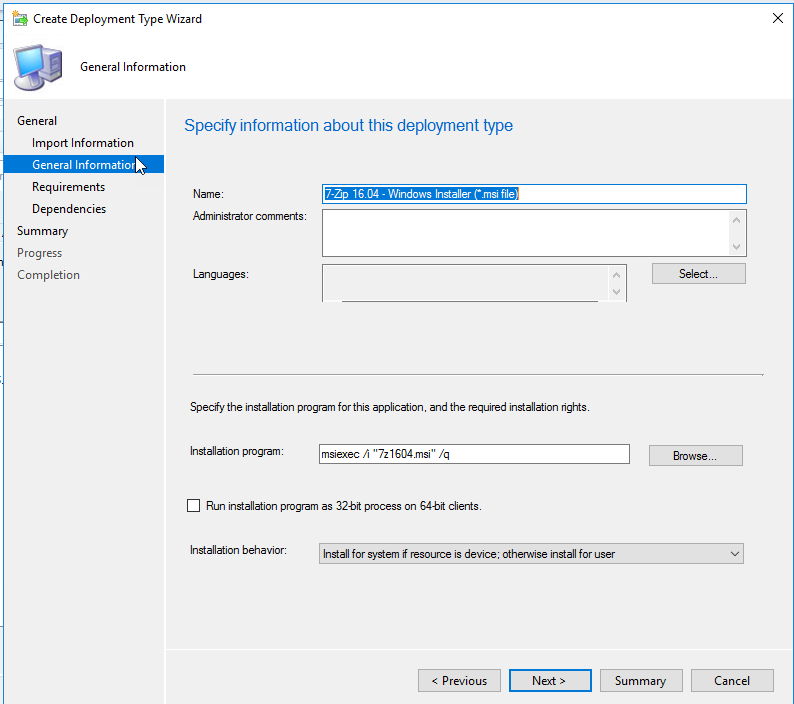
- Specify the application name according to DML standards and click “Next”.
- Adjust the installation command if needed. Example:
msiexec /i "7z1604-x64.msi" /q /log c:\temp\7zip.log
msiexec /i "7z1604-x64.msi" TRANSFORMS=fichier.mst /q
- Click “Next” and validate the subsequent screens.
Deploying a Setup.exe Application
- In the “System Center Configuration Manager” console, click on “Software Library”.
- Select “Overview” > “Application Management” > “Applications”.
- Right-click on “Applications” and select “Create Application”.
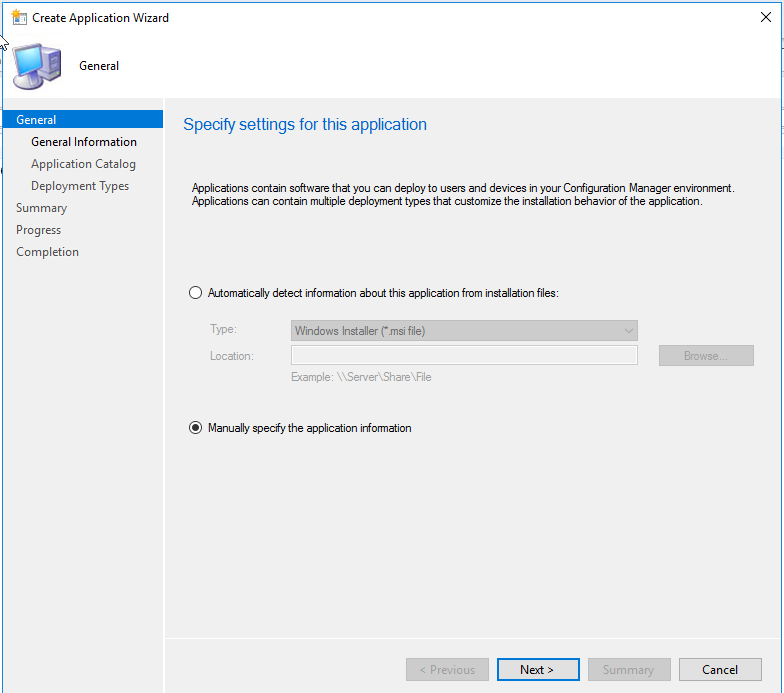
- Select “Manually specify the application information” and click “Next”.
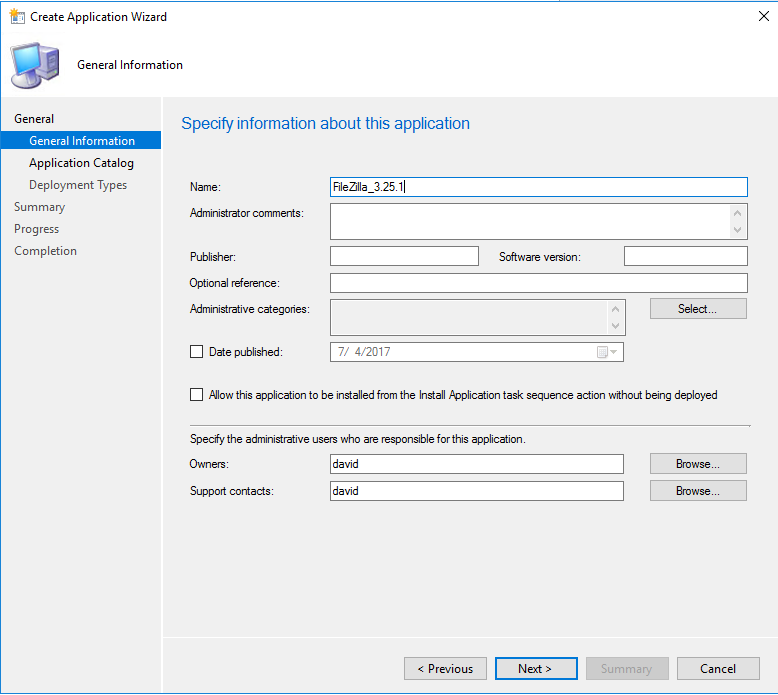
- Enter the application name and click “Next”.
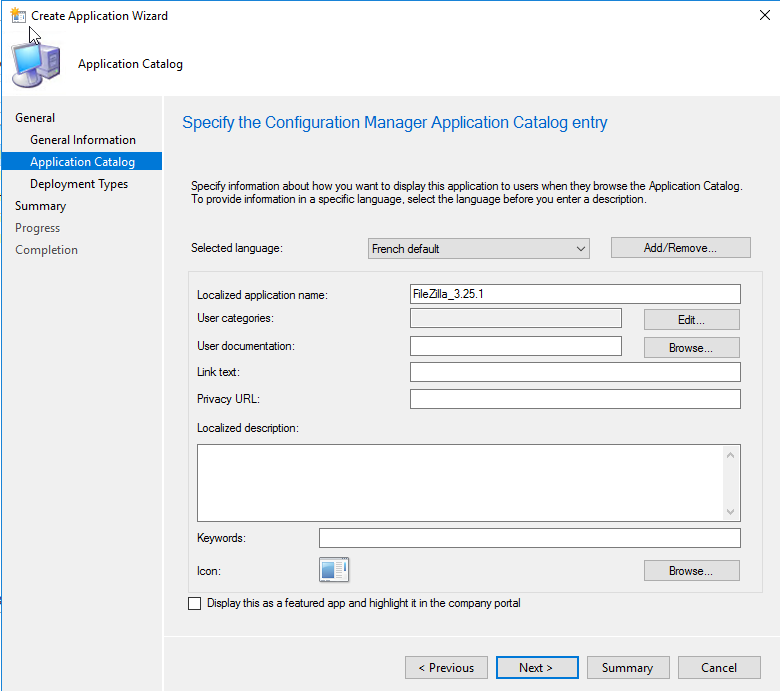
- Enter catalog information and click “Next”.
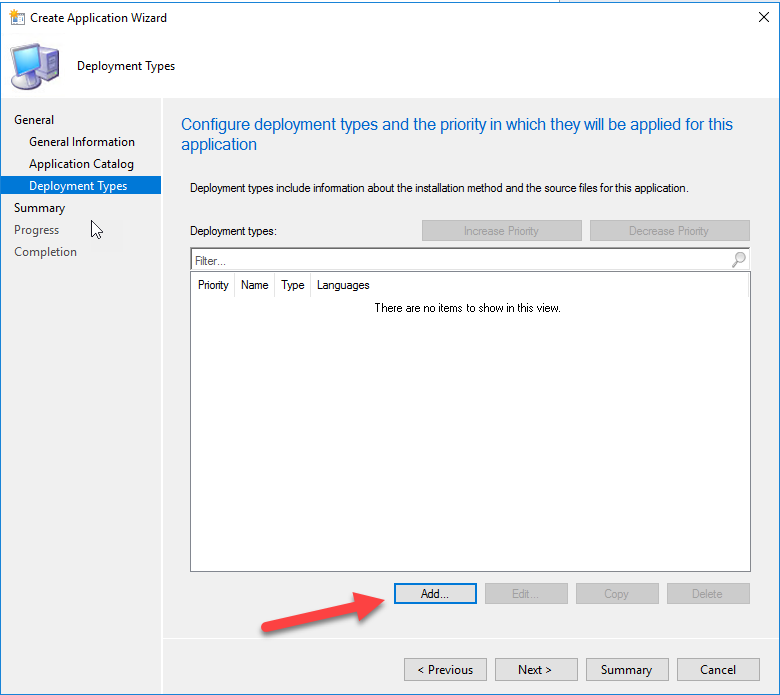
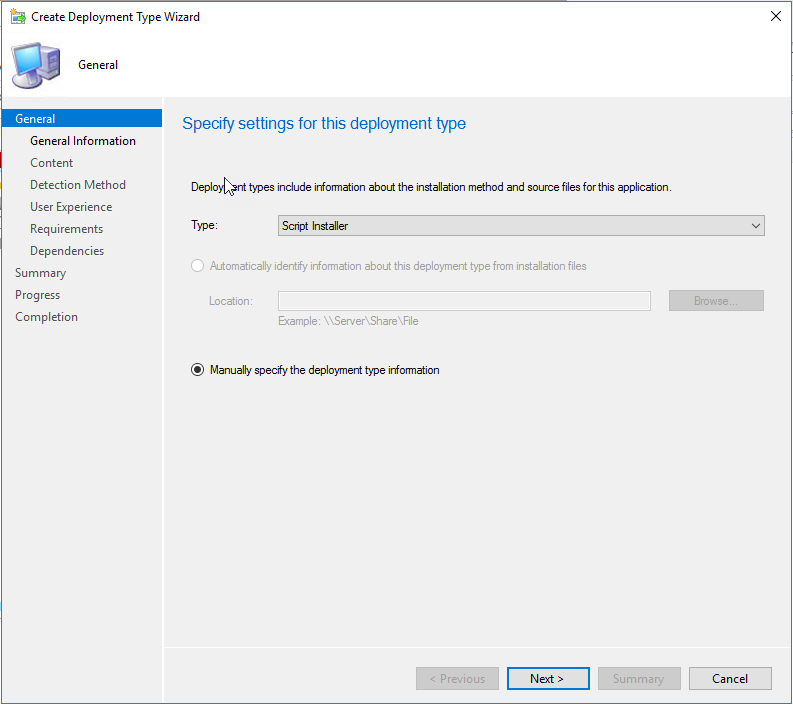
- Add a deployment type by selecting “Script Installer” and click “Next”.
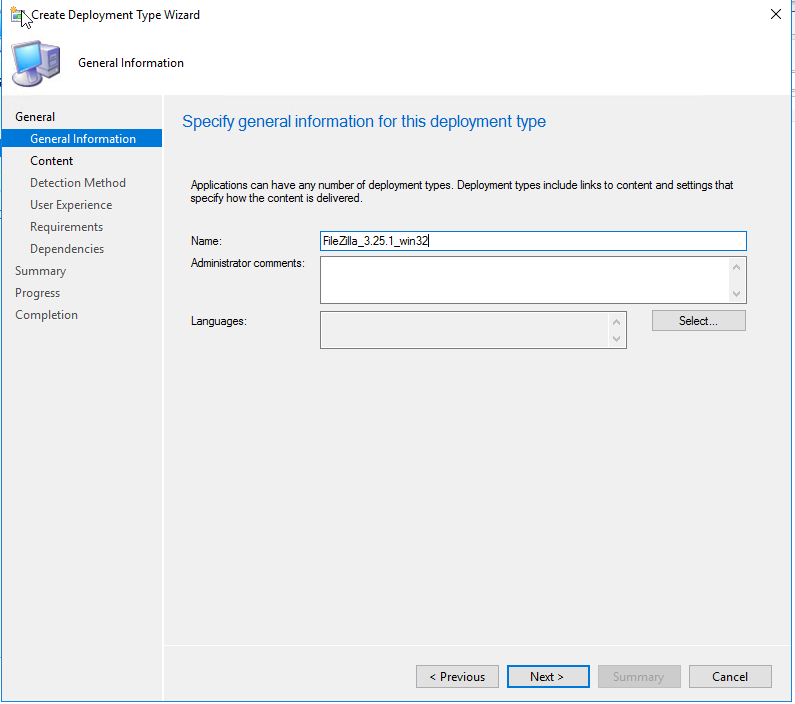
- Enter the deployment type name and click “Next”.
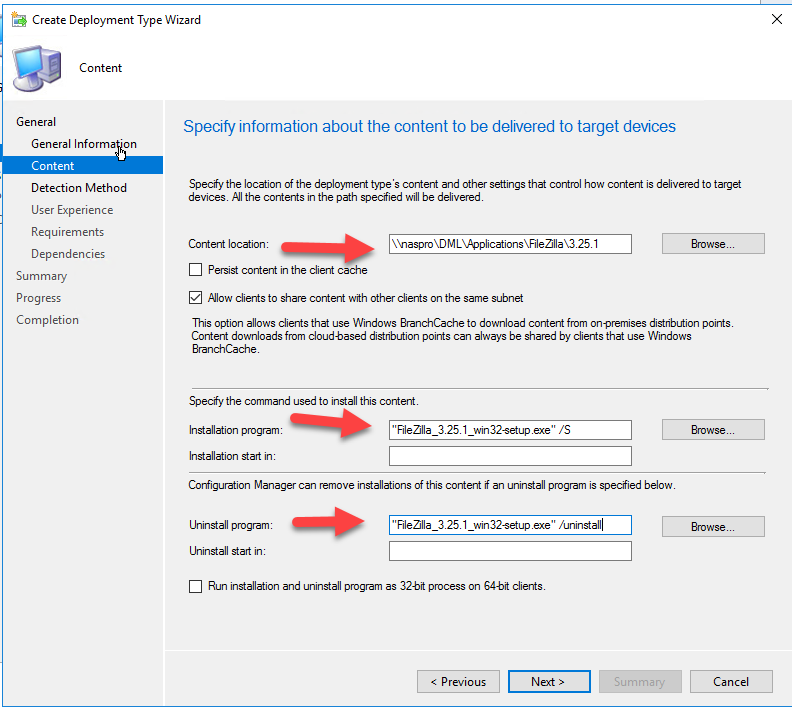
- Specify the content location and installation command, and click “Next”.
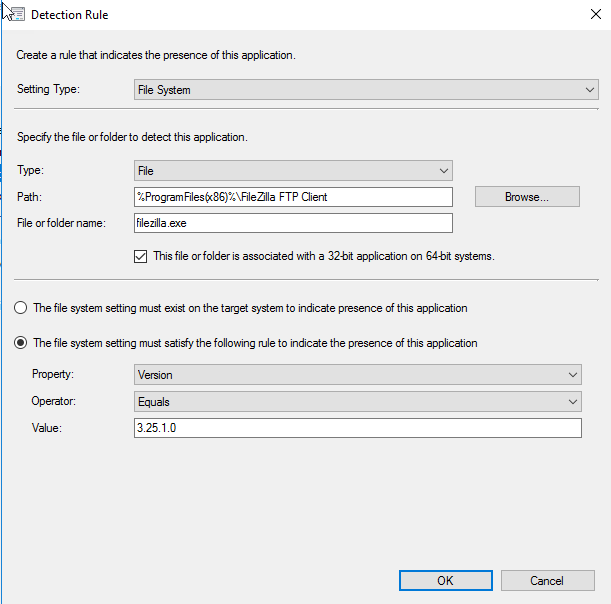
- Add a detection method to ensure the application is correctly installed and click “Next”.
- Select “Install for system if resource is device” in the installation behavior section and click “Next”.
- Validate the subsequent screens to complete the process.
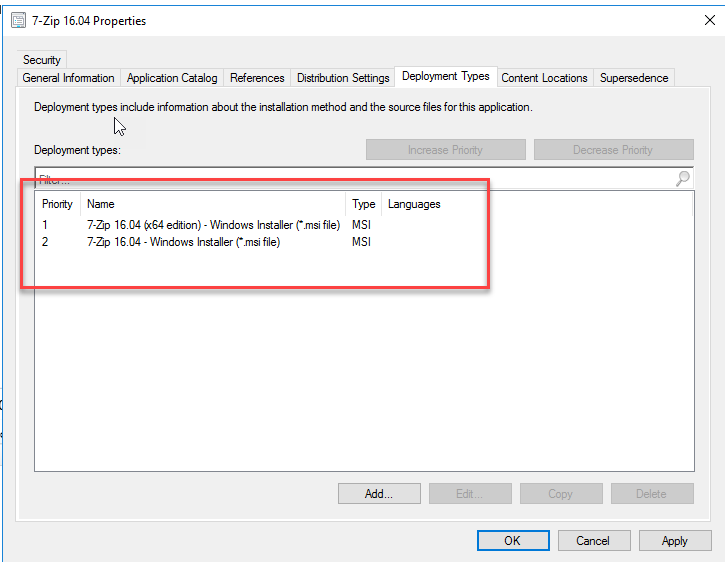
Adding Additional Deployment Types
To add more deployment types, such as different versions or platforms (e.g., 32-bit and 64-bit), follow these steps:
- In the application properties, go to the “Deployment Types” tab.
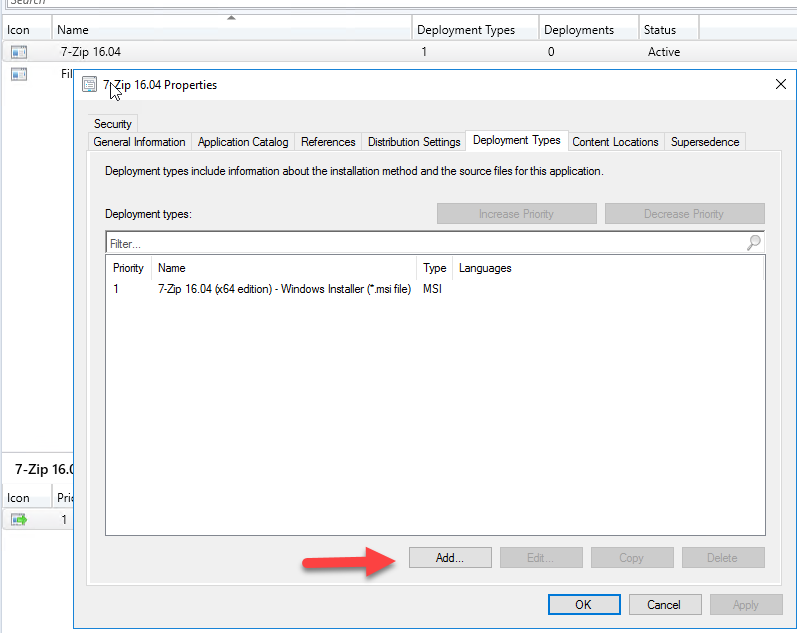
- Click “Add” to include different sources for the same application.
- Specify the installation commands and validate the subsequent screens.
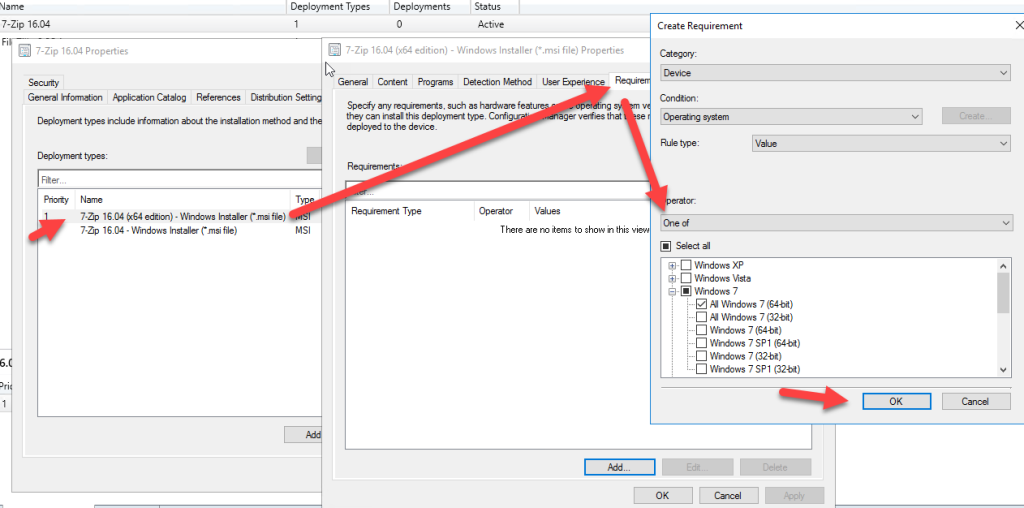
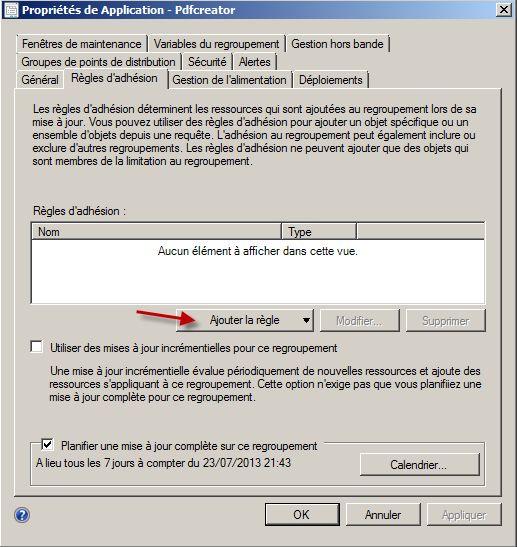
Setting Deployment Conditions
After adding multiple deployment types, set conditions to determine which deployment type is used:
- Edit each deployment type and add conditions such as OS version or architecture.
Other Settings (Optional)
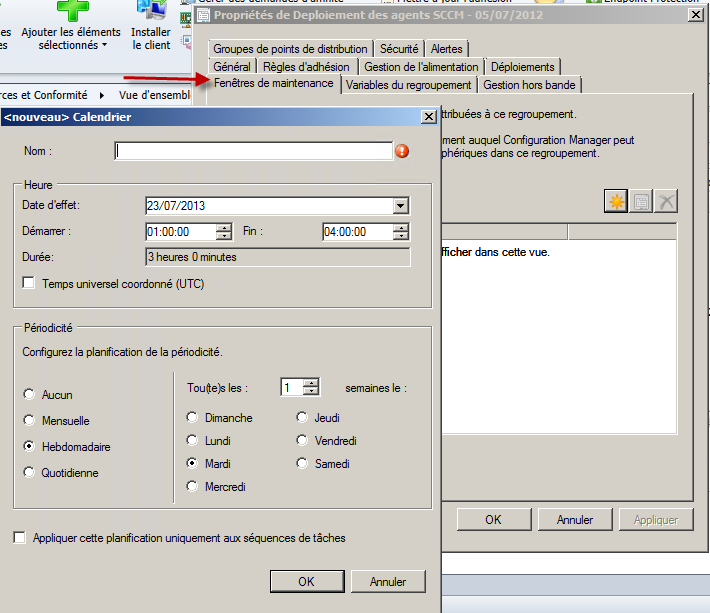
Maintenance Windows
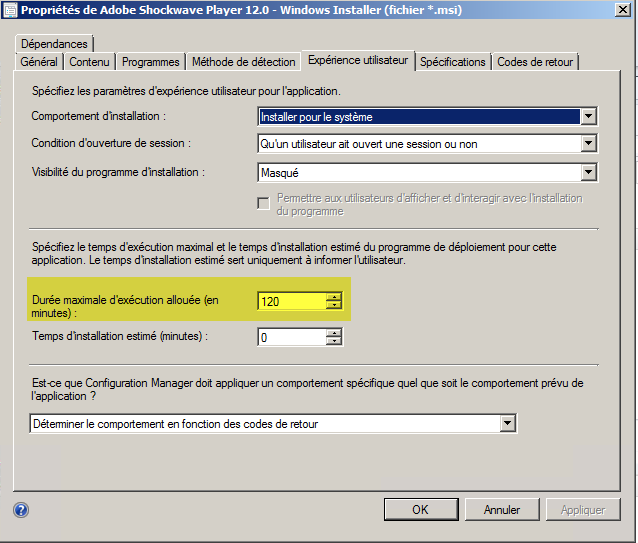
Maintenance windows restrict when changes can be made to systems in a collection. This ensures minimal disruption to the organization. Set the “Maximum allowed run time” in the application’s properties to be less than the maintenance window duration.
Distribution Points
To copy a package to distribution points:
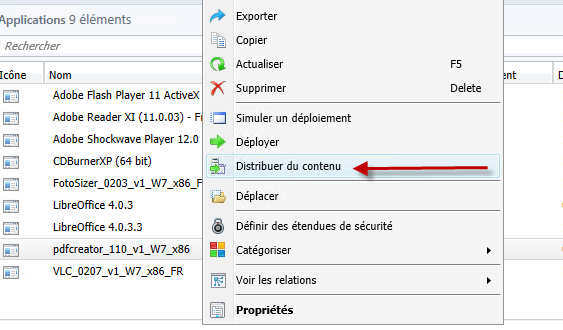
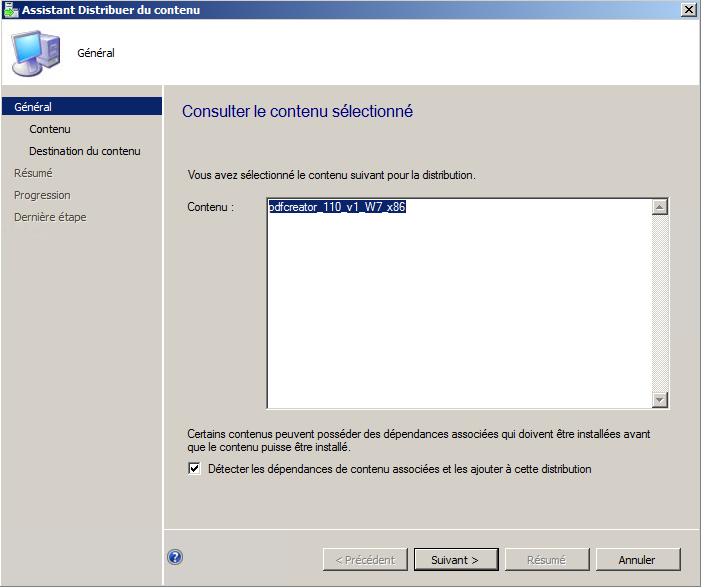
- Right-click on the package or application and select “Distribute Content”.
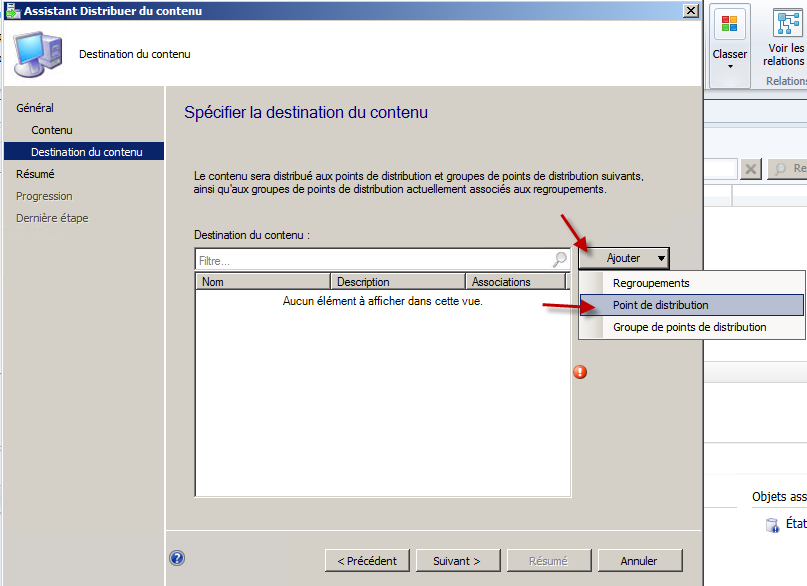
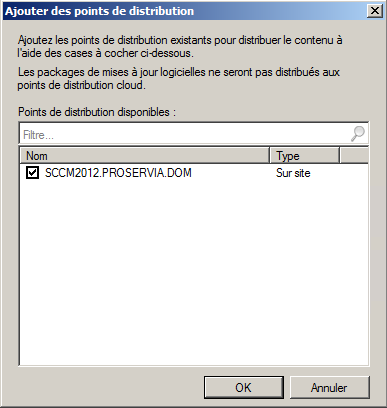
- Click “Next” and add the distribution points or groups.
- Click “Next” until the distribution process is completed.
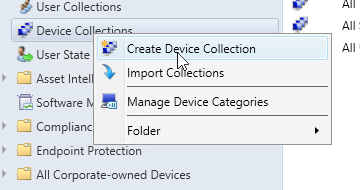
Creating Collections (or Groups)
Create static or query-based collections to manage which devices receive the application:
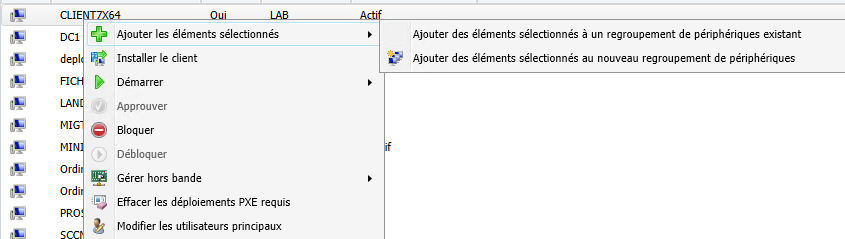
Static Collection
- Create a new empty collection.
- Select devices to add to the collection and click “Add Selected Items”.
Query-Based Collection
- In the collection properties, go to the “Membership Rules” tab.
- Add a query rule and specify the query criteria.
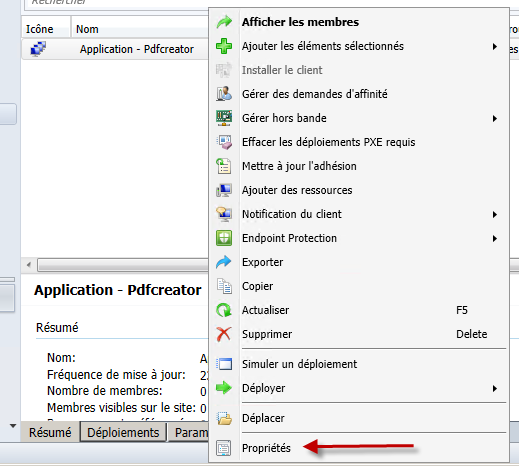
Publishing Applications
Applications can be marked as “Required” (mandatory) or “Available”. Required applications are deployed automatically, while available applications appear in the Software Center for on-demand installation by users.

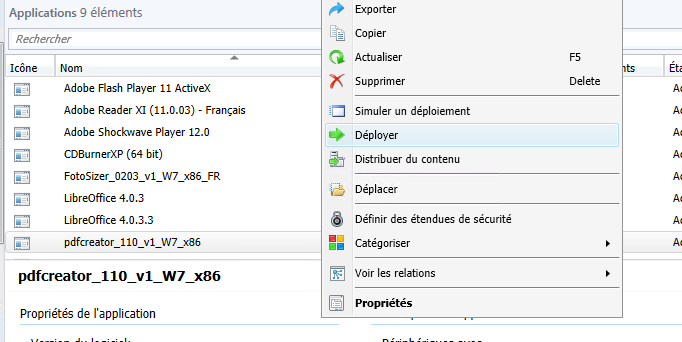
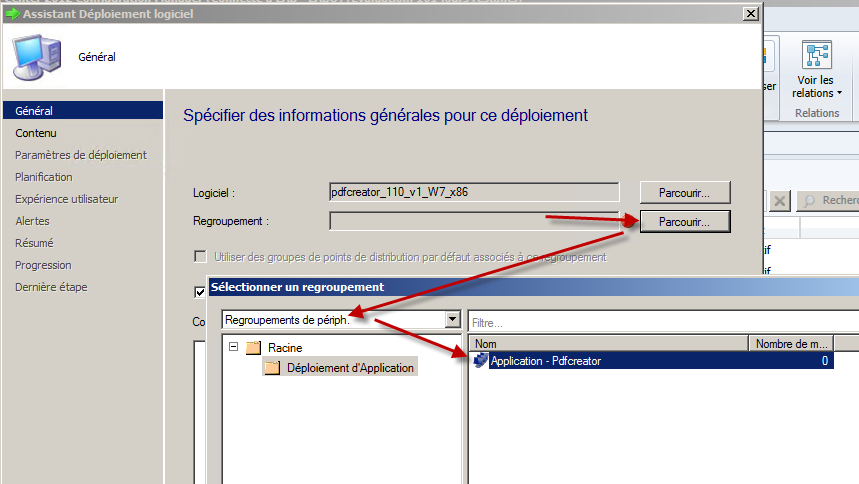
- Right-click on the application and select “Deploy”.
- Choose the target collection and click “Next”.
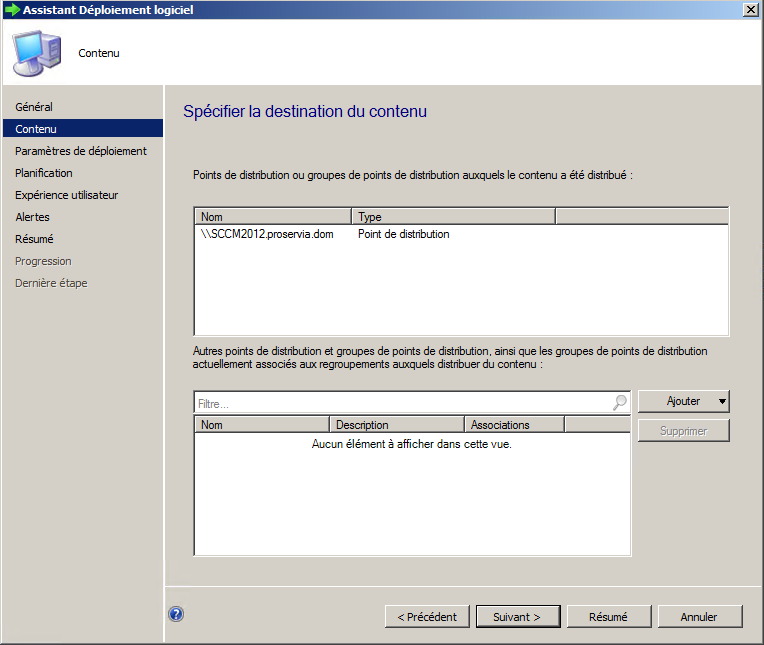
- Add distribution points as needed.
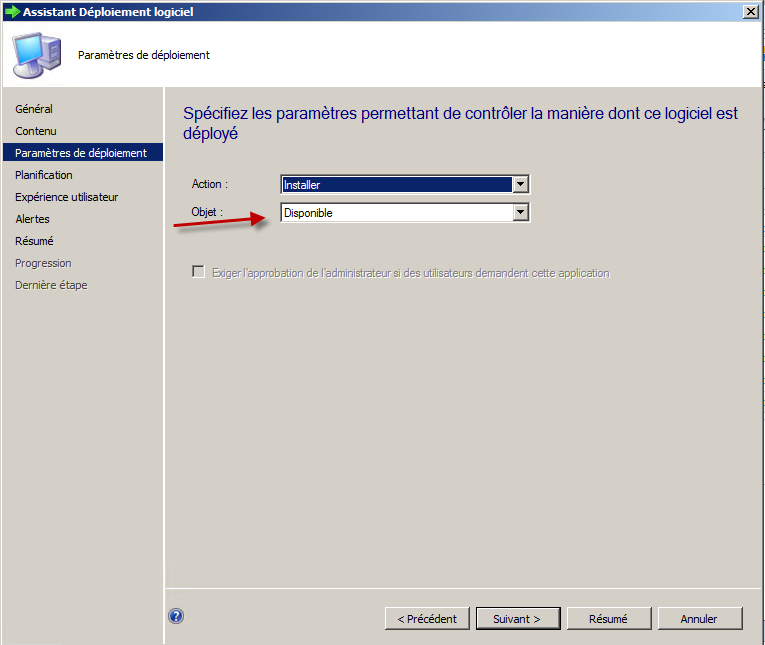
- Specify the action (install or uninstall) and the purpose (available or required), and click “Next”.
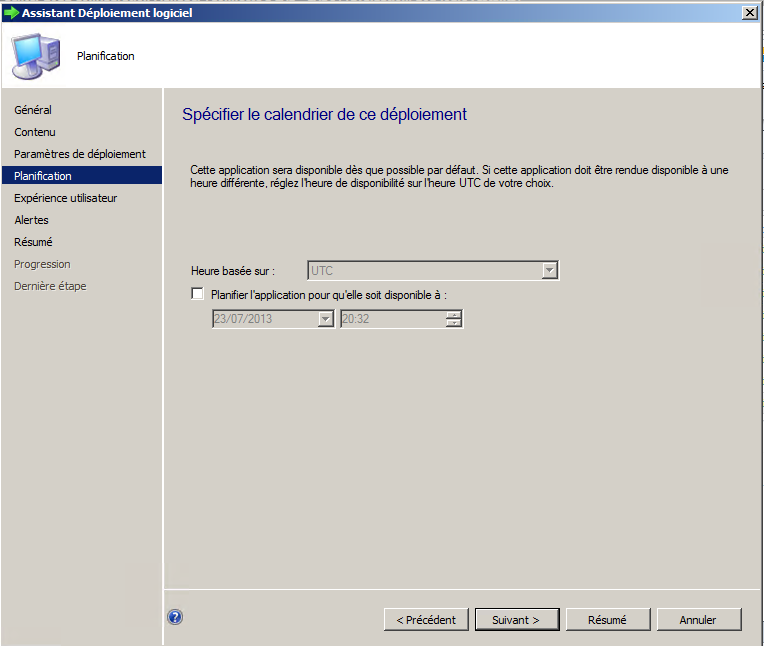
- Set the deployment schedule and click “Next”.
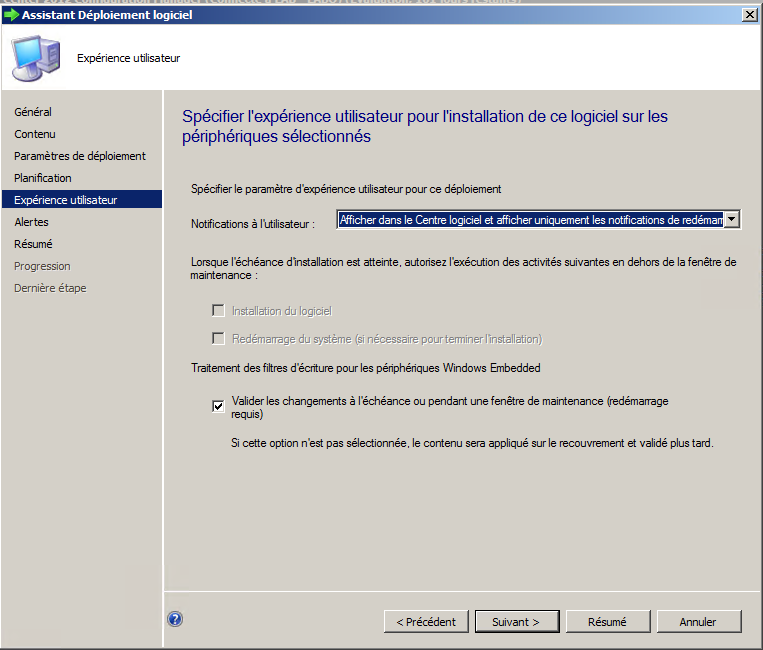
- Configure visibility in the Software Center and click “Next”.
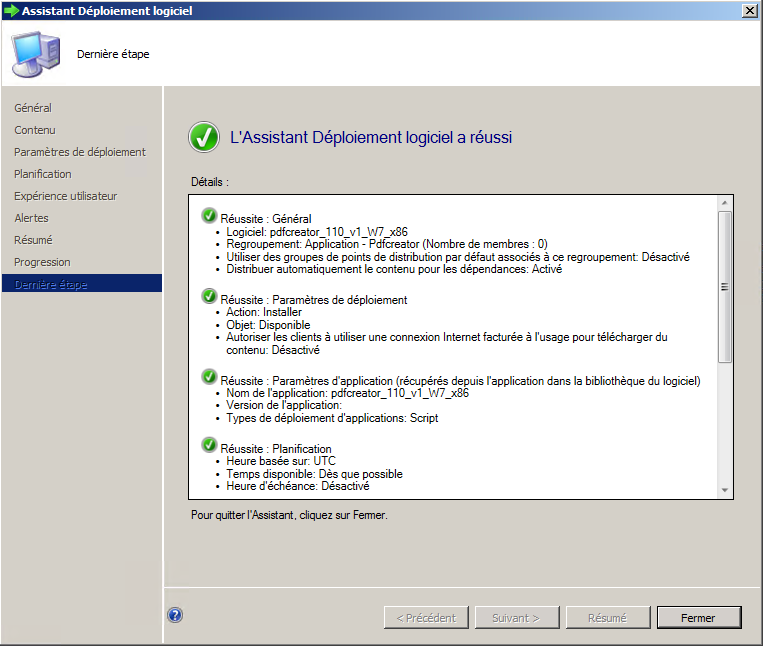
- Click “Next” and “Finish” to complete the deployment.
Monitoring Deployment
Monitor deployment status by navigating to “Monitoring” > “Overview” > “Deployment Status” in the SCCM console.