Introduction
This unified guide walks through preparing and deploying Windows with SCCM: configuring PXE/WDS, the State Migration Point and Network Access Account, preparing WinPE and Windows 10 sources, building the task sequence (drivers, EXE-based installers, unattend.xml), distributing content, publishing/deploying (including standalone media with OSDComputerName), useful variables, and USMT restore if a task sequence fails.
SCCM Configuration
WDS / PXE on the Distribution Point
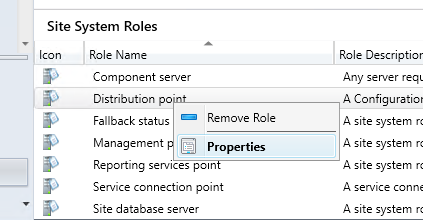
In the distribution point properties, enable the PXE option (do not install the Windows WDS role manually). The Enable unknown computer support option allows SCCM to recognize unknown computers.
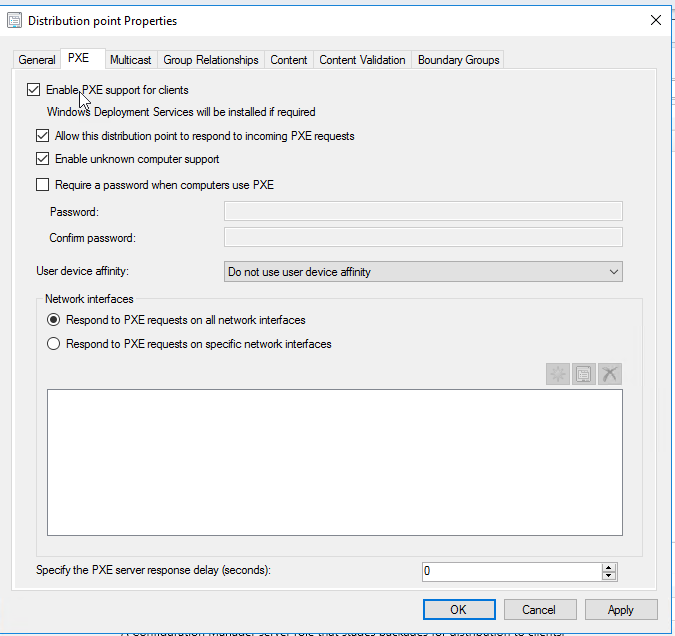
Useful logs: distmgr.log and SMSPXE.log.
State Migration Point (SMP) Role
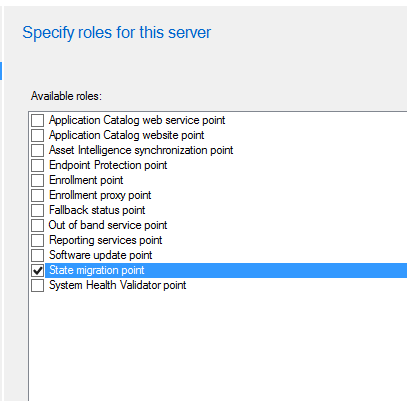
Install the State Migration Point role on one or more SCCM servers to handle user data backup and restore (USMT).
Network Access Account (NAA)
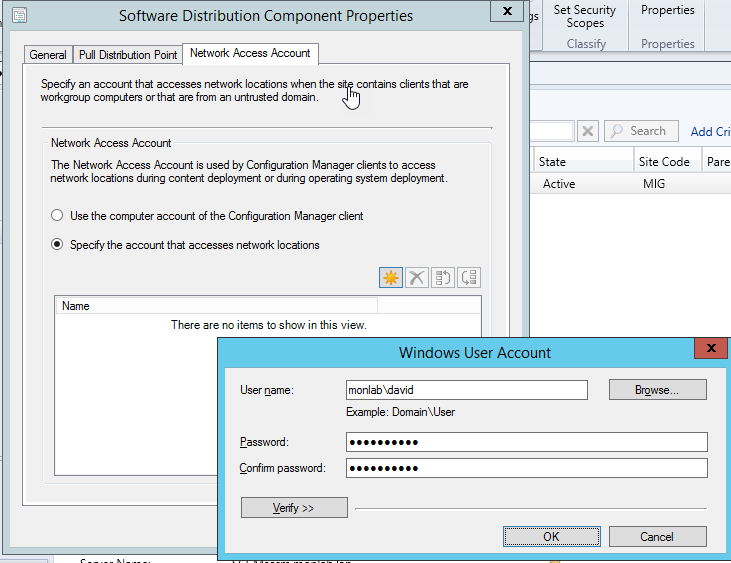
This account lets WinPE access SCCM server shares (distribution points). Configure it at the site level.
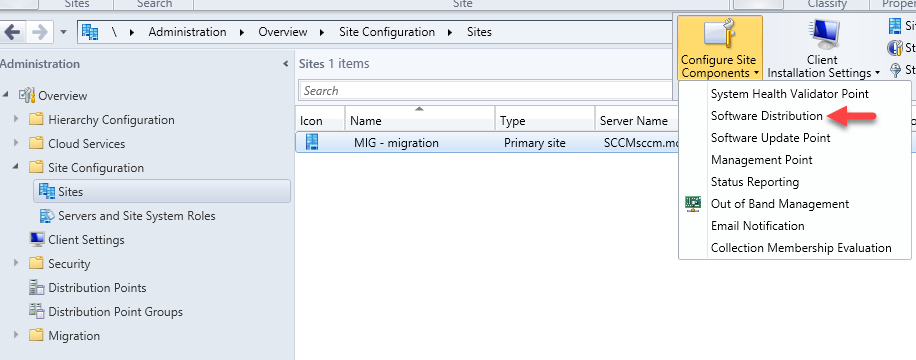
In the site settings, open Software Distribution and add an account with read permissions on the SCCM DP shares.
WinPE Environment
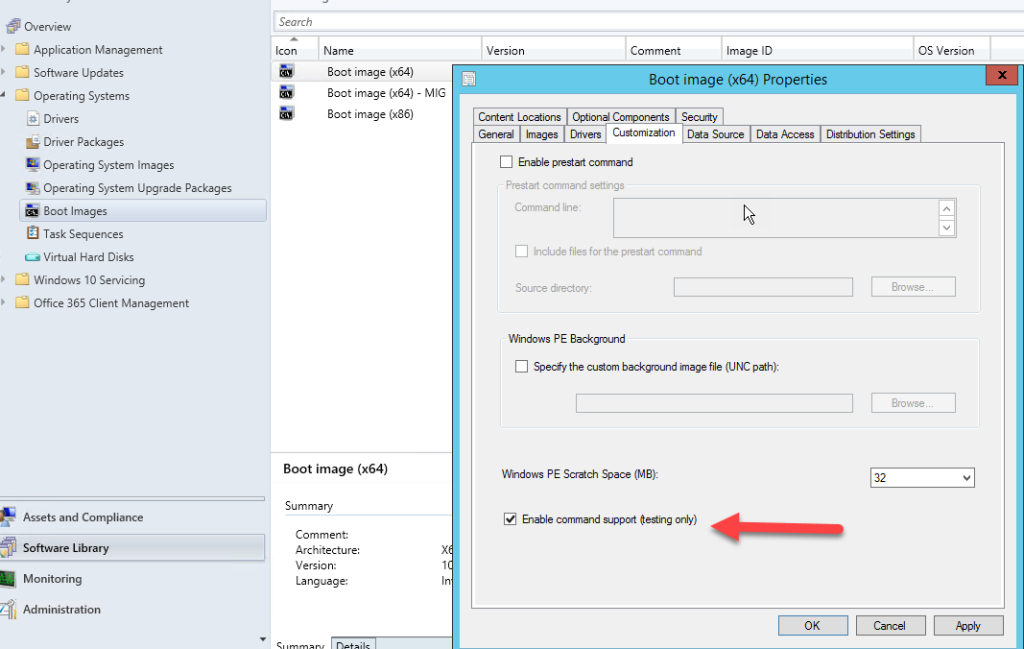
Command Prompt (F8) in WinPE
Enable Command Support in each boot image to allow opening a command window with F8 during OSD.
WinPE Drivers
For a WinPE based on ADK 10, inject Windows 10 drivers (even if you deploy Windows 7). Vendor driver packs (e.g., Dell) work well.
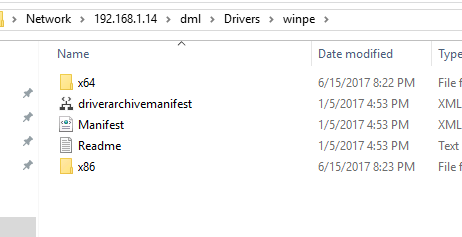
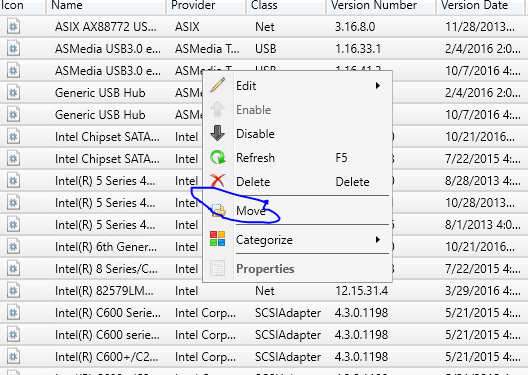
Tip: import drivers to the root of the Drivers node first, then move them into your specific folders.

Copy drivers to a network share, import them into SCCM, and associate them with the boot images by architecture.
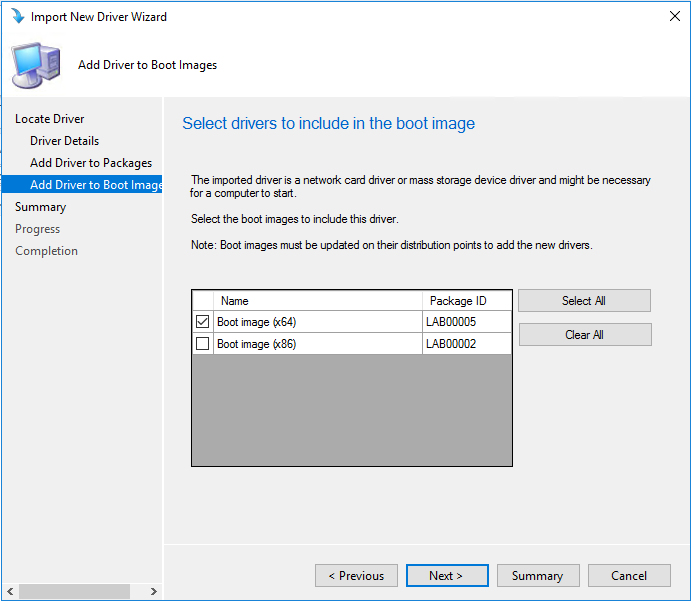
Important: SCCM doesn’t inherently separate 32-bit from 64-bit drivers for WinPE. Keep them split yourself to avoid WinPE BSODs.
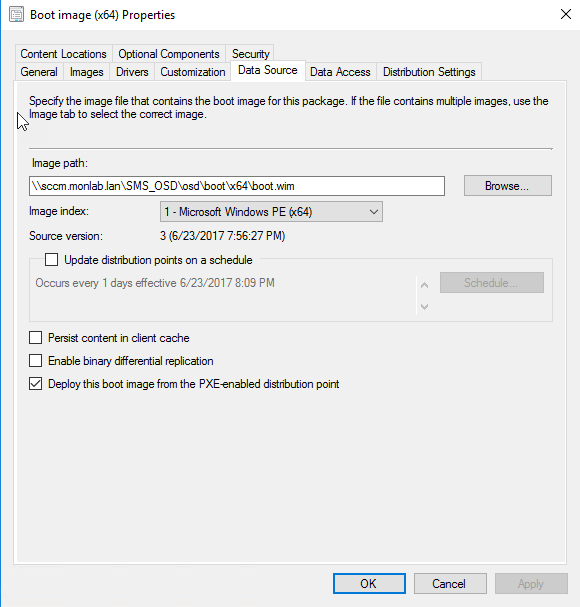
Authorize Boot Images for PXE
Allow boot images to be deployed via PXE and distribute them to the required distribution points.
Windows 10 Sources
Add .NET Framework 3.5 to the WIM
It’s recommended to inject .NET 3.5 into the WIM (otherwise client-side setup needs Internet).
- Extract the Windows 10 ISO.
- Create
C:\mount. - Mount the WIM:
dism /mount-image /imagefile:"<DVD>\sources\install.wim" /index:1 /mountdir:C:\mount
- Enable .NET 3.5:
dism /image:C:\mount /enable-feature /featurename:NetFx3 /All /Source:"<DVD>\sources\sxs" /LimitAccess
- Commit the WIM:
dism /unmount-image /mountdir:C:\mount /commit
Tip: temporarily disable antivirus during this operation.
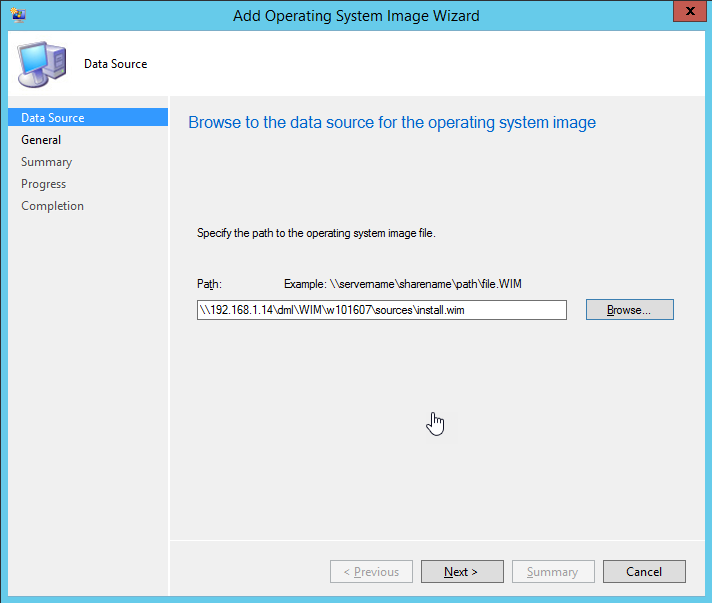
Add the Windows 10 WIM to SCCM
- Copy the ISO content to a UNC share.
- Copy
install.wimto a share readable by the SCCM server’s computer account.
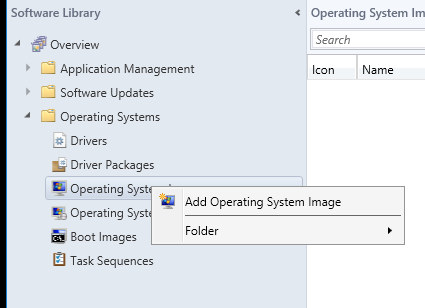
- In SCCM, specify the UNC path to
install.wim.
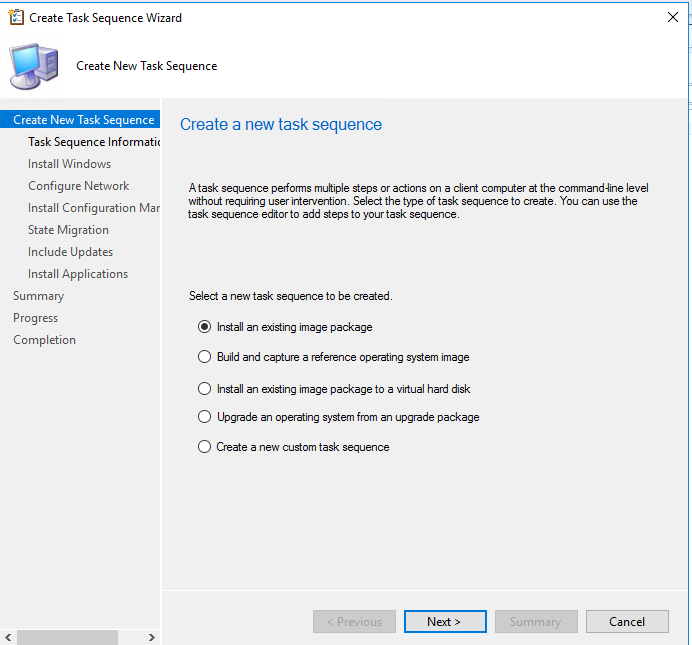
Create the Task Sequence
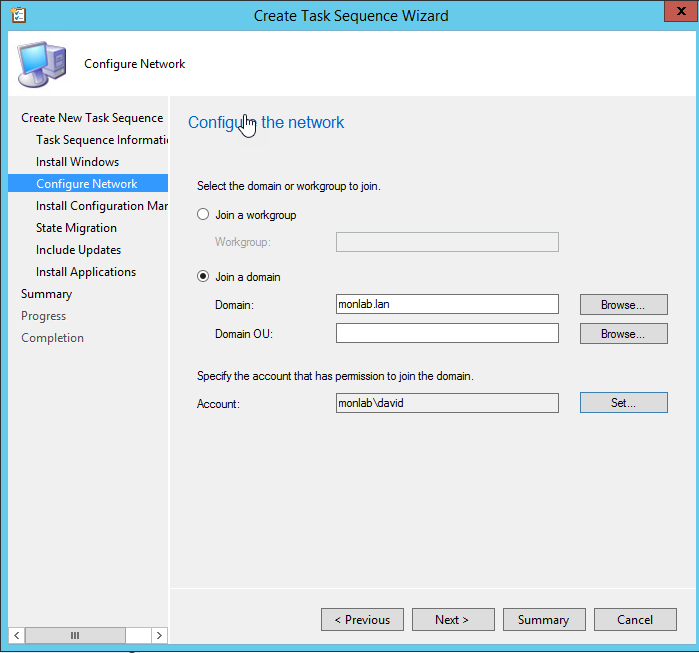
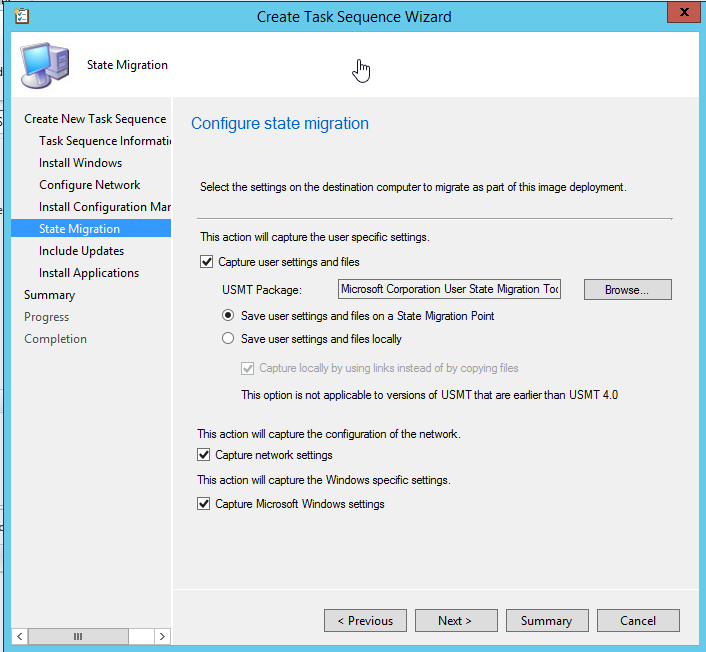
Create a Deploy an existing image task sequence and set the local admin password, domain join info, USMT backup, and update installation as needed.

Provide the local administrator password, the domain, and an account with rights to join the domain.
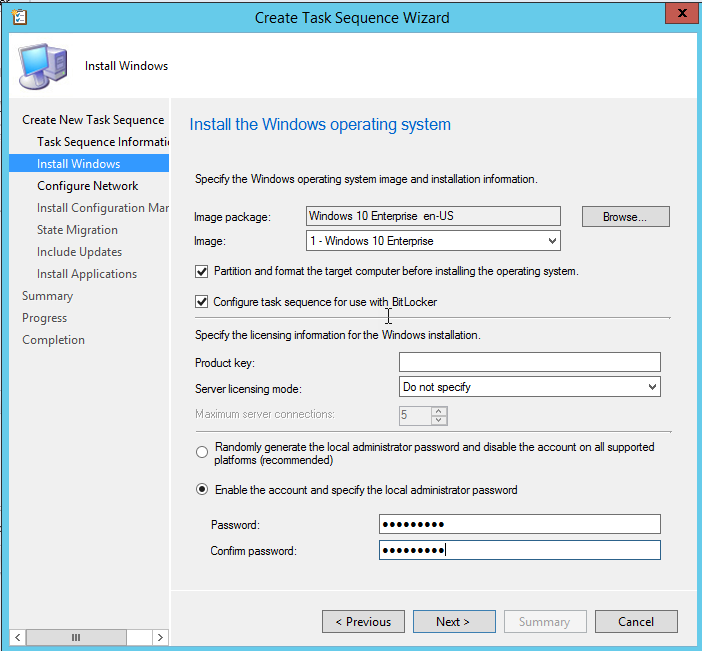
Enable user data backup/restore and install updates for a fully patched device.
Driver Management
Handling Duplicate Drivers
SCCM doesn’t allow the same driver to be imported multiple times. To keep per-model driver trees unique, create a .bat in each model’s directory:
@ECHO OFF
for /f "tokens=*" %%G IN ('dir /ad /b /s') DO (
  echo. > "%%G\%~n0.txt"
)
Run the batch to generate a tiny marker file in each subfolder, making the content unique per model.
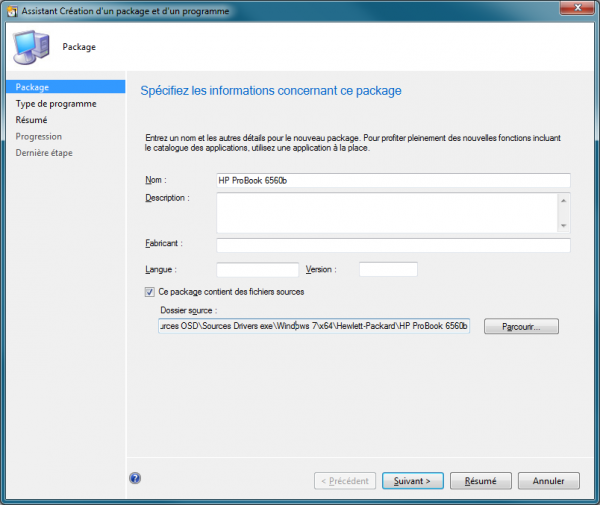
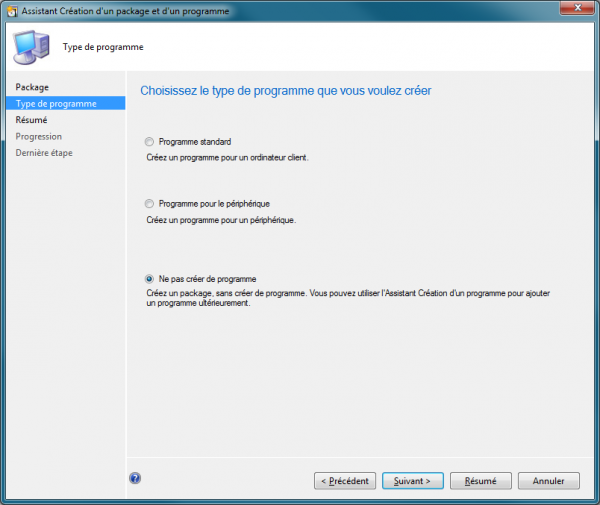
Import Drivers and Create Packages
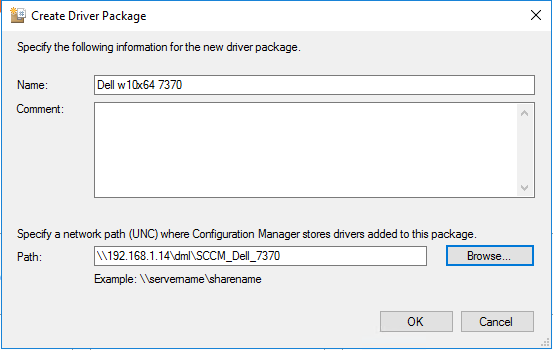
- Create one driver package per model with a UNC source where SCCM has write access.
- Import drivers, associate them to the package, and move them under the model’s folder.
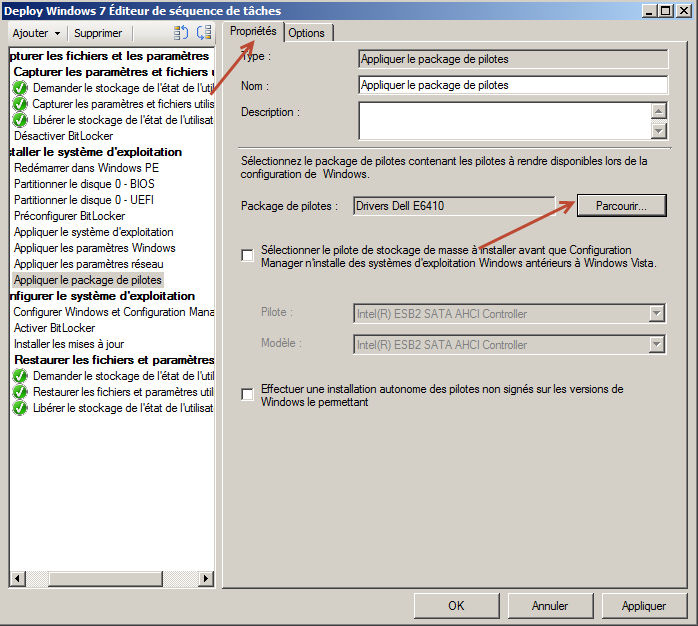
Use Driver Packages in the Task Sequence
- Replace the default driver management with Apply Driver Package steps.

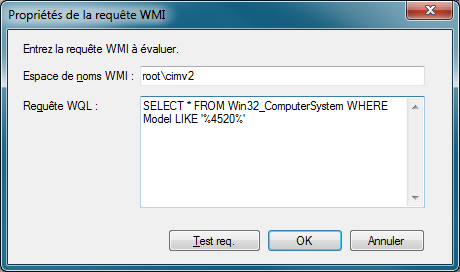
- Select the model’s driver package and add a WMI filter.
WMI query examples:
SELECT * FROM Win32_ComputerSystem WHERE Model LIKE "HP_ProBook_4530s%"
SELECT * FROM Win32_ComputerSystem WHERE NOT Model LIKE "%2530%"

EXE-Based Drivers
Some components (e.g., Hotkey Integration) are shipped as setup.exe. Deploy them with a Run Command Line step using a package (no program).
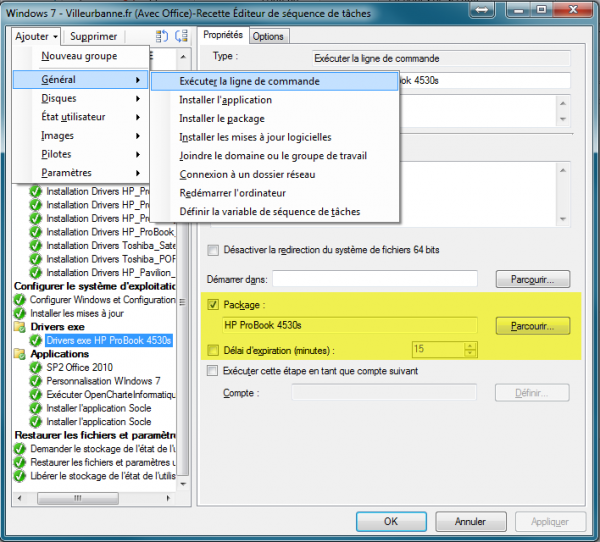
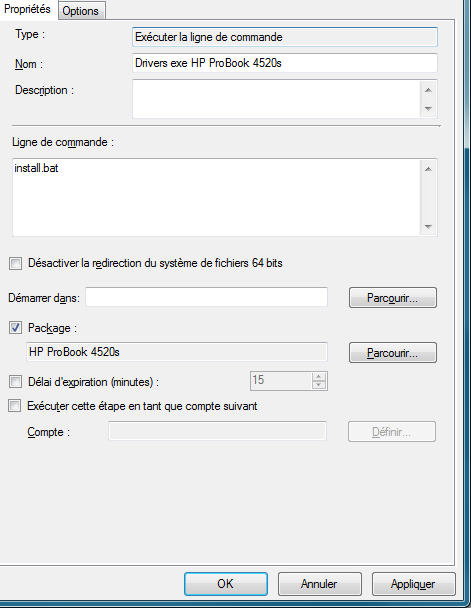
Example command:
cmd /c setup.exe /silent /install
:: or call a .bat included in the package
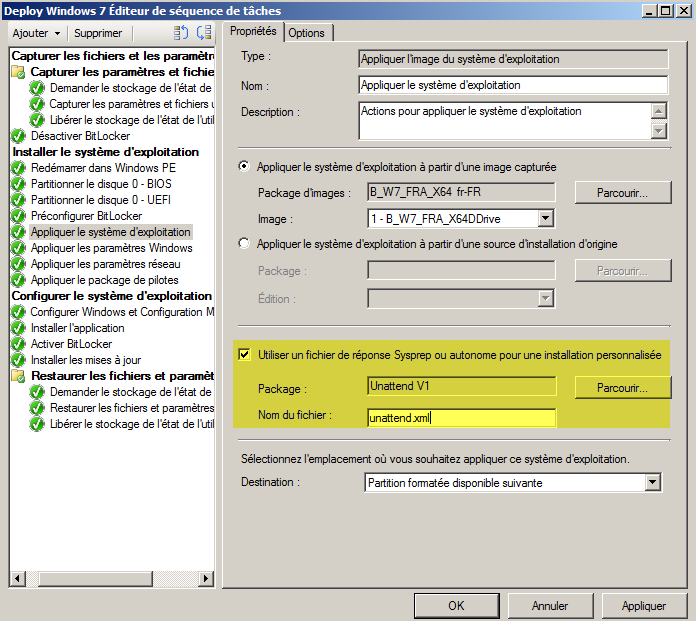
Use an unattend.xml
Create a package containing unattend.xml and reference it in the Apply Operating System step of the task sequence.

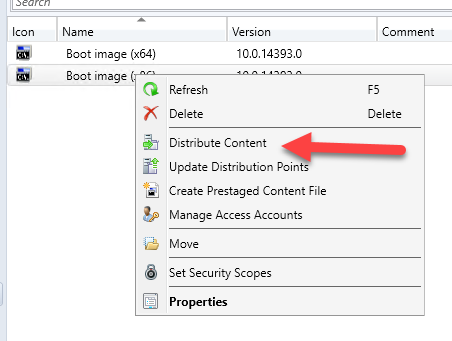
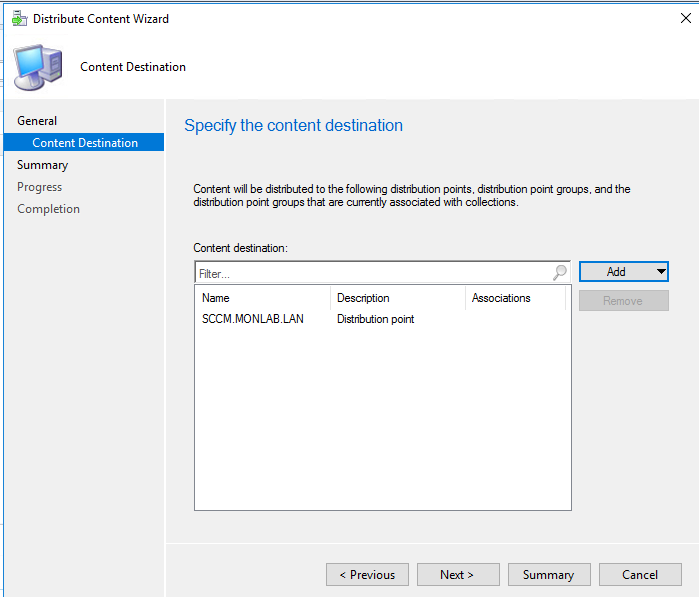
Distribute Content
Instead of distributing each dependency manually, use Distribute Content on the task sequence to update all dependencies on your DPs.
- Select the task sequence > Distribute Content.
- Select the distribution points.
Publish and Deploy
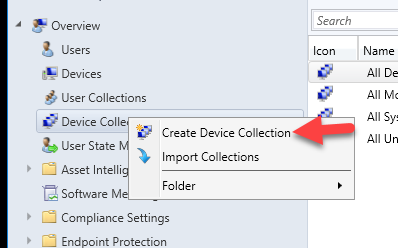
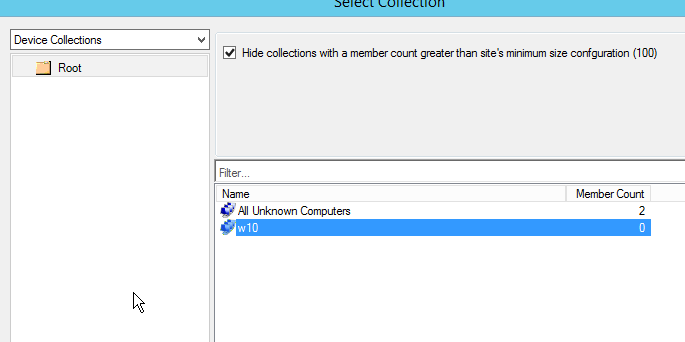
Create a Target Collection
- Create a new collection.
- Add one or more computers to it.
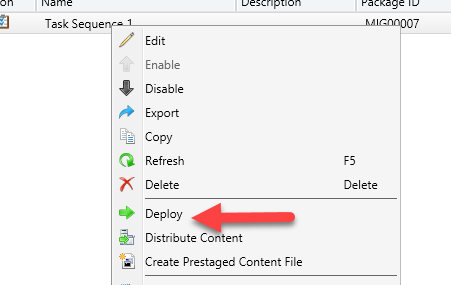
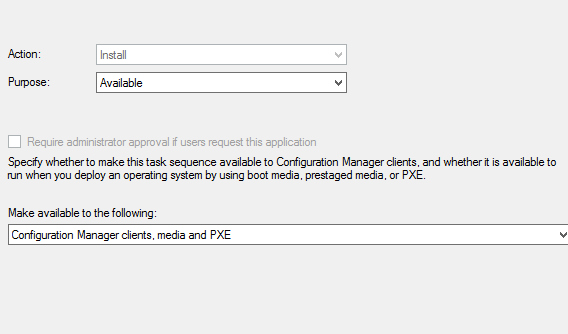
Choose Available to display the task sequence in Software Center (or Required to force the deployment).
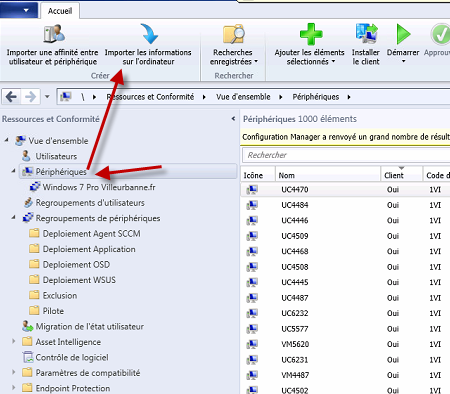
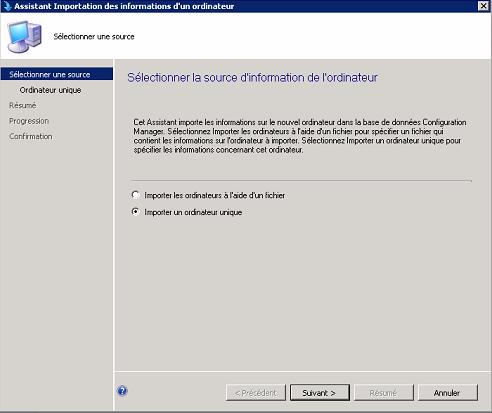
Import Computers (Pre-provisioning)
- In Devices, run Import Computer Information.
- Import a single computer (name + MAC address) and target the deployment collection.
Deploy with Standalone Media (OSDComputerName)
To prompt for the computer name at startup, add the OSDComputerName variable to a standalone media.
Create the Standalone Media
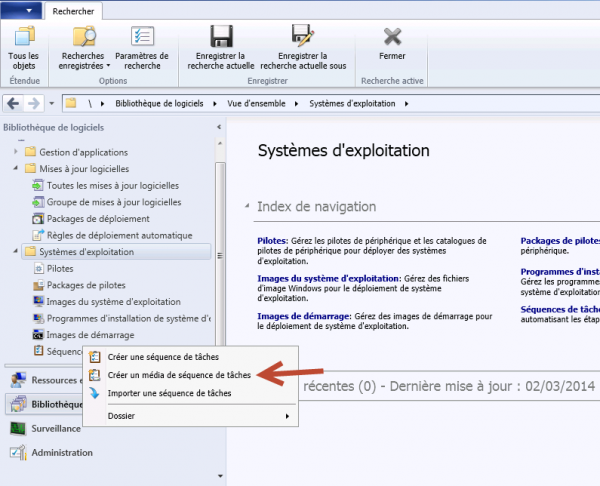
- SCCM console > Software Library > Operating Systems > Task Sequences.
- Right-click your task sequence > Create Task Sequence Media.
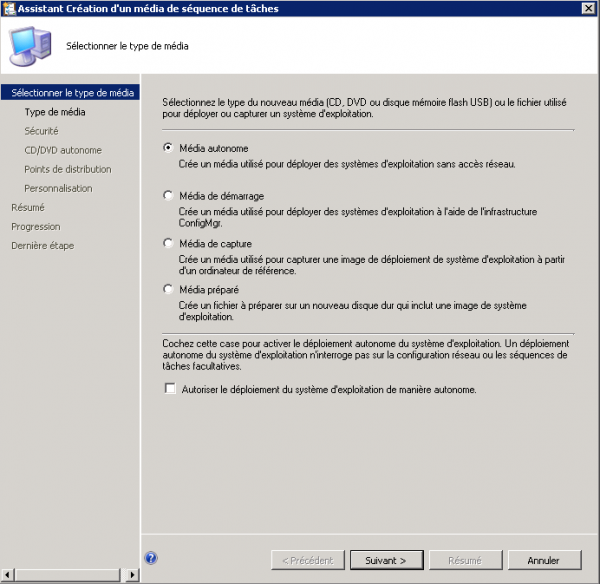
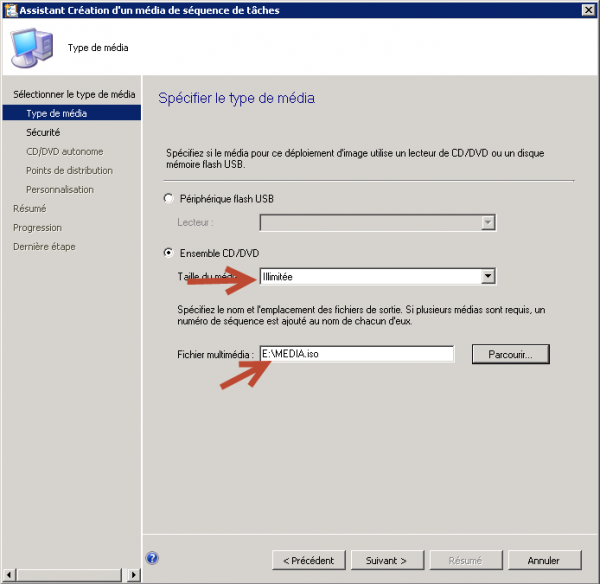
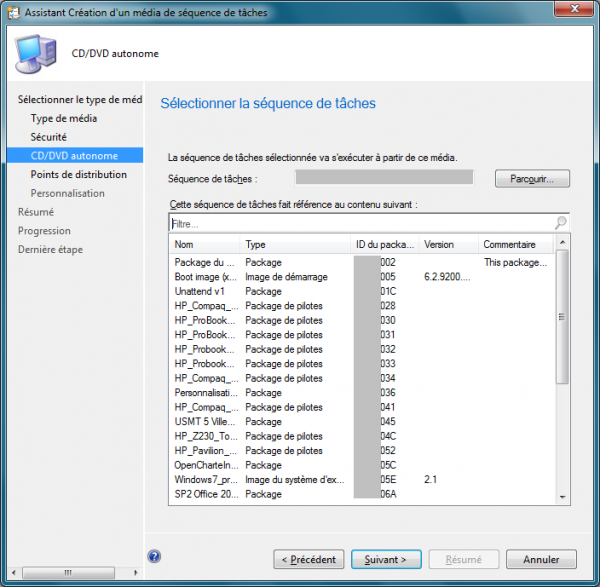
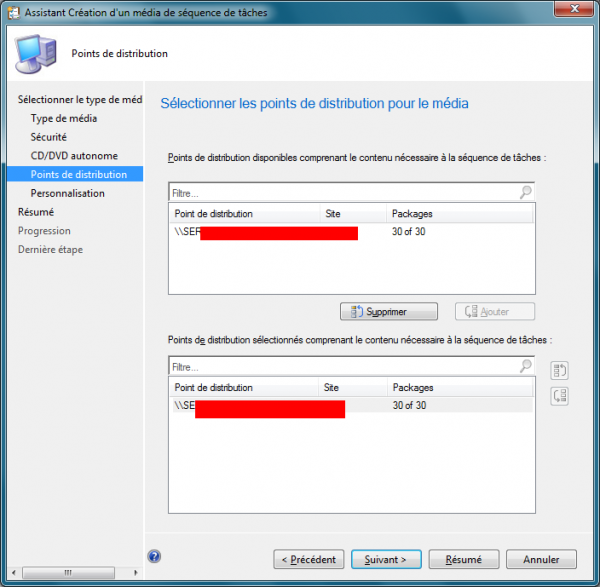
- Select Stand-alone media (ISO), set a password if needed, pick the task sequence and a DP that holds the packages.
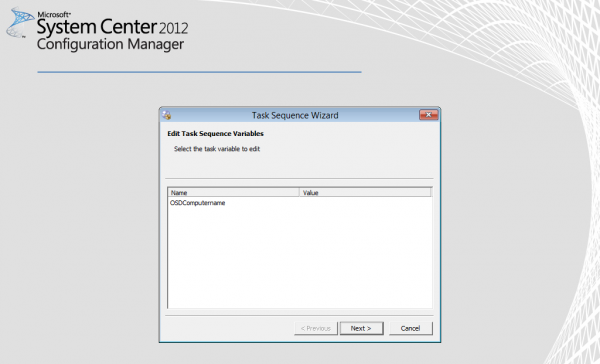
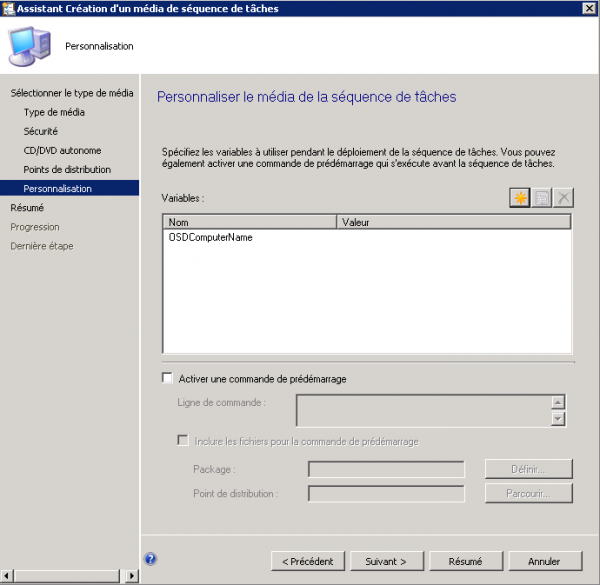
Add the OSDComputerName Variable
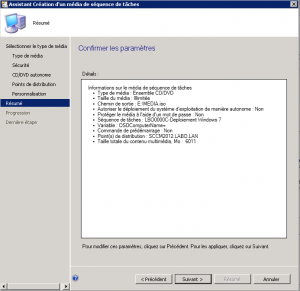
In Customization, click New Variable and enter OSDComputerName. Finish the ISO creation.
Deploy with the Media
- Transfer the ISO to a USB drive if needed.
- Boot the target device from the ISO/USB.
- When prompted, enter the computer name; it’s stored in
OSDComputerNameand applied by the task sequence.
Useful Task Sequence Variables
Examples: _SMSTSAdvertID (running TS advertisement ID), _SMSTSBootImageID (boot image package ID), _SMSTSMachineName (computer name in status logs), SMSTSRebootDelay (seconds before reboot), SMSTSRebootMessage (message shown before reboot).
Full list in Microsoft Docs: Task Sequence Variables.
USMT Restore When a Task Sequence Fails
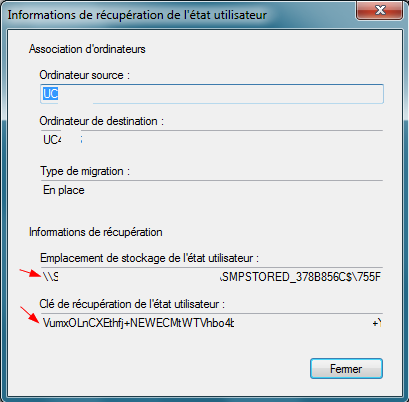
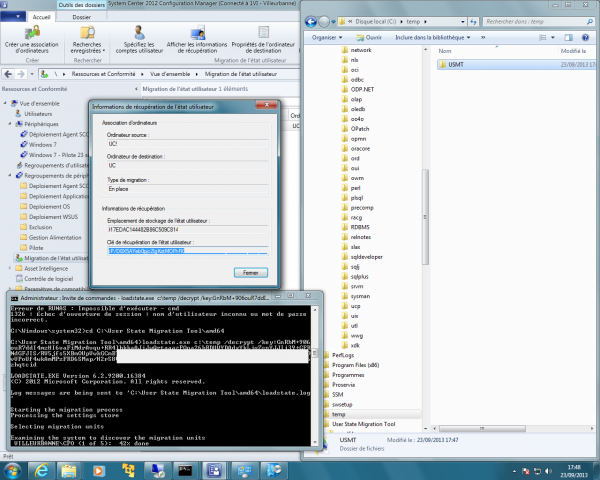
If a task sequence fails and user data isn’t restored, you can manually restore encrypted USMT data stored by SCCM.
Access the USMT Data
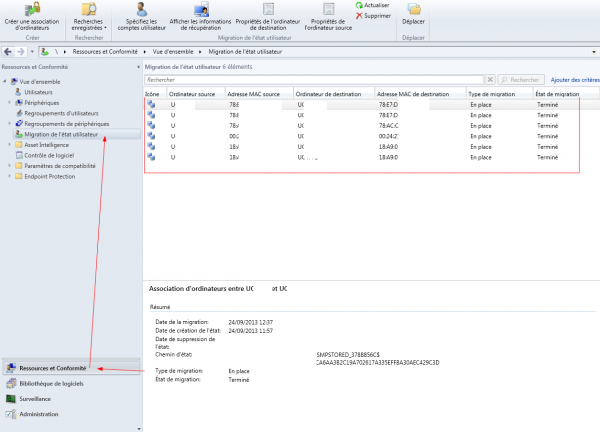
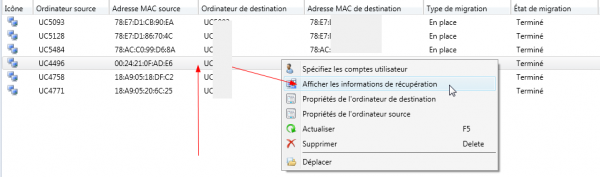
- SCCM console > Assets and Compliance > User State Migration.
- Find the affected device > right-click > View Recovery Information.
Back Up and Restore Locally
- Copy the storage path from SCCM and back it up (e.g., to USB).
- Record the recovery key shown in the recovery information.
- On the target machine, copy the USMT data and USMT tools locally, then run this command as admin:
loadstate.exe "C:\USMT\Store" /decrypt /key:"YOUR_RECOVERY_KEY"