Safe Mode is an essential tool for troubleshooting issues in Windows 11. It allows you to start your computer with only the basic drivers and services necessary to run the operating system, making it easier to diagnose and fix problems.
Method 1: Enabling Safe Mode with the Shift Key
- From the Sign-in Screen:
- On the Windows 11 sign-in screen, press and hold the Shift key.
- While holding the Shift key, click the Power icon in the lower right corner and select Restart.
- Continue to hold the Shift key until the computer restarts and the Windows Recovery Environment (WinRE) appears.
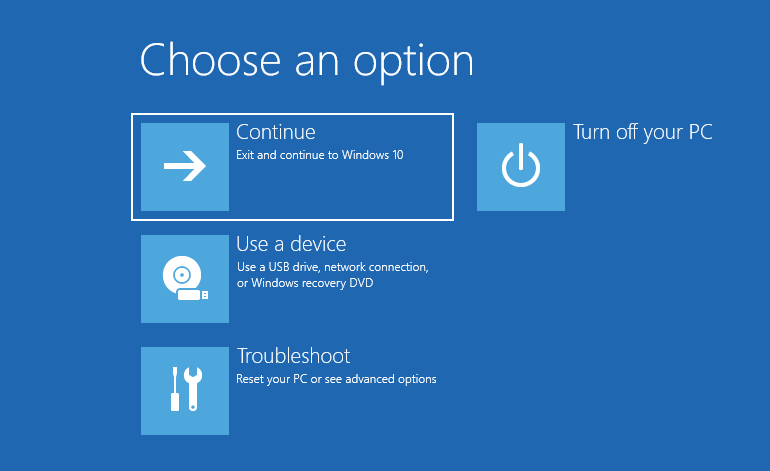
- Navigate to Safe Mode:
- In WinRE, select Troubleshoot > Advanced options > Startup Settings > Restart.
- After the computer restarts, you will see a list of options. Press F4 to enable Safe Mode, or F5 to enable Safe Mode with Networking.
Method 2: Enabling Safe Mode via Command Line
- Open Command Prompt:
- Open Command Prompt with administrative rights.
- Type
cmdin the search bar, right-click on Command Prompt, and select Run as administrator.
- Activate Safe Mode:
- To enable Safe Mode with Networking, type the following command and press Enter:cmdCopier le code
bcdedit /set {default} safeboot network - Restart your computer to boot into Safe Mode.
- To enable Safe Mode with Networking, type the following command and press Enter:cmdCopier le code
- Deactivate Safe Mode:
- Once you’ve resolved the issues and want to boot normally, open Command Prompt with administrative rights again.
- Type the following command and press Enter:cmdCopier le code
bcdedit /deletevalue {default} safeboot - Restart your computer to boot into normal mode.


0 Comments