As an IT professional, deploying tools built with PowerShell scripts is a common task. These tools might include:
- Installing printers with SNMP queries to identify the model.
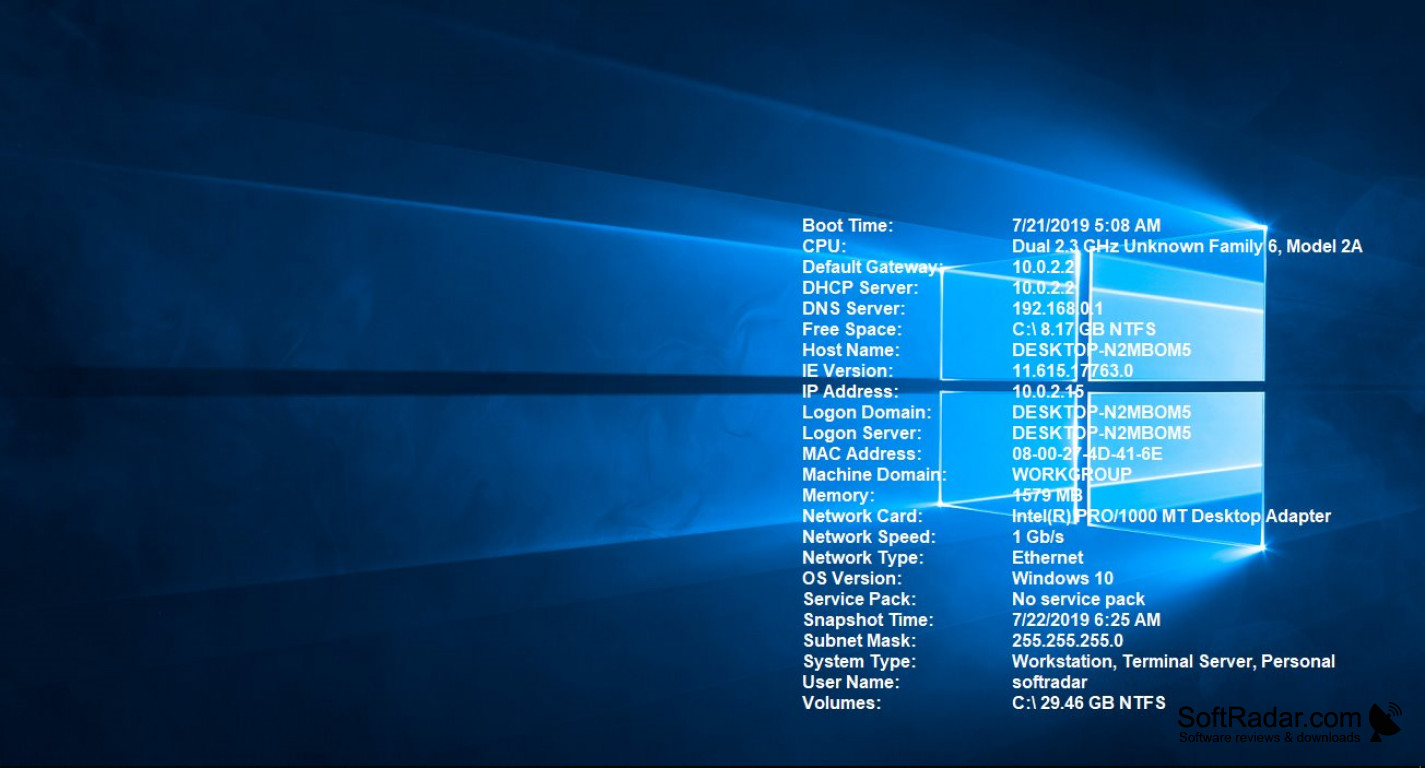
- Displaying PC information.
- Creating a technical menu for accessing Windows 10 functions with admin prompts on locked machines.
Since these scripts often change versions, it’s crucial to track the installed versions. This tutorial outlines the method I use to achieve this.
Converting PS1 to EXE
The first step is to convert the PowerShell script (.ps1) to an executable (.exe). Managing an executable is much simpler than dealing with a PowerShell script on a user’s machine. For this, I use ps2exe GUI, a well-known tool.
If you have inventory tools (LANDESK, SCCM, KACE, etc.), you can include version information and product name details. Pay attention to these two options in ps2exe:
- Compile a graphic window program: Uncheck this option to see messages like
write-host. - Require administrator rights: This option is useful for tools dedicated to administrators, allowing an authentication prompt at the tool’s launch.
Creating an Installer
Option 1: Using Inno Setup
My preferred solution is Inno Setup, a popular installer for freeware tools. Download it from here.
Example command line for using Inno Setup:
if exist "C:\install\LSA\unins000.exe" "C:\install\LSA\unins000.exe" /VERYSILENT /NORESTART
"%~dp0ScriptStartLSA.exe" /VERYSILENT /NORESTART
Steps to create an installer with Inno Setup:
- Launch Inno Setup and start the wizard.
- Enter the script (exe) information.
- Specify the path where files will be copied.
- Add the files (your exe generated with ps2exe).
Option 2: Using WiX
WiX allows creating an MSI installer with a free tool, suitable for simple installers. Download the required tools:
Orca is a simple MSI file editor. Follow these steps to create an installer with WiX:
- Launch WixEdit and create a new project.
- Create the directories where files will be copied. For example, a subfolder in “Program Files (x86)”.
- Create a component to store your executable. Multiple components can be created in an MSI, typically one per executable or a group of non-exe, non-dll files.
- Import your executable into the component.
- On the next screen, choose to create a shortcut. Ensure your exe has an icon.
- Enter the executable name and shortcut name.
- Specify the publisher (Manufacturer), program name, and version. The ID must be unique to your MSI. Generate one here.
- The upgradeCode should be the same for every MSI of your application to check for updates based on the version.
- Build your project to create the MSI.
Note: If you encounter Error: error CNDL0006, ensure a name is added in the component.