Introduction
Installing the prerequisites for SCCM involves configuring several Windows features and roles. You can automate parts of this with a PowerShell GUI script, then proceed to extend the Active Directory (AD) schema, create the System Management container and delegate permissions, install SQL Server and Windows features, deploy SCCM, configure boundaries and discovery, and optionally brand the console with your company name.
Automating SCCM Prerequisites (PowerShell GUI)
Downloading the Tool
The script is available on the TechNet Gallery. Follow these steps to download it:
- Visit the TechNet Gallery website.
- Search for the SCCM prerequisites installation script.
- Download the script to your local machine.
Using the Tool
After downloading the script, install the SCCM prerequisites as follows:
- Open PowerShell with administrative privileges.
- Navigate to the folder containing the script.
- Run the command below to launch the GUI and follow the prompts to select and install the needed Windows features and roles.
.\Install-SCCMPrereqs.ps1
Advantages of Using the Tool
Benefits include:
- Automation: Reduces the risk of missing components.
- Ease of Use: A graphical interface simplifies selection and installation.
- Time-Saving: Streamlines setup so you can focus on deployment.
Extending the Schema
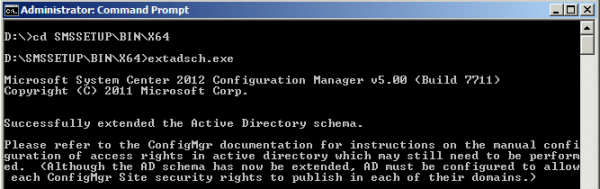
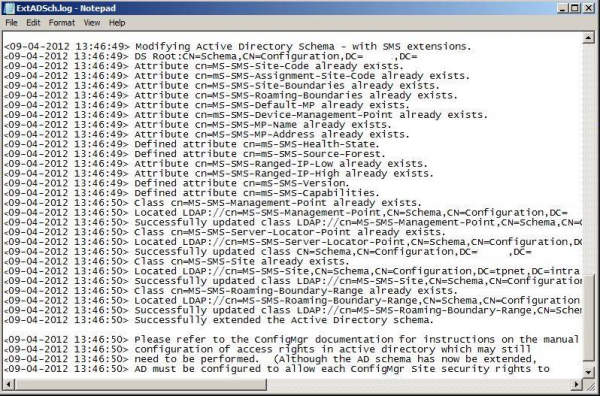
The installation of SCCM 2012 requires extending the Active Directory (AD) schema so that SCCM clients can identify their management point.
- Log in with an account that has Schema Admins rights.
- Open a command prompt with elevated privileges.
- Navigate to
\SMSSETUP\BIN\x64or\SMSSETUP\BIN\i386on the SCCM media. - Run
extadsch.exe. - Verify
extadsch.logat the root of the system drive to confirm success.
Creating the System Management Container
The System Management container allows SCCM site servers to publish data in AD. SCCM clients use this information (site code, management point) to locate their services.
Steps to Create the Container
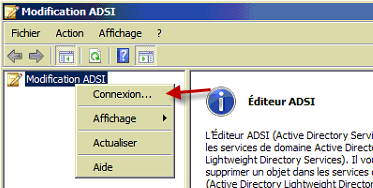
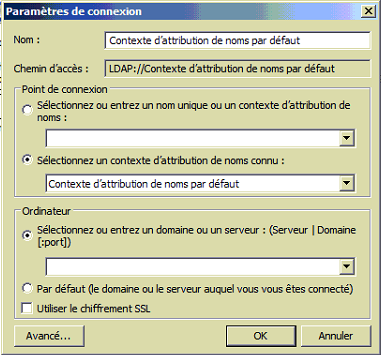
- On a domain controller, run
adsiedit.mscto open ADSI Edit. - In ADSI Edit, right-click ADSI Edit > Connect to…, keep defaults, click OK.
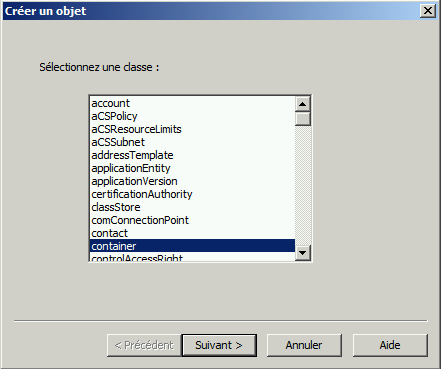
- Expand the tree, right-click CN=System > New > Object…
- Select container, click Next.
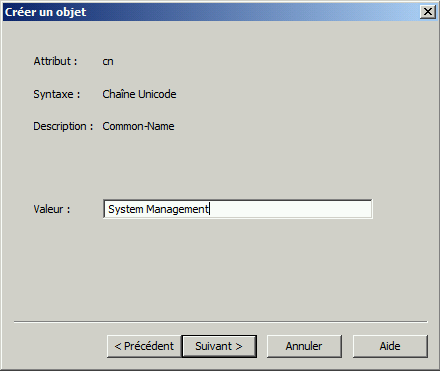
- Enter System Management as the value, click Next, then Finish.

Delegating Control to SCCM Servers
Delegate permissions on the System Management container to your SCCM site servers:
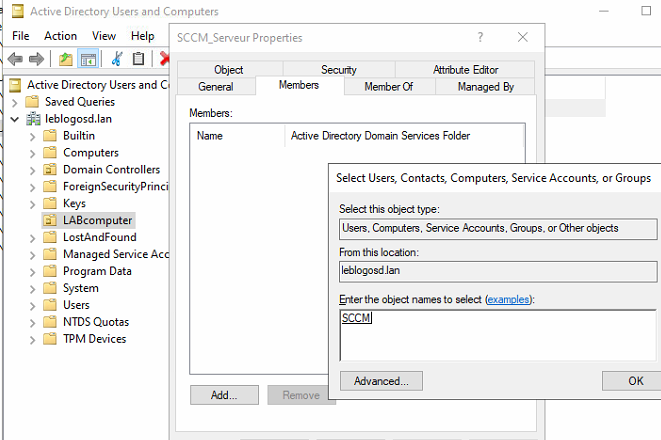
- Create a global group (e.g., SCCM_Servers) and add the SCCM server(s) to it.
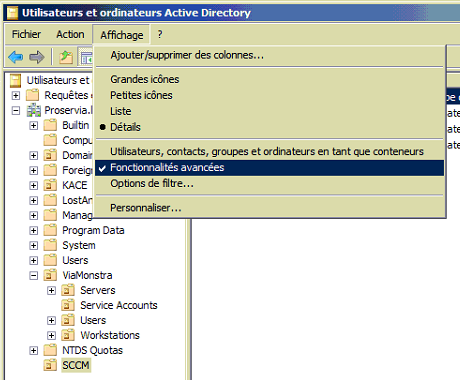
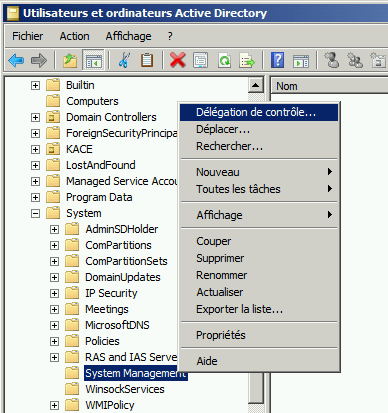
- Open Active Directory Users and Computers. In View, enable Advanced Features.
- Go to System > right-click System Management > Delegate Control…
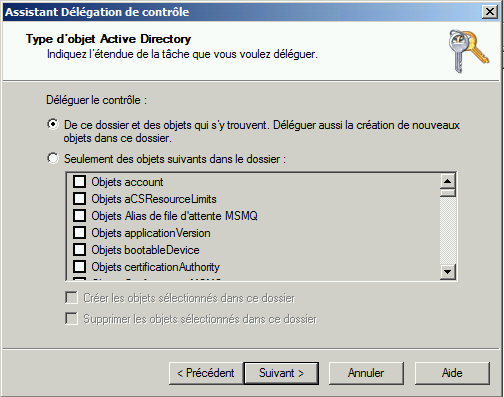
- Start the wizard, click Next, select the SCCM_Servers group, click Next.
- Choose Create a custom task to delegate, then select This folder, existing objects in this folder, and creation of new objects in this folder.
- Check Full Control, then Next > Finish.

Prerequisites
Before installing SCCM, make sure:
- The AD schema has been extended and the System Management container created.
- Required Windows components and tools are available (ADK, WSUS, etc.).
SQL Server Installation
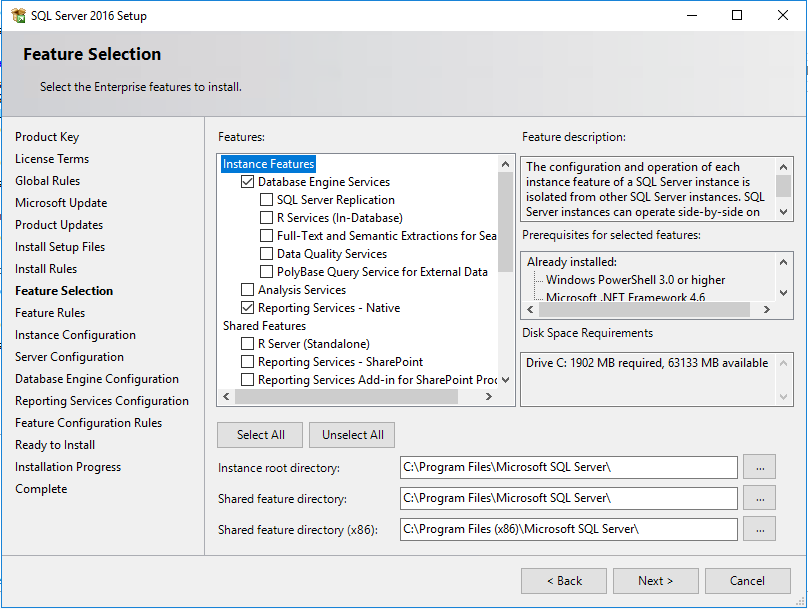
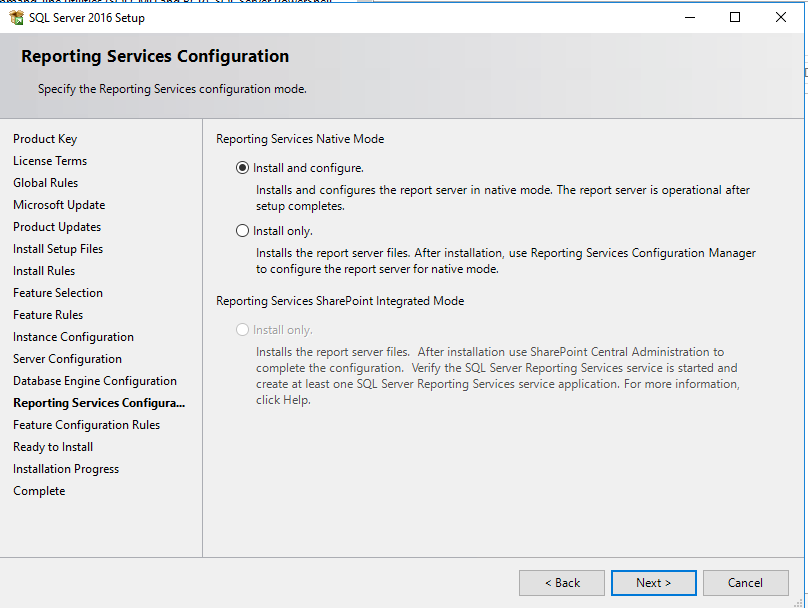
During SQL Server setup, include at least:
- Database Engine Services
- Reporting Services
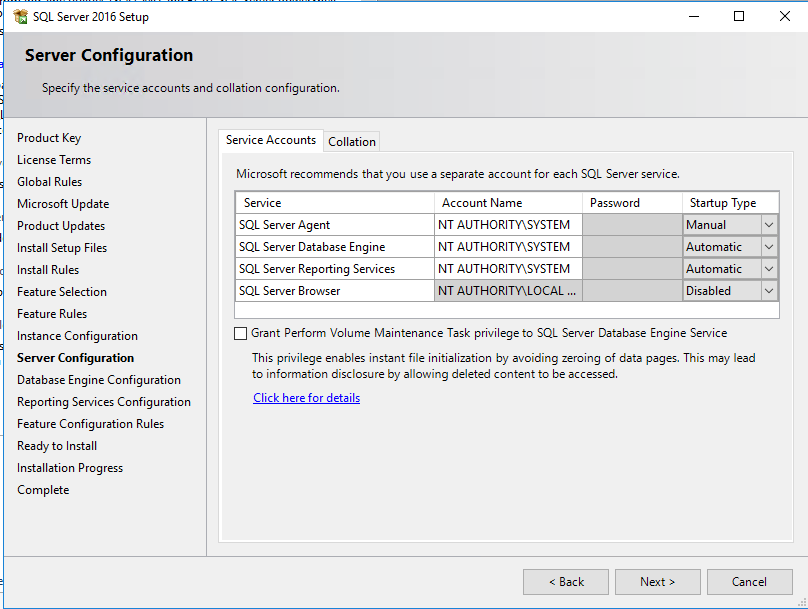
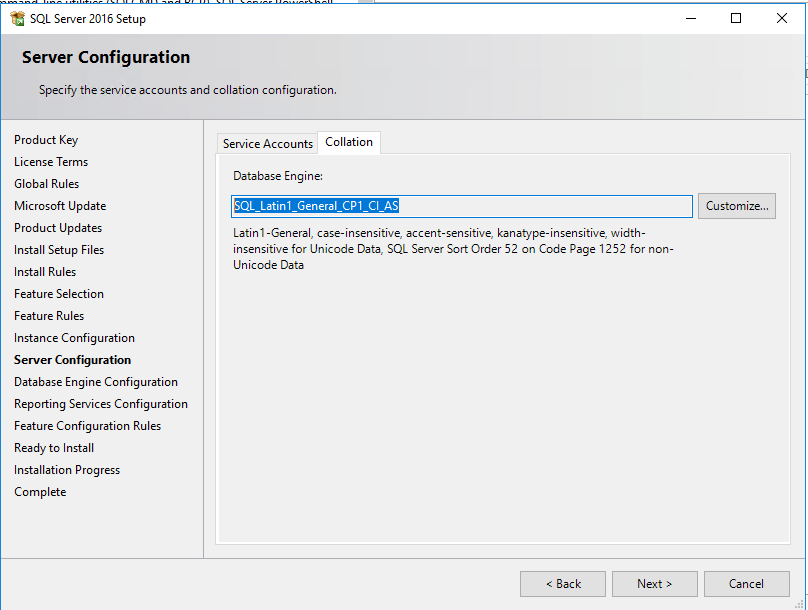
Use the system account for all three SQL services (or your standard service accounts). Set collation to SQL_Latin1_General_CP1_CI_AS. For Reporting Services, choose Install and configure. After installation, set the minimum server memory to 8 GB.
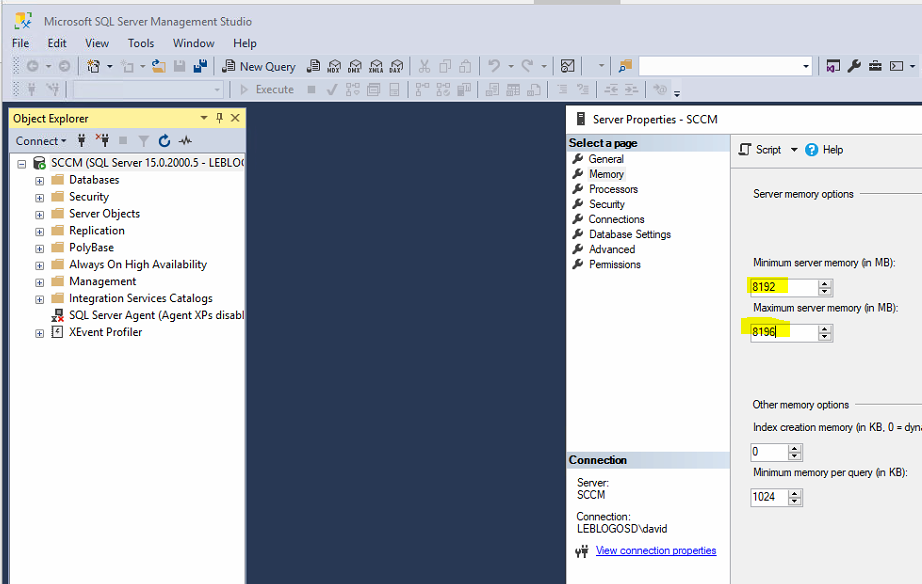
Installing SSMS
Download and install SQL Server Management Studio (SSMS). Prefer the English version for consistency with documentation and logs.
Configuring RAM for SQL
Open SSMS, connect to the instance, and set appropriate min/max memory values according to your server sizing.
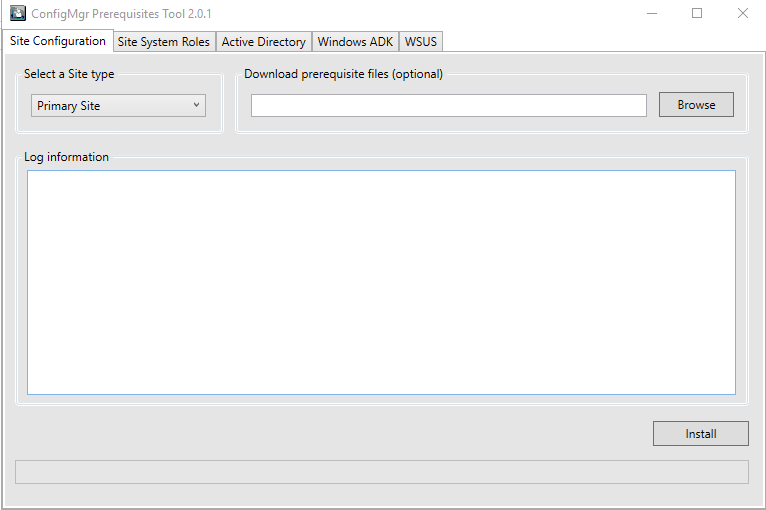
Installing Windows Features
You can also use the ConfigMgrPrerequisitesTool to automate primary site prerequisites like:
- Installing Windows ADK
- Installing WSUS
SCCM Installation
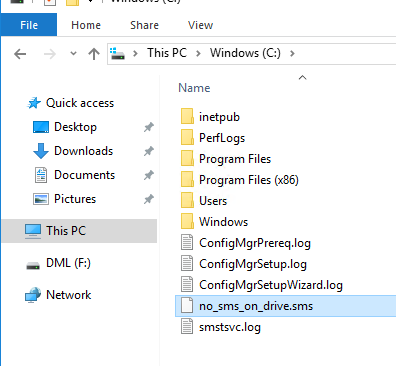
Preparing the Drive
Create a blank file named no_sms_on_drive.sms on all partitions that are not dedicated to distribution points.
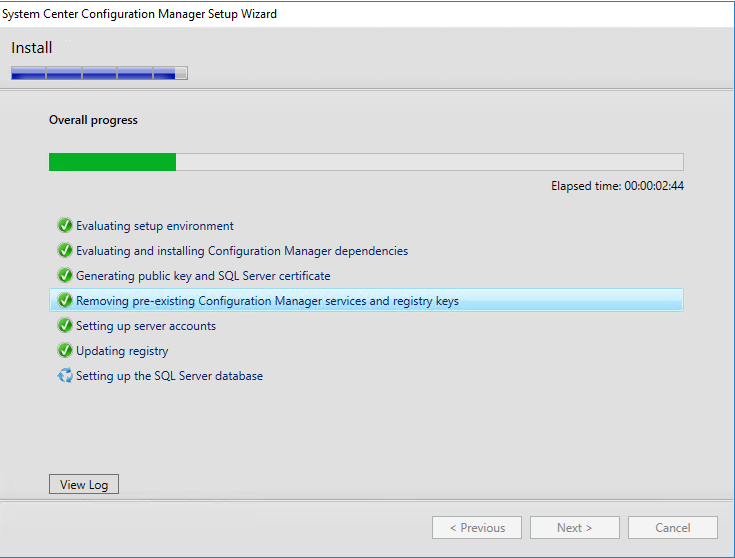
Installation
- Launch the SCCM setup for a Primary Site.
- Select the appropriate branch (Current Branch or LTSB).
- Specify the path to download additional components.
- Enter a unique site code.
- Install the server in standalone mode.
- Provide database information (instance, DB name, ports).
- Start in HTTP mode (you can switch to HTTPS later).
- Configure the MP and DP roles in HTTP.
- Begin the installation and monitor progress.
Initial SCCM Configuration
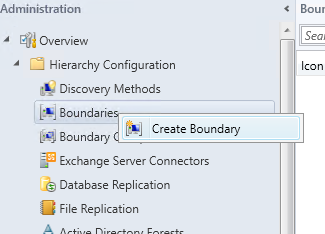
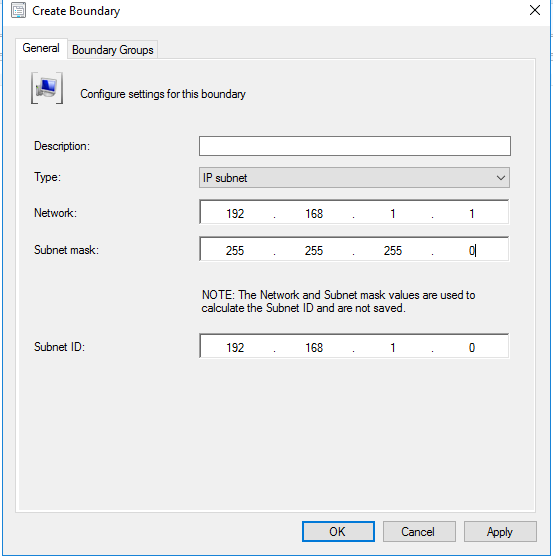
Site Boundaries
Create boundaries so clients can associate to the site:
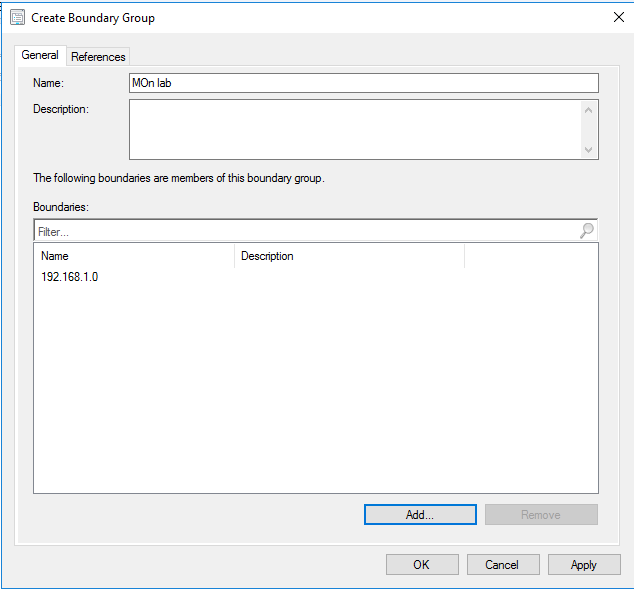
- Create a boundary.
- Add IP ranges (or use Active Directory sites).
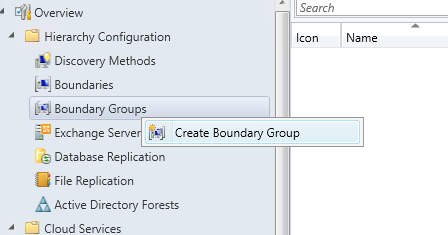
- Create a boundary group, add your boundaries to it, and associate the group with your distribution points.
- For multiple physical sites, create multiple boundaries and groups as needed.
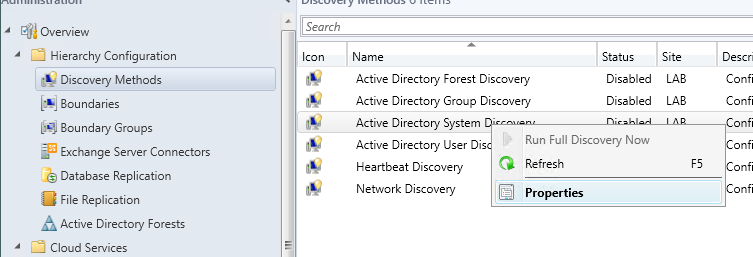
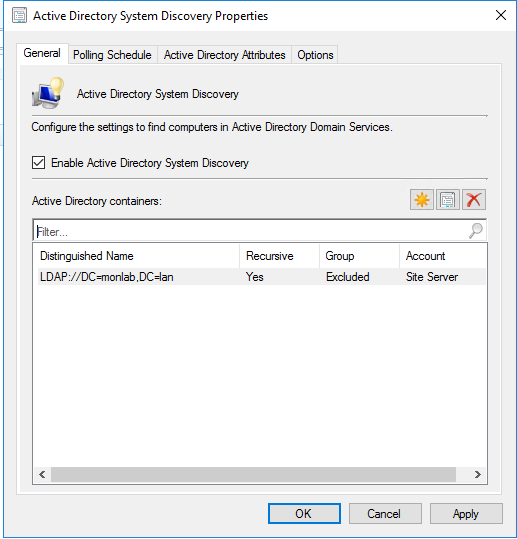
Active Directory Discovery
- In Discovery Methods, enable Active Directory System Discovery.
- Trigger an immediate discovery to populate resources quickly.
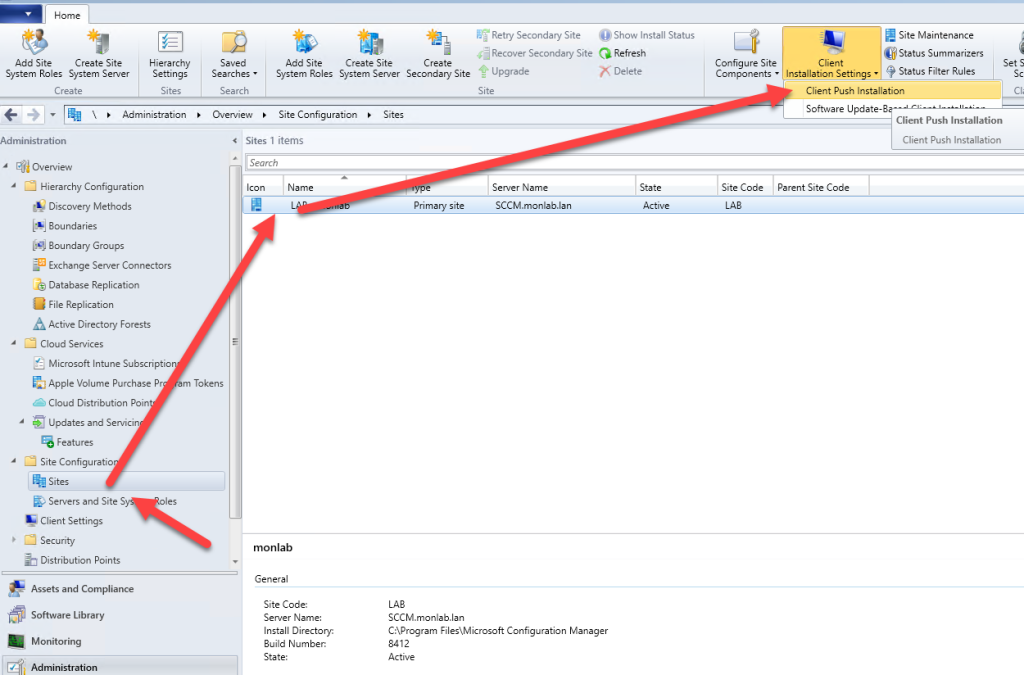
Client Push Installation Account
- Specify an account with administrative rights on workstations.
- In Client Push Installation, add one or more AD accounts.
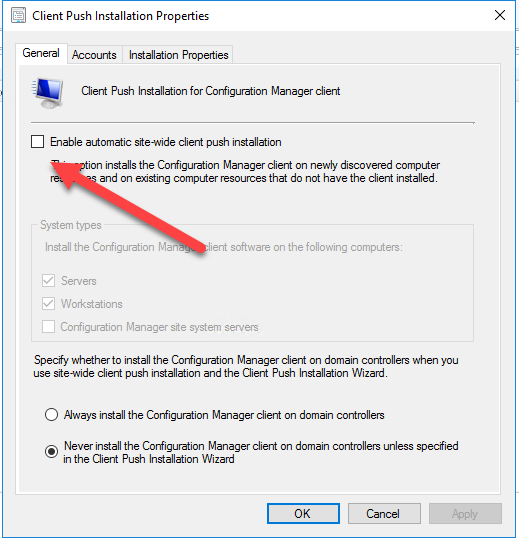
- (Optional) Enable automatic client push for all discovered computers — prefer targeted deployments in production.

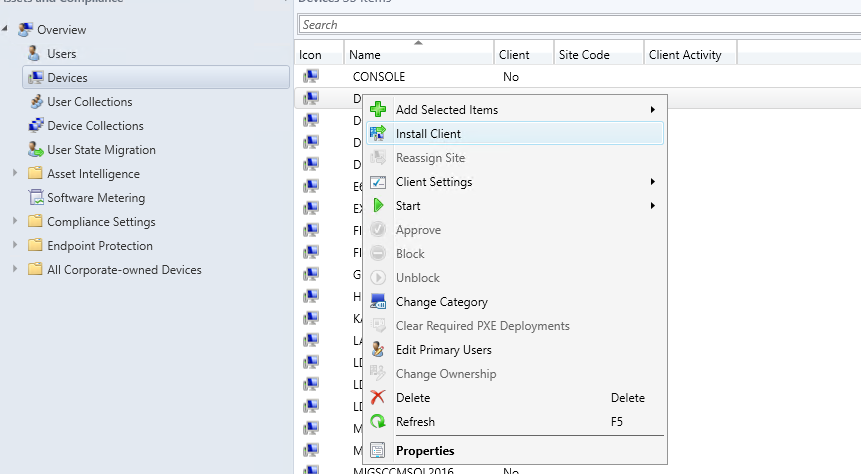
Installing SCCM Clients
From the console, trigger client installation on selected devices. By default, SCCM retries installation periodically (e.g., every hour for up to 7 days).
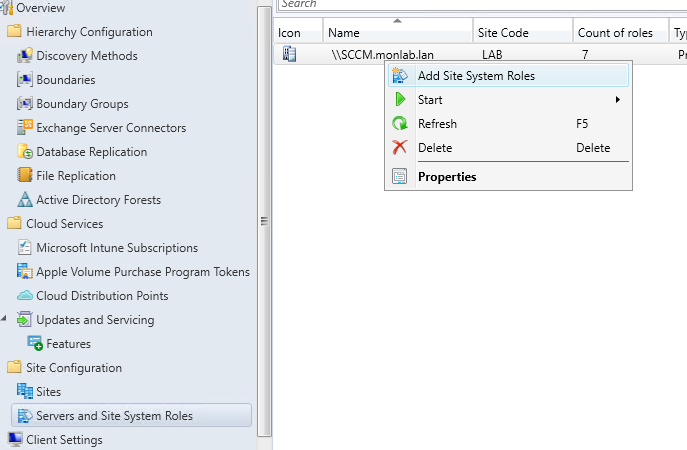
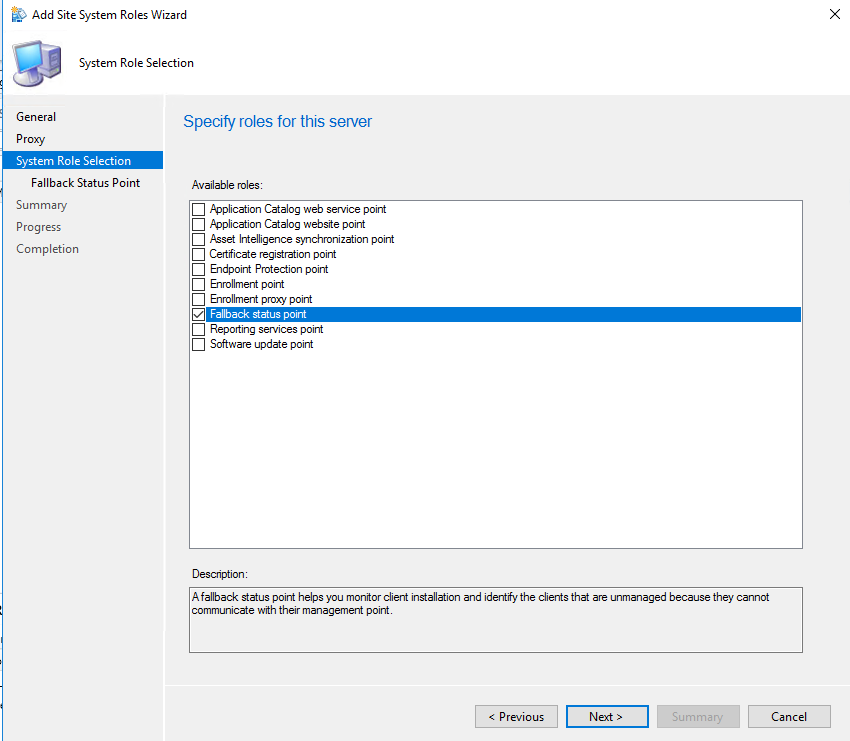
Optional Site Roles
Fallback Status Point (FSP)
In Servers and Site System Roles, add the Fallback Status Point role. It collects state messages to help troubleshoot client installation and communication issues.
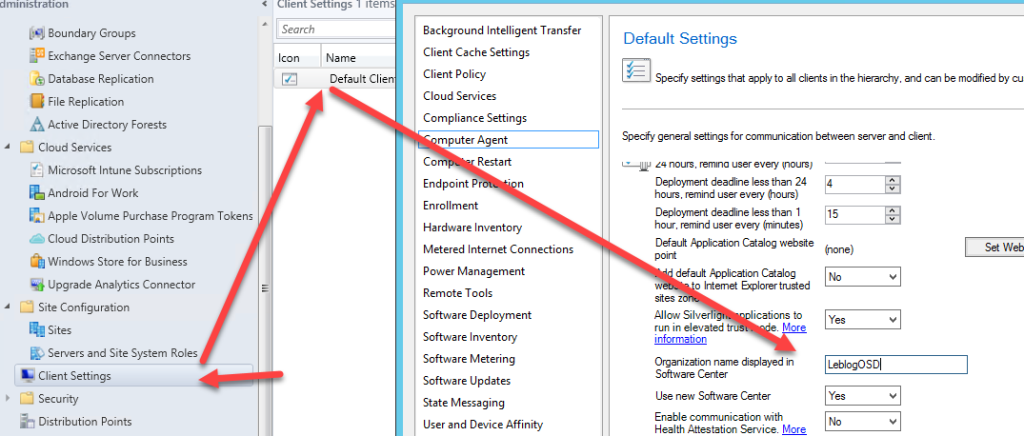
Branding: Display Your Company Name
Displaying your company name in SCCM improves identification and gives a professional look across the console and client UI.
Steps to Configure the Company Name
- Open the SCCM console and go to Administration.
- Select Client Settings under Overview.
- Edit Default Client Settings or create a custom policy.
- In General, locate the Organization Name field.
- Enter your company/organization name, then click OK or Apply.