Introduction
This procedure covers the main steps required to deploy a Tanium Server on TanOS in an on-premises environment. It includes the initial appliance configuration, user preparation, backup steps, array creation, role installation, module server association, web-based solution installation, and TanOS upgrade.
Requirements
SSH Keys and Local Accounts
Before initializing the appliance, prepare SSH keys for the local administrative and transfer accounts.
- tanadmin: primary administrative account. Configure SSH public key authentication and disable password access after key installation if your operating model allows it.
- tancopy: file transfer account used for backups, logs, and package transfers. Configure SSH public key authentication and do not allow password login.
- tanrecovery: emergency administrative account. Create it manually, assign the admin role, configure SSH public key authentication, and disable password login.
Required Workstation Software
- PuTTY for SSH access.
- PuTTYgen to generate SSH keys in a PuTTY-compatible format.
- WinSCP for secure file transfers to and from the appliance.
Initial Appliance Configuration
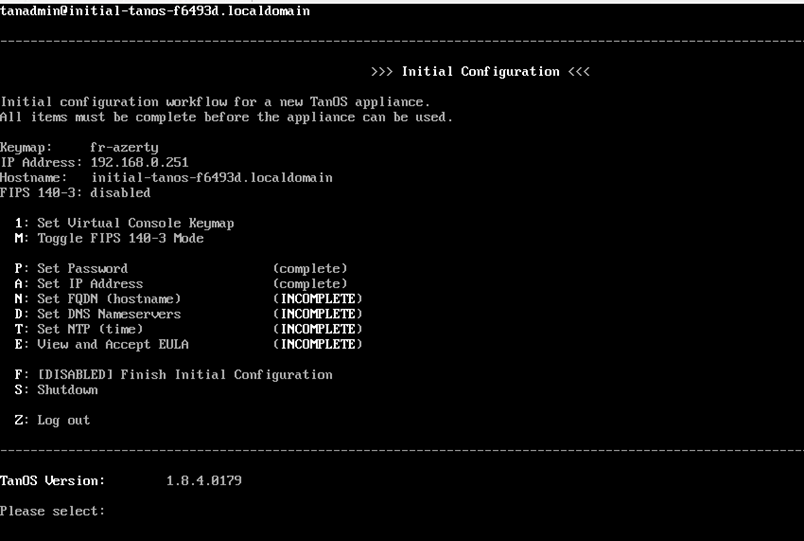
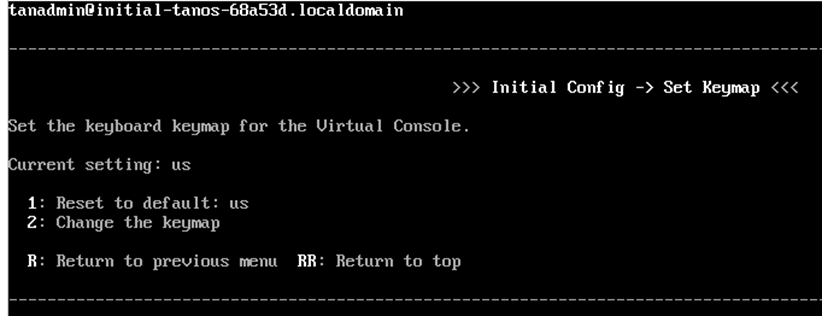
Set Keyboard Layout
Menu path: B -> 8
- Open the Virtual Console Keymap menu.
- Display the list of available keymaps.
- Select the required keyboard layout, for example
fr-azerty.
Set Hostname
Menu path: A -> 1 -> 1
- Open the hostname configuration option.
- Enter the fully qualified domain name of the appliance, for example
tanium-core01.example.local.
Configure DNS Server
Menu path: A -> 1 -> 2
- Open the DNS configuration option.
- Enter the DNS server address used by your environment.
Configure NTP
Menu path: A -> 3 -> A
- Open the NTP configuration option.
- Enter the NTP server used by the appliance.
- If needed, use a public example such as
pool.ntp.orgin lab documentation.
Accept the EULA and Finish Initial Setup
Menu path: Q from the TanOS main menu to view the EULA.
- Open the EULA viewer.
- Exit the viewer after review.
- Enter the email address required for license acceptance.
- Finish the initial setup and return to the main TanOS menu.
Checks after completion: keyboard, hostname, DNS, NTP, and EULA acceptance are completed before moving to account configuration.
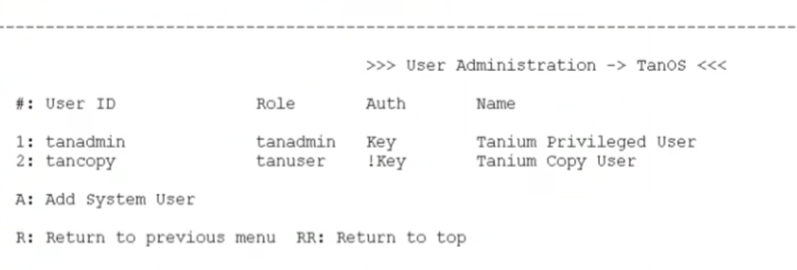
User Account Configuration
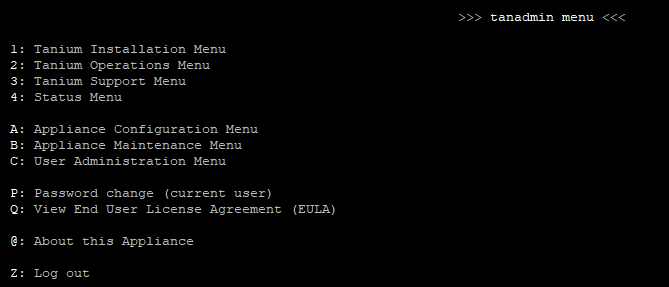
Menu path: C -> U for existing TanOS users and C -> L for local Tanium users.
- Open the User Administration Menu.
- Open the existing user account list.
- Configure the tanadmin account: use
C -> U -> x -> Cto change or enable the password if required, andC -> U -> x -> Ato manage SSH authorized keys. - Configure the tancopy account: use
C -> U -> x -> Ato add the SSH public key andC -> U -> x -> Nto disable password access if required. - Create the tanrecovery account if it does not already exist by using
C -> L -> 1. - Manage the account with
C -> L -> 2, then assign the admin role, add the SSH public key, and disable password authentication.
Checks after completion: all required accounts exist and the expected SSH keys are configured.
Backup Preparation
Add SSL Backup Key
Menu path: B -> 1 -> E
- Install OpenSSL on the management workstation if it is not already available.
- Generate a 3072-bit RSA key pair.
- Keep the private key offline and protected.
- Connect to the appliance using tanadmin.
- Open Appliance Maintenance -> Backup -> Edit key.
- Paste the public key contents and save the configuration.
Checks after completion: the public backup key is stored on the appliance and the private key is secured offline.
Screenshot to add: backup key menu and key import screen.
Export the GRUB Key
Menu path: B -> X -> 6
- Open Appliance Maintenance Menu.
- Open Advanced Configuration.
- Select Export GRUB Key.
- Use an SFTP client such as WinSCP with the tancopy account to retrieve the generated archive from the outgoing directory.
- Store the file in a protected backup location.
Checks after completion: the GRUB key archive is exported, downloaded, and stored securely.
Screenshot to add: Advanced Configuration menu, Export GRUB Key option, and outgoing SFTP directory.
Create the Appliance Array
Menu path: 1 -> M, then C to create the array and A to add members.
- Open the Tanium Installation Menu.
- Open Manage Appliance Array.
- Select Create a new array.
- Enter a name for the array, for example
Tanium-Array-01. - Add additional appliances one by one and authenticate with the administrative account when prompted.
Checks after completion: all required appliances are visible in the array and communication between members is healthy.
Screenshot to add: Manage Appliance Array menu, array creation screen, and member addition screen.
Install the Tanium Server Role
Requirement: if you perform a manual or offline installation, upload the required RPM package first with the tancopy account.
Install the Core Server
Menu path: 1 -> 2
- Open the Tanium Installation Menu.
- Select Install the Tanium Server.
- Set the initial Tanium web console administrator password when prompted.
- On the first appliance in the array, download the server role package if required by the installation workflow.
Checks after completion: the Tanium Server role is installed and the web console administrator password is set.
Install the Module Server
Menu path: 1 -> 3
- On the second appliance, open the Tanium Installation Menu.
- Select Tanium Module Server.
- Let the appliance coordinate the role installation with the existing array.
Checks after completion: the module server role is installed and visible as part of the appliance array.
Associate the Core Server and Module Server
Menu path: 2 -> A, then use 3 to read the instructions and the module-server registration steps available on the appliance.
- On both appliances, open the Tanium Operations Menu.
- Open Configure Module Server.
- Open View Instructions to review the guided pairing steps.
- On the core server appliance, select Configure Core Server.
- On the module server appliance, select Configure Module Server.
- Follow the guided prompts until the association completes.
Checks after completion: the core server and module server are paired and the module configuration is healthy on both appliances.
Complete the Web Installation
- Open the appliance web interface in a browser by using the appliance hostname or IP address over HTTPS.
- Upload the license file.
- Open the configuration area.
- Open the Solutions submenu.
- Select the recommended installation proposed by Tanium.
- Wait until the solution deployment completes.
Checks after completion: the license is imported, the recommended solutions are installed, and the console is accessible.