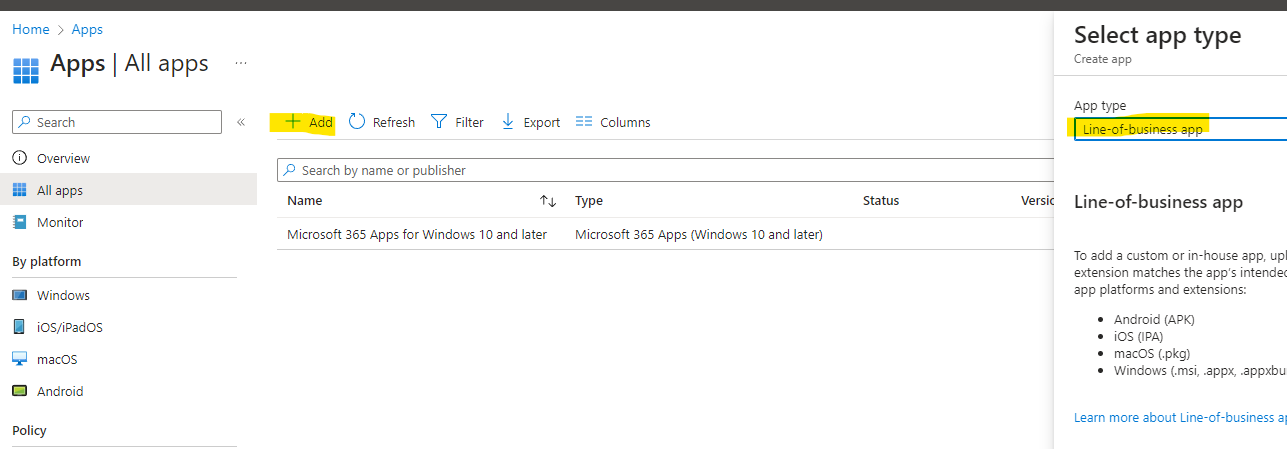
- Navigate to Apps: Select ‘Apps’, then ‘All Apps’, and click ‘Add’.
- Selecting App Type: Choose ‘Line-of-business app’ from the App type drop-down and click Select
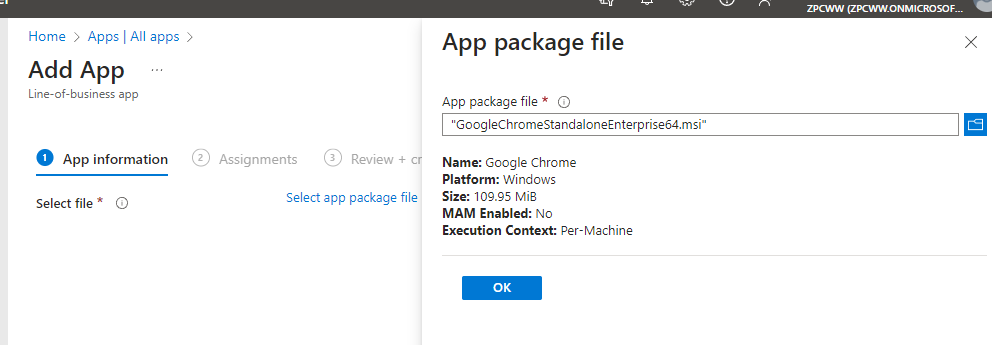
- Uploading MSI File: Browse and upload the MSI file.
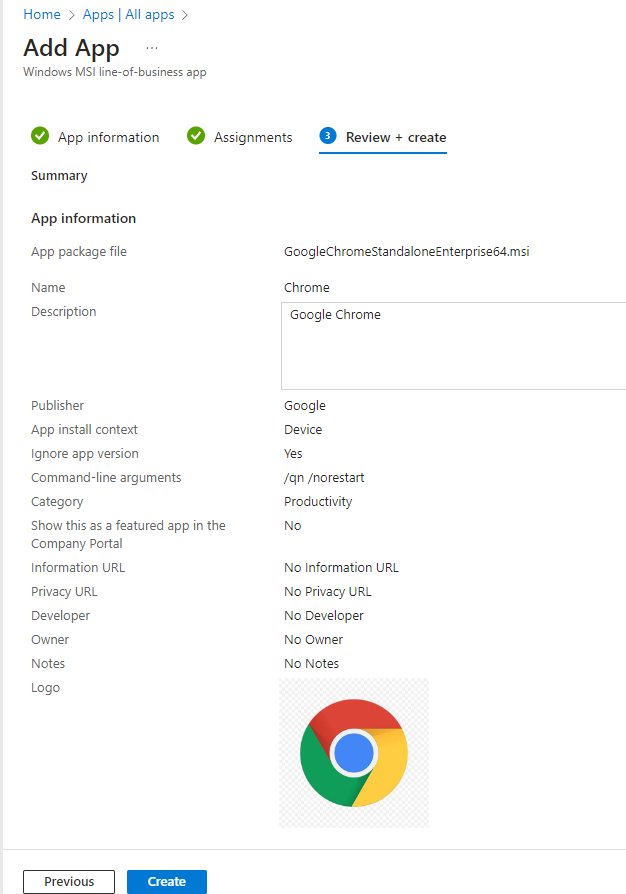
- Providing App Information: Enter details like Name, Description, and Publisher. Set the App Install Context and decide whether to ignore the app version during deployment.
- Command-line Arguments: Input necessary installation parameters, such as “/norestart” and “/qn” for a silent install.
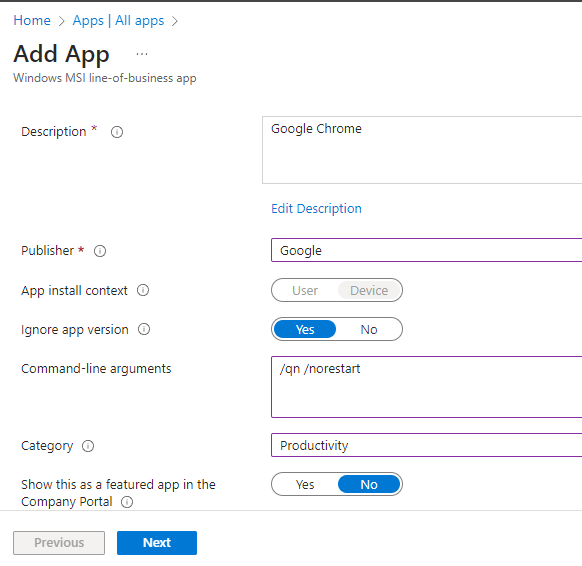
- Command-Line Arguments. It is not necessary to specify /QN or /quiet

- Adding Product Icon/Logo: Enhance the user experience with image files (.jpg, .gif, .png) ideally between 250px to 500px.
- Setting Installation Context: Modify the context as needed and leave the installation argument field empty if no specific arguments are required
- Click Next
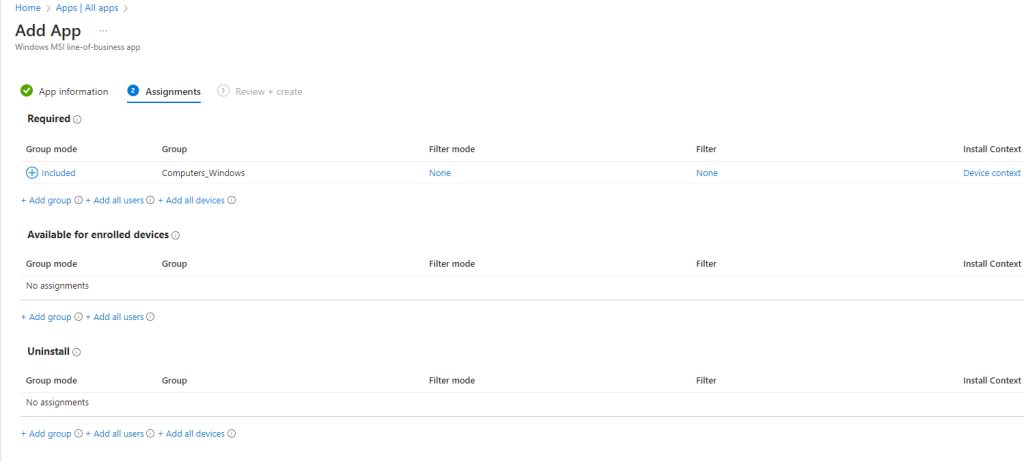
- Assigning to Groups: Assign the application to specific Azure AD groups containing users or devices.
- Review and Create: Finalize and create the deployment policy
- Click Create


0 Comments