Patch – Configuration with Ivanti EPM
Patch Configuration Ivanti – update security bulletins, create groups (_NewPatch, L1, L2), scopes, and rollout projects. Workflow
Useful external reference: Ivanti resources.
Patch Configuration Ivanti – Before any security vulnerability detection on systems, the LANDesk Security Suite must be updated with security bulletins. These bulletins will be downloaded from a database hosted by LANDesk.
Useful external reference: Ivanti resources.
Patch Configuration Ivanti – Unlike a traditional WSUS, EPM allows for managing patches from “standard” publishers.
Useful external reference: Ivanti resources.
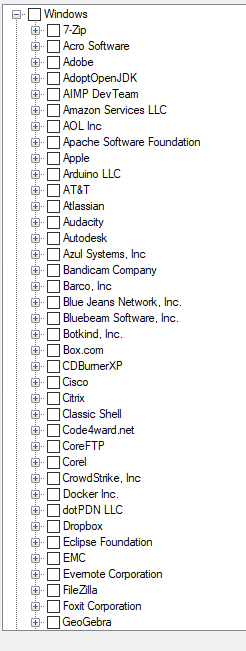
Downloading Definitions
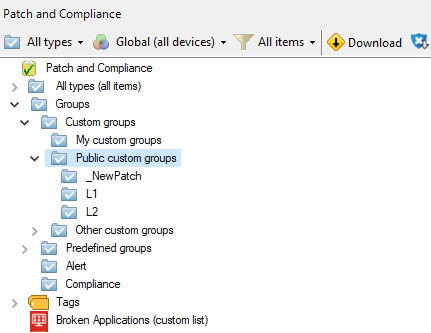
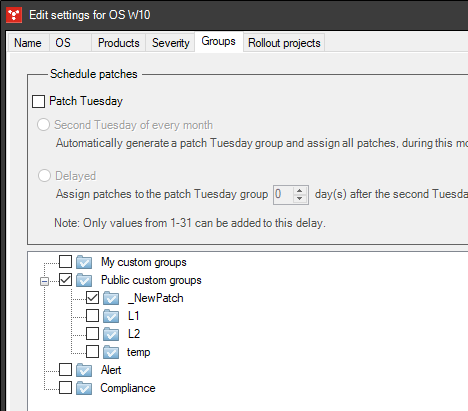
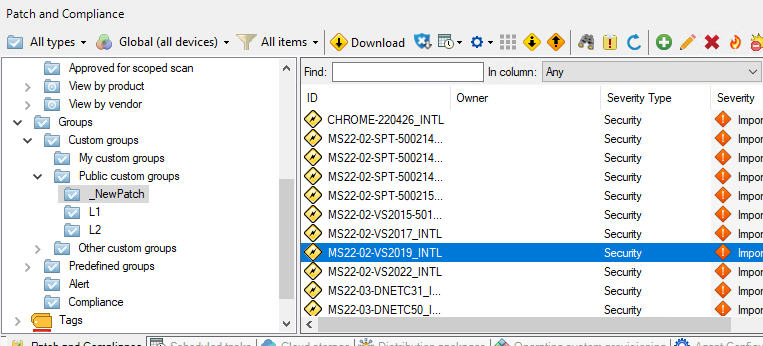
Creating Groups
Patch Configuration Ivanti – We will create multiple groups to manage the approval of patches and pilot terminals.
Useful external reference: Ivanti resources.
- In “Patch and Compliance” “Public Custom Groups”, we will create the following groups:
- _NewPatches => For new patches awaiting validation
- L1 => For technical recipe testing of patches on a small group of terminals
- L2 => For widespread deployment
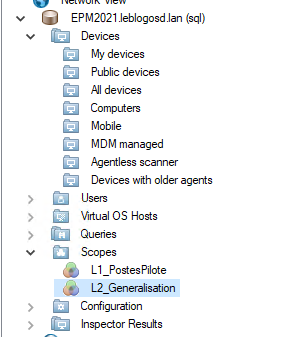
Creating Scopes
Patch Configuration Ivanti – We will create scopes that will be associated with the groups, consisting of:
Useful external reference: Ivanti resources.
- L1_PilotTerminals
- L2_Widespread
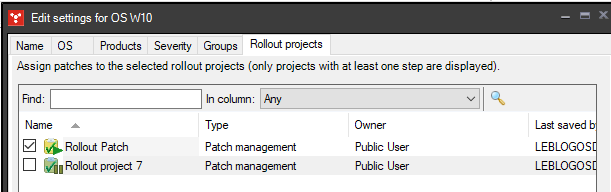
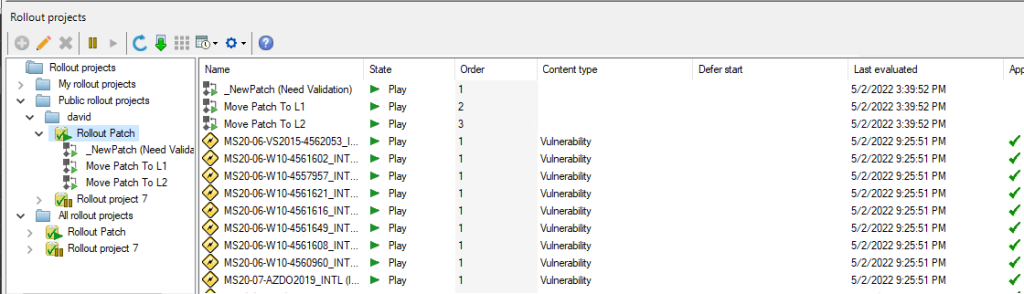
Creating Rollout Projects
Rollout Projects
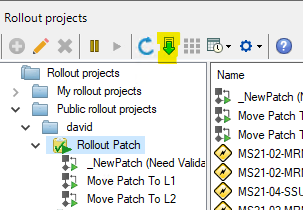
- In “Rollout Projects”, we will initiate a new project

- The project will involve three key steps:
- Patch validation => _NewPatch (need validation)
- Technical recipe transition => Move Patch To L1
- Broaden the deployment of patches => Move Patch To L2
Step _NewPatch (Need Validation)
- Create a new step
- Rename it to _NewPatch (Need Validation)
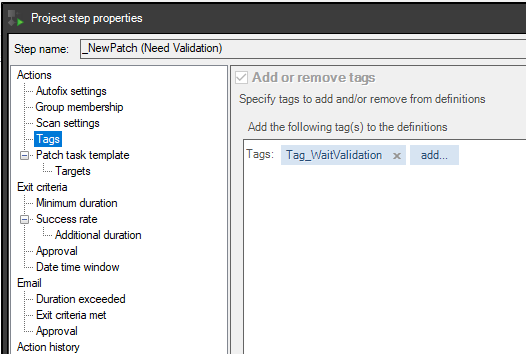
- In Actions Tags, add a tag
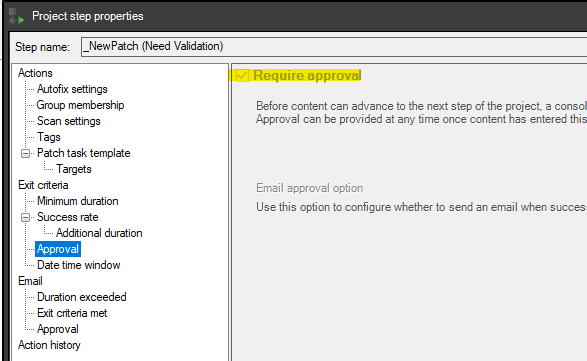
Patch Configuration Ivanti – Patches will be moved to L1, provided they are validated.
Useful external reference: Ivanti resources.
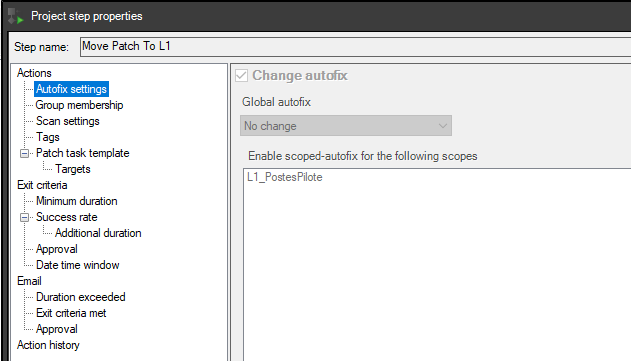
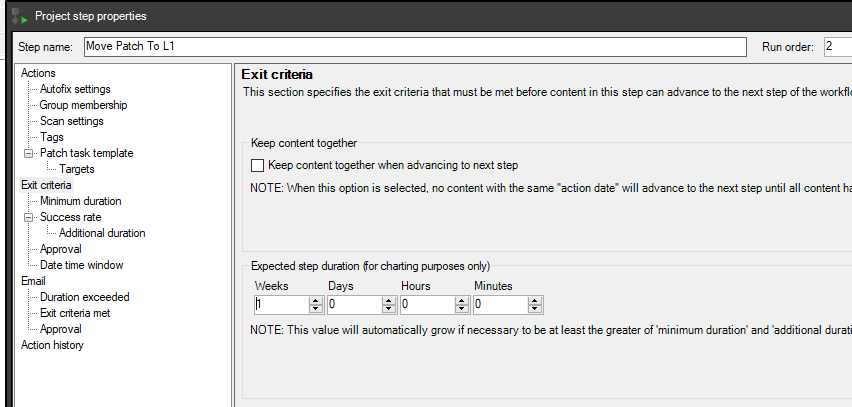
Step Move Patch to L1
- Create a new step.
- Rename it to Move Patch To L1.
- In Actions Autofix settings, change the autofix for the L1_PilotTerminals scope.
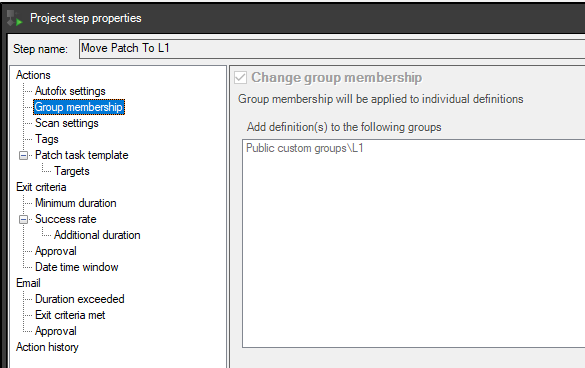
- In Actions Group membership,
- Add to the L1 group.
- Remove from the _NewPatch group.
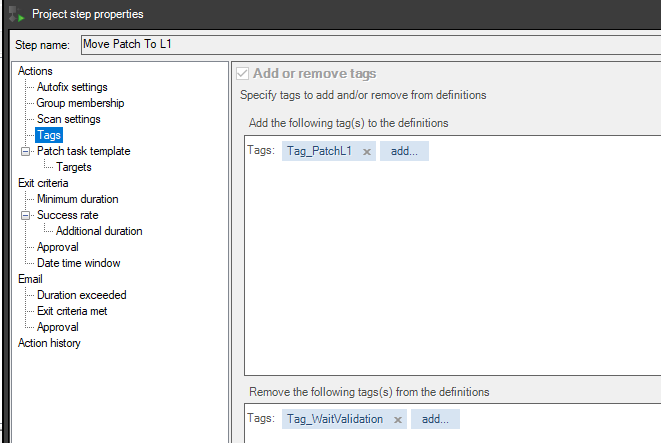
- In Actions Tags, we will make the following changes:
- Add Tag_PatchL1.
- Remove Tag_WaitValidation.
- In Exit criteria Minimum duration,
- Add 1 week
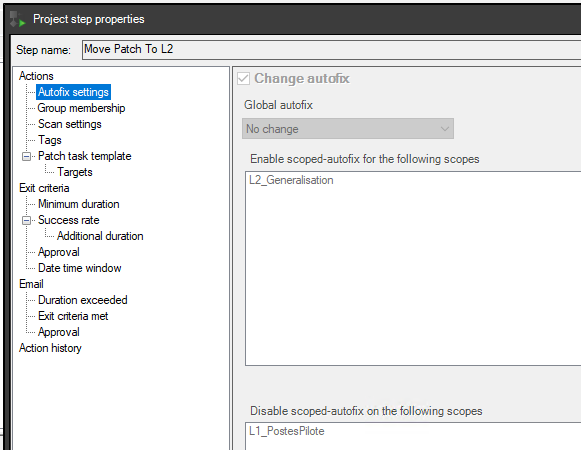
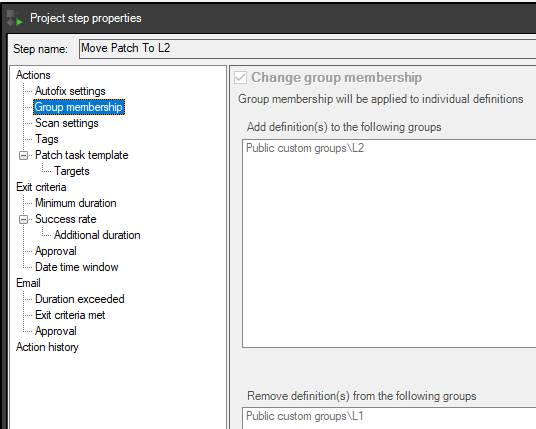
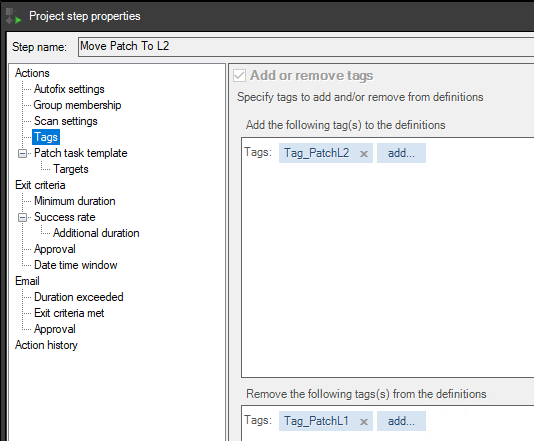
Step Move Patch To L2
- Create a new step
- Rename it to Move Patch To L2
- In Actions Autofix setting
- Add the autofix for the L2_Generalisation scope
- Remove the autofix for the L1_PilotTerminals scope
- In Actions Group membership,
- Add to the L2 group
- Remove from the L1 group
- In Actions Tags, we will add:
- Add Tag_PatchL2
- Remove Tag_PatchL1
Downloading Signatures
Downloading
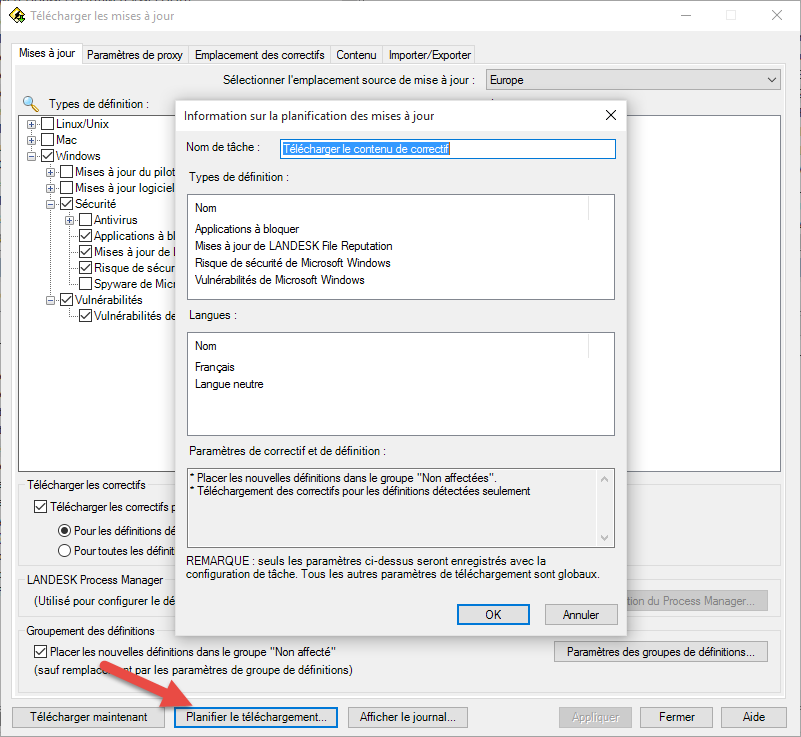
- Select the “Download updates” button
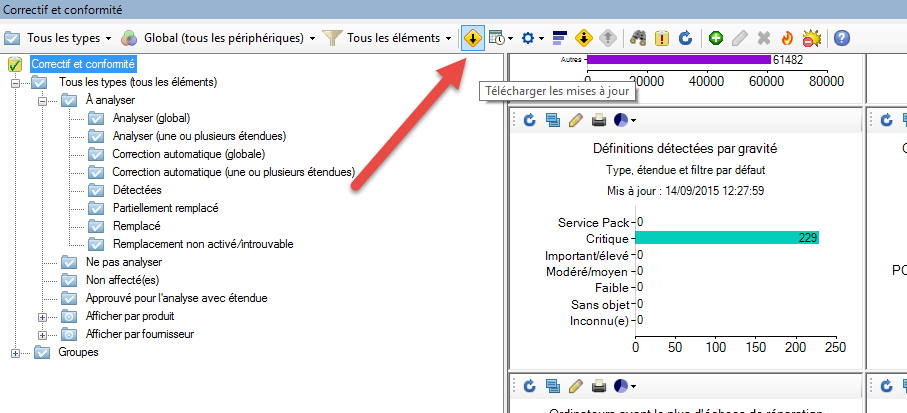
Updates Tab
- In Select update source site,
- Select “Europe”
- In Definitions,
- At minimum, enable Microsoft vulnerabilities
- In Definition grouping,
- Select “unassigned”
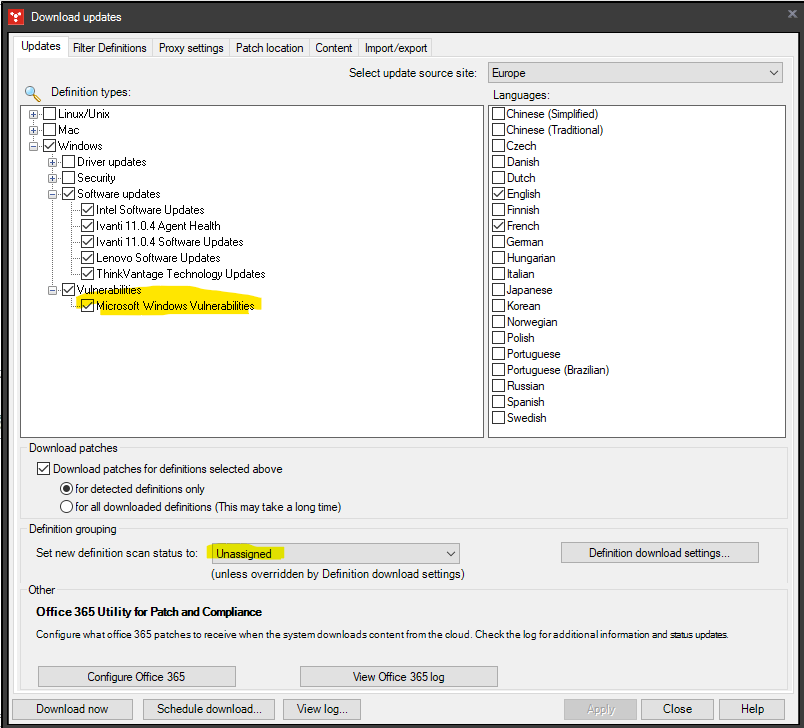
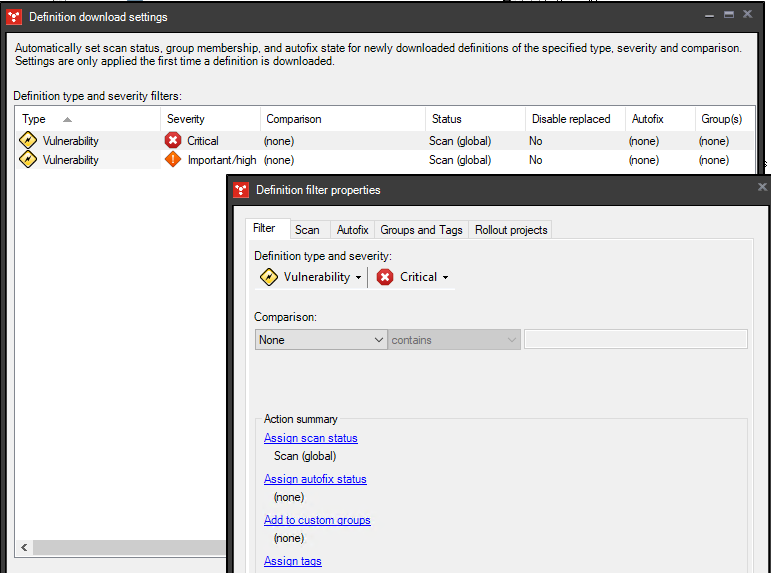
- Click on “Definition download settings”,
- Apply the scan for critical and important patches (for example)
Patch Configuration Ivanti – The scan does not apply the patch but simply identifies the devices where the patches are not installed
Patch Configuration Ivanti – ATTENTION: If you want to download drivers, you must configure the HII LANDesk first (it allows configuring the location of the drivers)
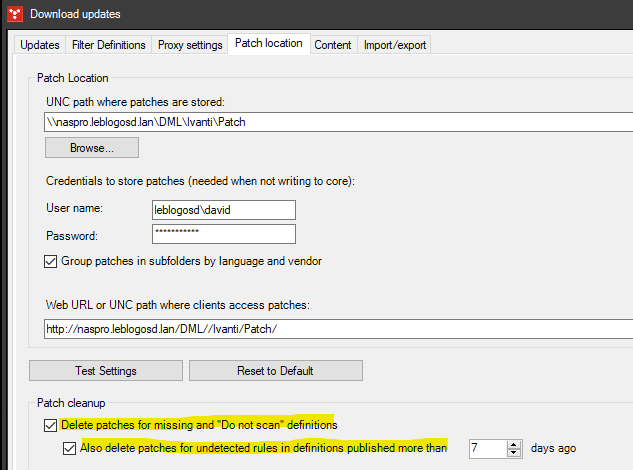
Patch Location Tab
- In this tab, indicate the UNC and HTTP paths where the patches will be copied
- Enable automatic patch cleaning
Filter Definition Tab
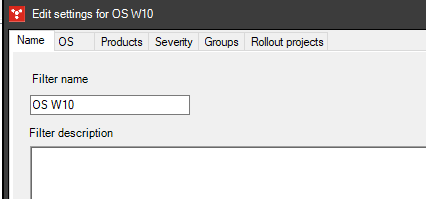
- Create a new filter
- Under the Name tab,
- Indicate a name for this filter
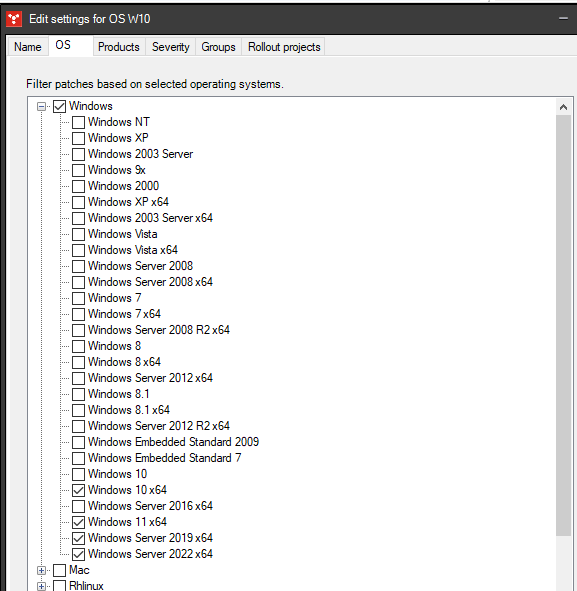
- Under the OS tab,
- Select the OS you want to manage
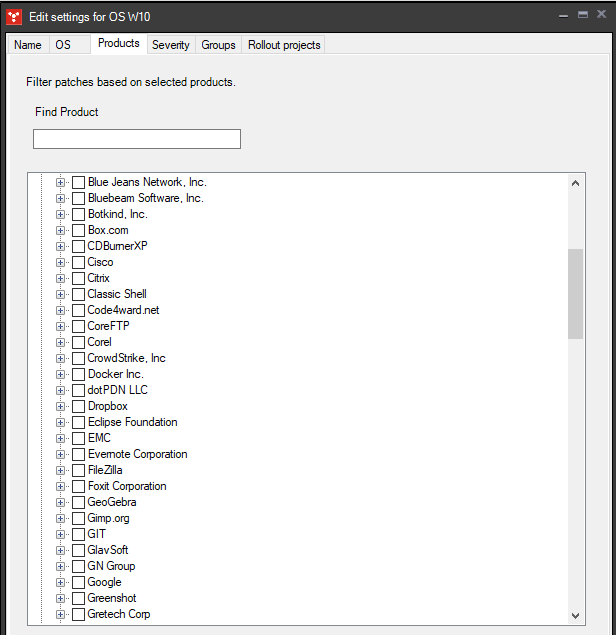
- Under the Products tab,
- Select the applications you want to manage
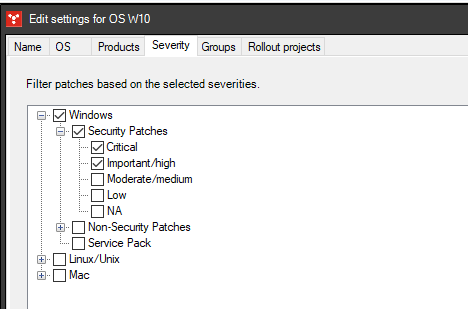
- Under the Severity tab,
- Indicate at least Critical Patches
- Under the Groups tab,
- Add patches to the _NewPatch group
- Under the “Rollout Project” tab,
- Associate with the previously created Rollout Project
Patch Configuration Ivanti – There will be 3 tasks for patching, so you can create a folder to “organize tasks”.
“Rollout Projects”
- If you don’t want to schedule the project, simply click the “Process selected Item Now” button
- Otherwise, schedule the project with the Create a task button

Downloading Patches
- Click on “Schedule Download” to create a scheduled task that will download new definitions.
- You can change the task name. Click “Ok”.
- The task is scheduled to run daily.
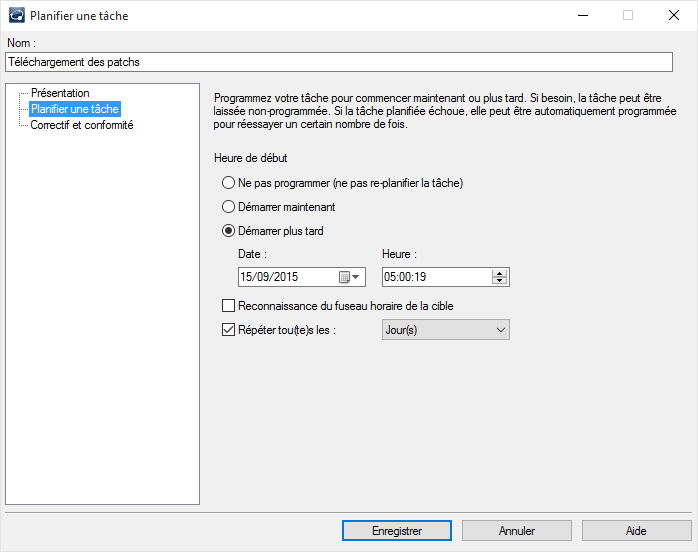
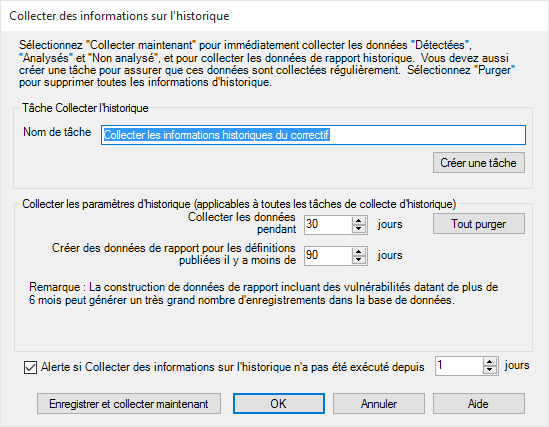
Data Collection
- Go to “Create a task Collect historical data…”
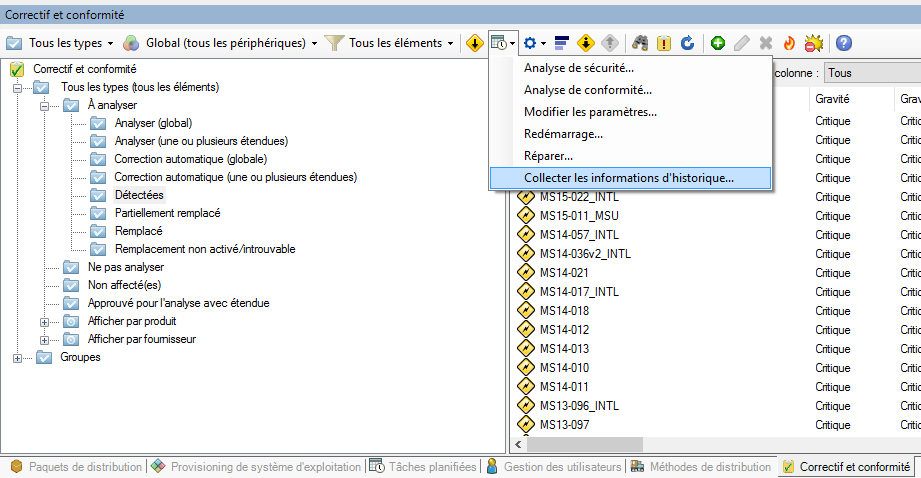
- Click on “Create a task”.

Patch Configuration Ivanti – Go to the task properties.
Useful external reference: Ivanti resources.
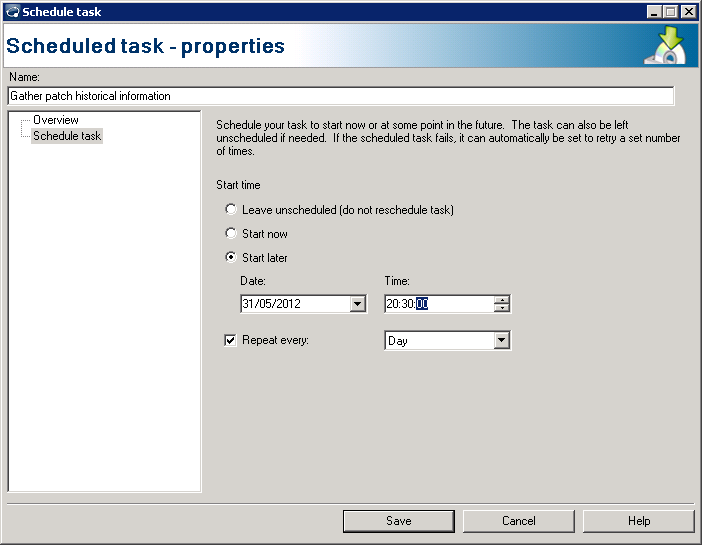
- The task is scheduled to run every night at 10:30 PM
How Patching Will Be Done
Downloading Patches
Patch Configuration Ivanti – This is the role of the scheduled task Download patch content.
Useful external reference: Ivanti resources.
Patch Configuration Ivanti – Once launched, the new “critical” and “important” patches will be copied to _NewPatch.
Useful external reference: Ivanti resources.
Patch Approval
Patch Configuration Ivanti – During the execution of:
Useful external reference: Ivanti resources.
- The scheduled task “Rollout project task”
- Or with the button “Process selected Item Now”
Patch Configuration Ivanti – The new patches will be in the “rollout project” awaiting validation.
Useful external reference: Ivanti resources.
Installation on L1 (Pilot) Group
Patch Configuration Ivanti – Once the patches are validated, during the execution of:
Useful external reference: Ivanti resources.
- The scheduled task “Rollout project task”
- Or with the button “Process selected Item Now”
Patch Configuration Ivanti – The patches will move to the L1 group.
Useful external reference: Ivanti resources.
Installation on L2 Group
Patch Configuration Ivanti – Once the one-week period has passed, during the execution of:
Useful external reference: Ivanti resources.
- The scheduled task “Rollout project task”
- Or with the button “Process selected Item Now”
Patch Configuration Ivanti – The patches will move to the L2 group.
Useful external reference: Ivanti resources.