Using preferred servers on remote sites helps limit WAN bandwidth usage. Planning is necessary to copy sources to remote sites.
For provisioning, you need to configure at least the core server with its name and the read account in the preferred servers. If you want to do provisioning without remote sites, only refer to the chapter: SETTING UP THE PREFERRED SERVER For the core server
Definition
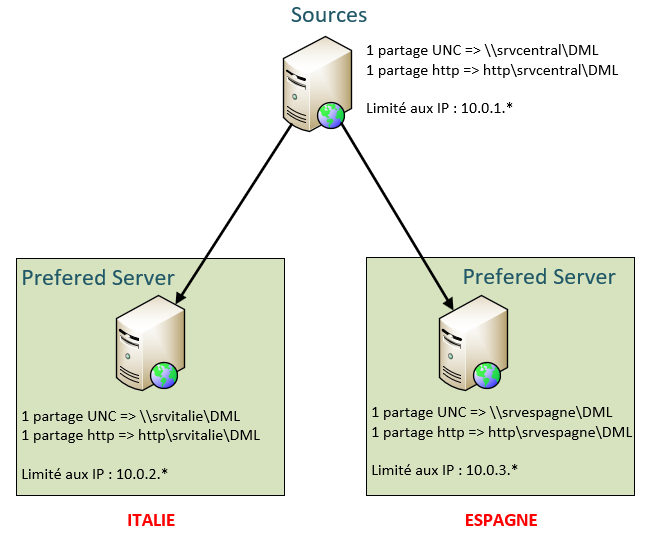
- Sources: Location where application sources, drivers, and patches are stored
- The replicator: A server or Windows PC with the LANDesk agent used to copy sources from the repository to a preferred server
- A preferred server: A relay for clients where the sources are located. LANDesk clients will use this preferred server instead of pointing to the source
Prerequisites
Accounts
Two accounts will be necessary:
- A service account with read rights on the UNC share
- A service account with write rights on the UNC share
Share on the Core Server
At a minimum, you will need:
- A UNC share on the core server or a third-party file server
- An HTTP share on the core server
Preferred Server Installation
EPM Agent
A specific agent will be needed for the preferred server. It is not mandatory, but it is advisable to change the sdmcache folder location to avoid saturating the system partition.
When creating your EPM agent for the preferred server:
- Modify the cache folder to be on the same partition as the UNC share
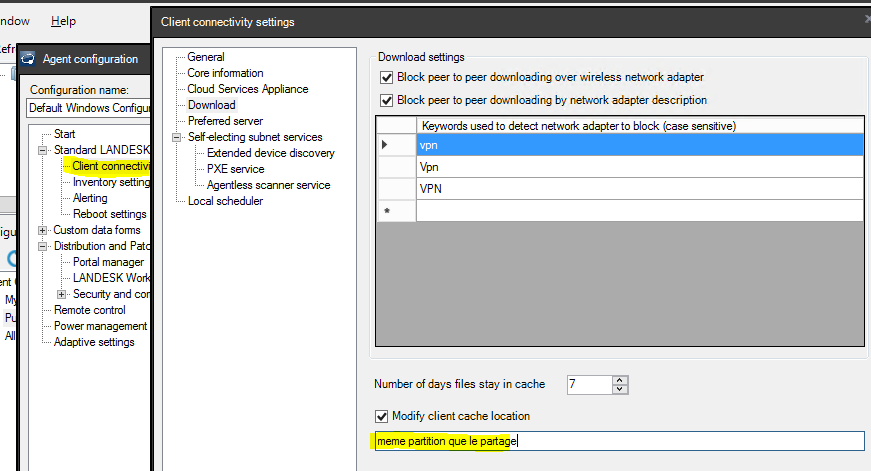
Then install this agent on your preferred servers
UNC and HTTP Share
On your EPM core server, you have:
- 1 UNC share on the repository
- 1 HTTP share
On your preferred server, you will need the same shares (same name, same rights)
For example:
- On the core server, you will have \\Core\Share and http://Core/Share
- On the preferred server, you will need \\NASorCLIENT\Share and http://NASorCLIENT/Share
UNC Share
- Create the Windows share with full control for everyone

- Add the LDMSread account with read permissions and the LDMSwrite account with write permissions in NTFS permissions

Creating the HTTP Share
On Windows 2012 R2 or later
- In IIS, create a new virtual directory
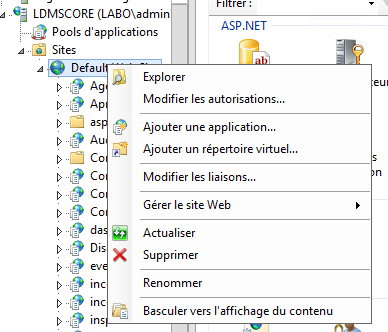
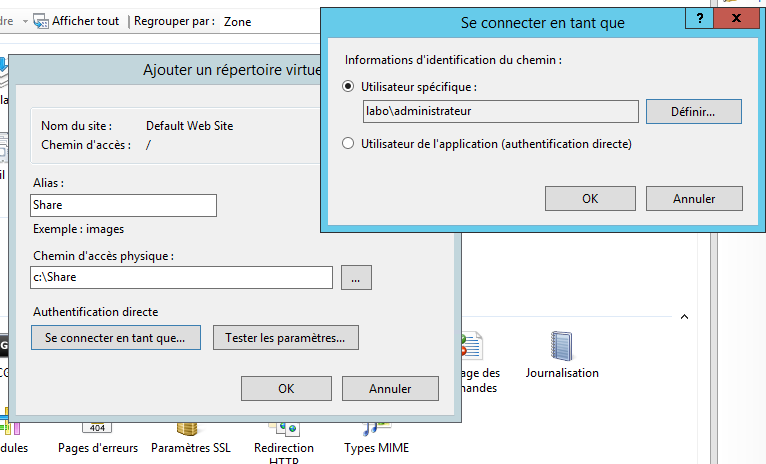
- Specify the directory name and specify a domain or local account with rights to this folder (if the path is different from the IIS virtual directory)
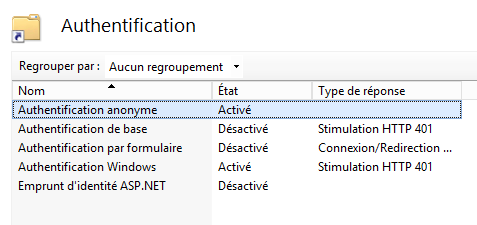
- Ensure that anonymous authentication and Windows authentication are allowed
- Enable directory browsing for the virtual directory

- In your browser, verify that you have access to the files
Note: In case of an error (e.g., using a NAS), you can convert the virtual directory to an Application
Preferred Server Configuration
Configuration Menu
The rest of this chapter will be done in the preferred server configuration menu
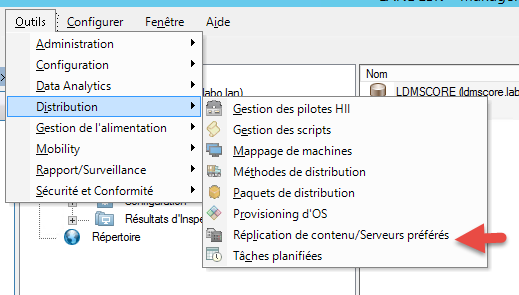
- In Tools \ Distribution \ Content Replication \ Preferred Servers
For the Core Server
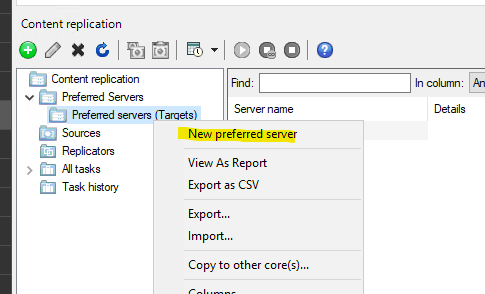
- Create a new preferred server
- Add the UNC path of the core server with:
- Its name (preferably use the FQDN)
- An account with read rights on the share
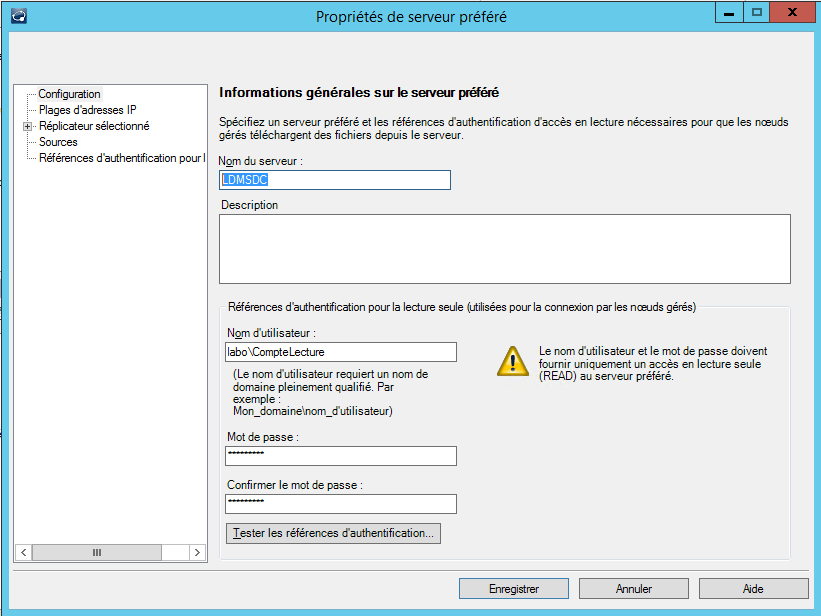
- Also specify an account with write rights on the share
This setting will only be necessary if you are capturing OS images with provisioning
For the Preferred Servers
Sources
One or more sources will need to be configured to schedule copying to the preferred servers
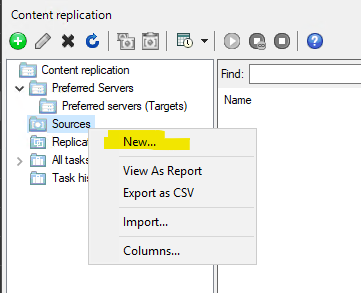
- Create a new source
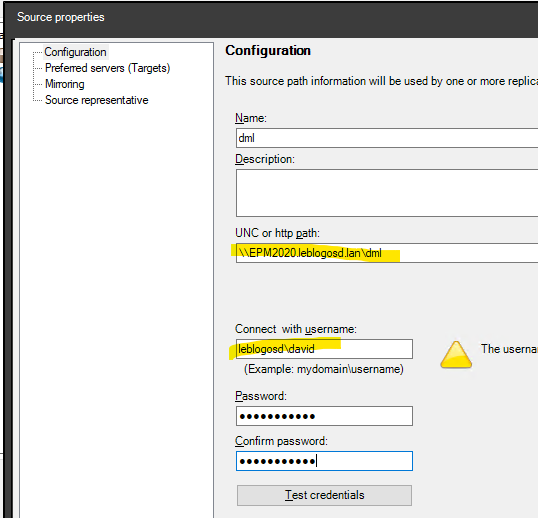
- Specify:
- Name
- UNC or HTTP path
- The read account if it is a UNC path
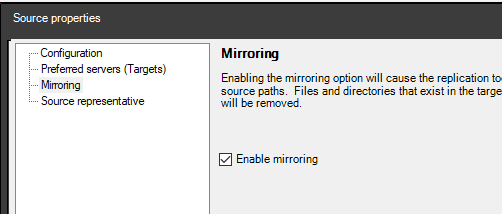
- Enable the Mirroring option to remove deleted files from the preferred server
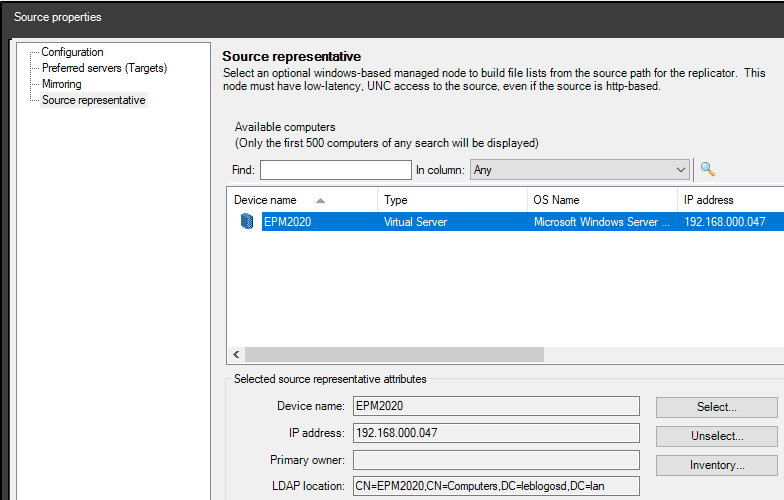
- Select the server responsible for listing files. Generally, this is the core server
Preferred Server Configuration
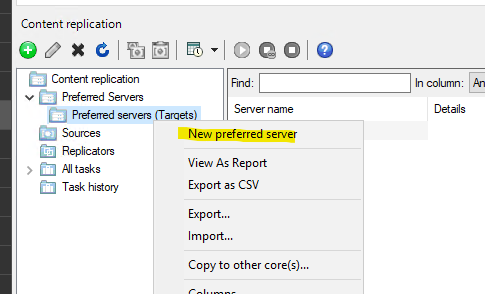
- Create a new preferred server
- Specify the preferred server name
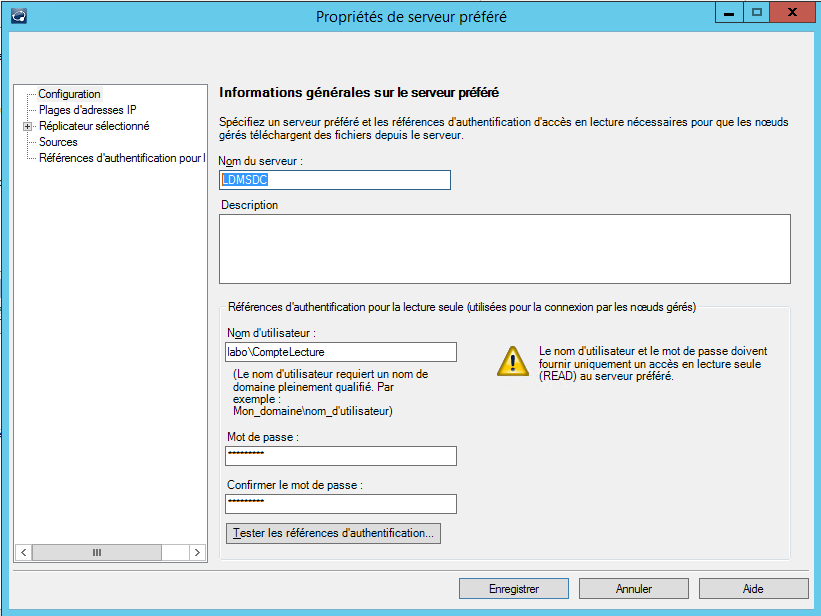
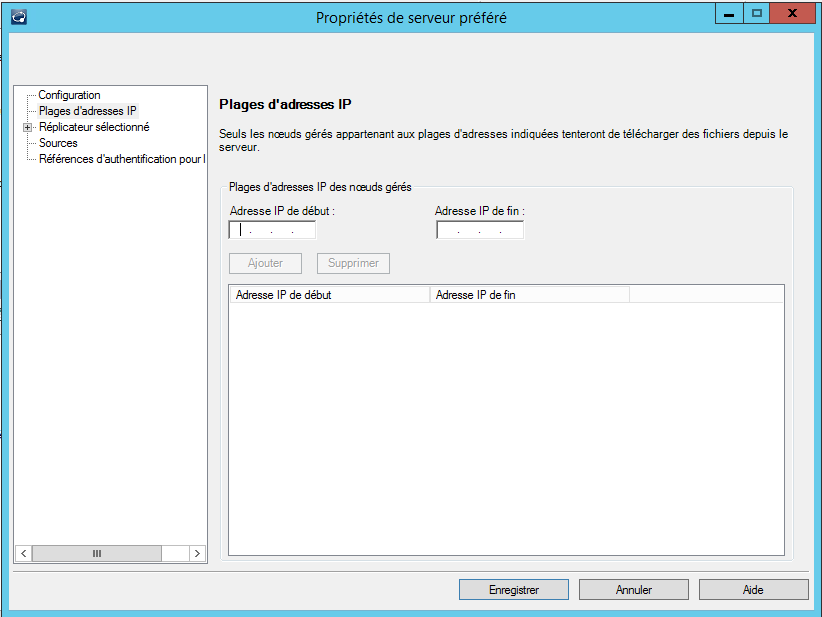
- Specify the IP ranges allowed to connect to the preferred server. Otherwise, all EPM clients can connect
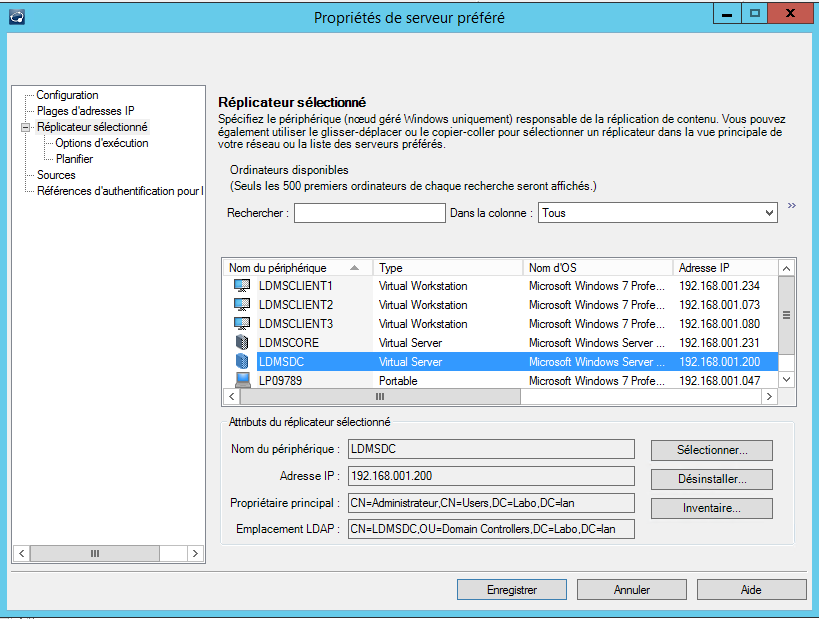
- Specify the remote site computer that will copy the sources to the preferred server (the replicator)
- In sources, select the source created previously
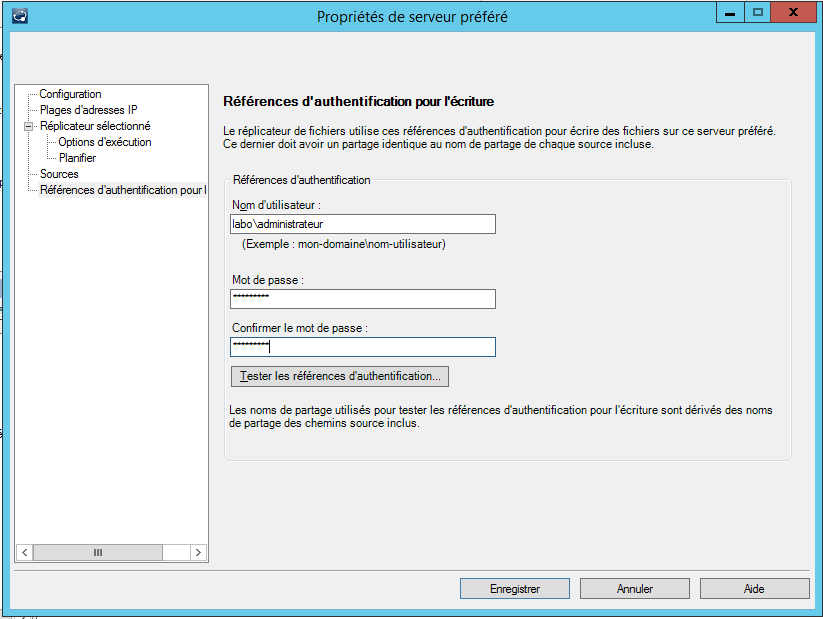
- Specify an account with write rights on the shares on the preferred server
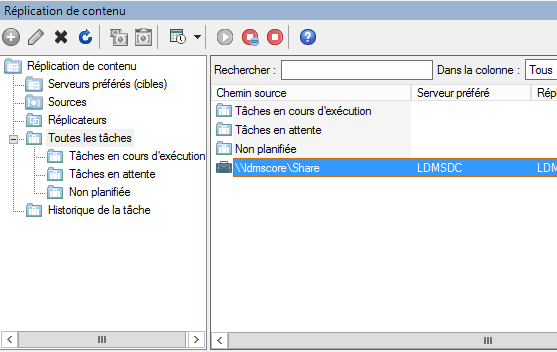
- You can then either manually start replication or schedule it
Note: Declaring a new preferred server is applied to clients within 24 hours

