Deploy Applications with Quest SMA Managed Installations
Deploy Applications Quest – Deploy applications with Quest SMA using managed installations, software inventory, custom inventory rules, MSI packages, zip sources and deployment targeting.
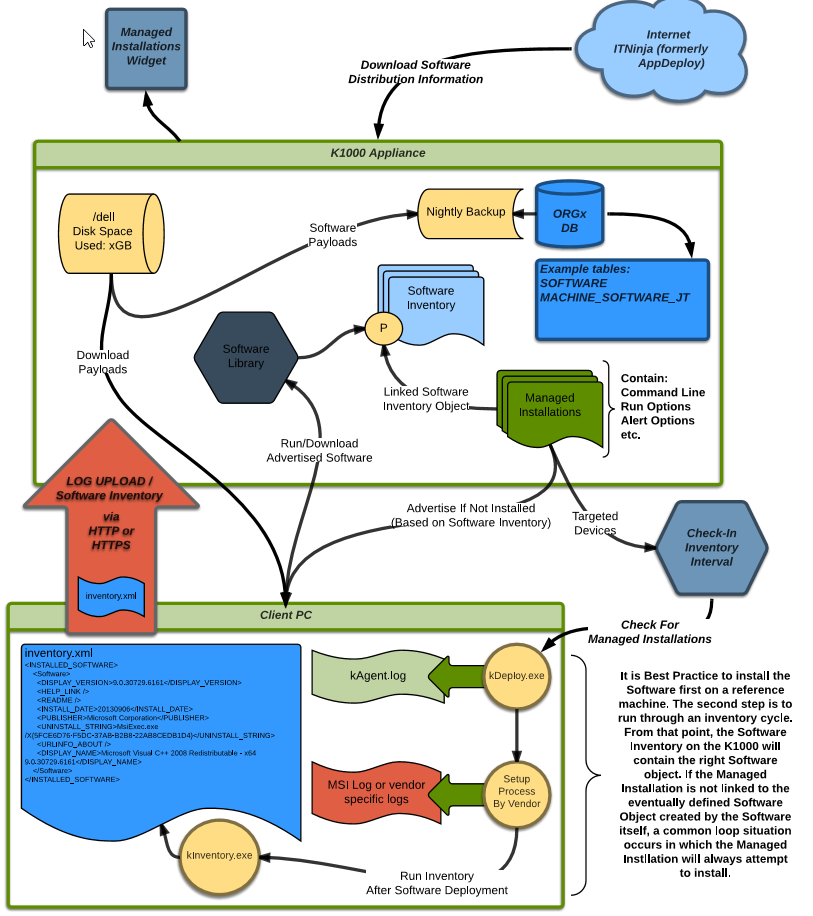
Deploy Applications Quest – The article provides a detailed guide on managing application deployments with KACE SMA. It covers the following steps:
Creating the package
Managing inventory upload
Zipping the sources
Associating sources with the inventory
Distributing the application
Special cases
Installation Package
Packaging
Deploy Applications Quest – Before deploying an application, you need:
Offline installation sources
The installation command
Deploy Applications Quest – Here are 2 examples of packages:
Google Chrome
Deploy Applications Quest – Download the MSI: Download
Deploy Applications Quest – Download the EXE: Download
npp.8.3.3.Installer.x64.exe /S
Manual Installation
Deploy Applications Quest – Inventory upload:
Install the KACE agent on a machine
Manually install the application (preferably using your installation script) on this machine
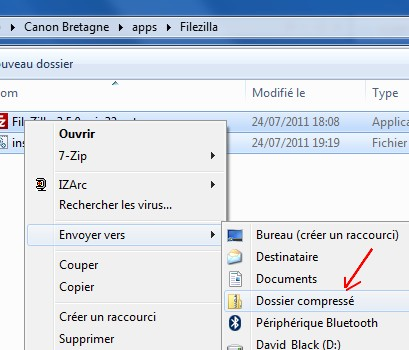
Zipping the Sources
Only one file can be associated as a source per application, so the installation sources must be zipped.
Deploy Applications Quest – Note: Zip the content of the folder, not the folder itself.
Deploy Applications Quest – Avoid high compression rates with 7zip, as decompression is done by a Linux system which might face compatibility issues.
Files > 2GB
Deploy Applications Quest – If the zip file exceeds 2GB, it must be uploaded to the appliance’s ClientDrop share.
Via the Application Catalog
Introduction
Deploy Applications Quest – This is the preferred solution in most cases.
Deploy Applications Quest – It is based on a product rather than a strict version, allowing for management of applications like Office that can auto-update.
Inventory
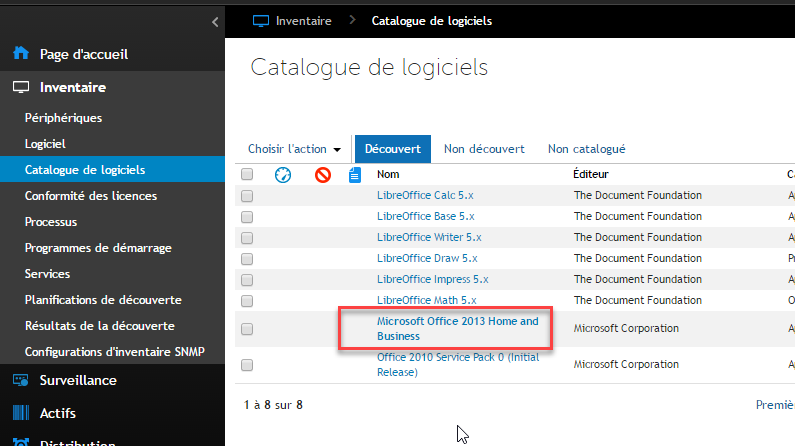
Identify if the application is present in the application catalog (e.g., Office 2013 Home and Business).
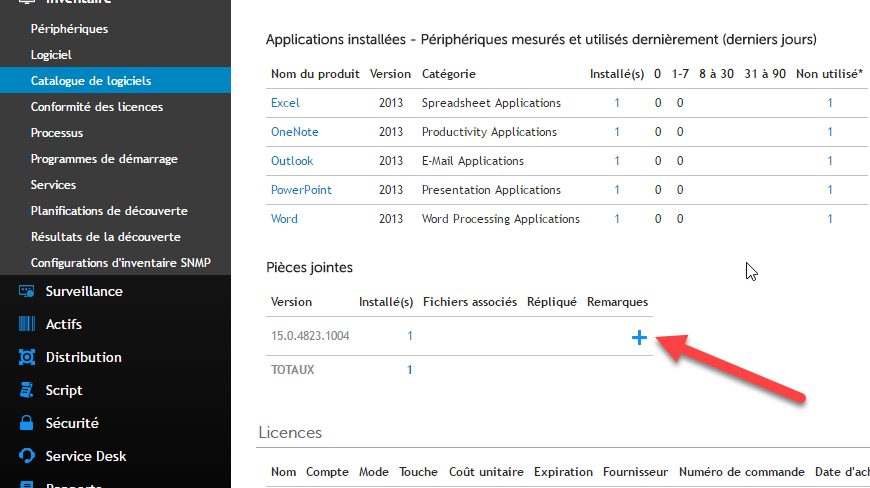
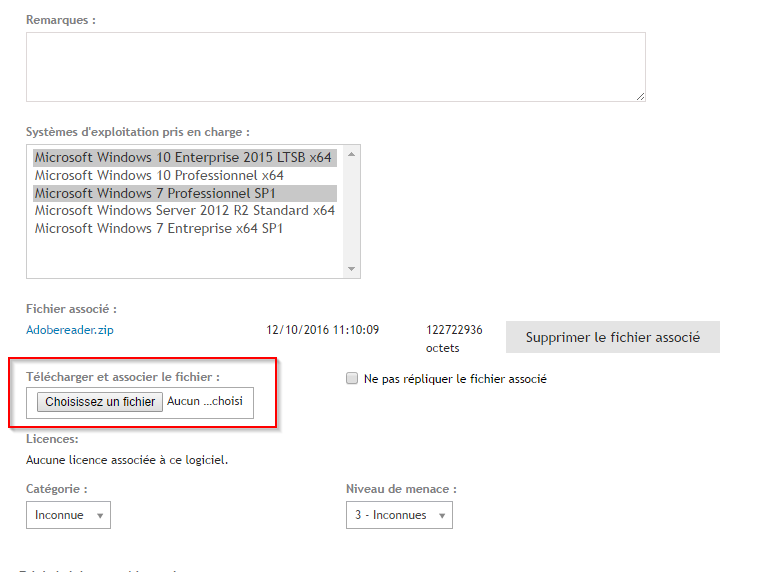
Return to the application catalog and click the + icon to associate an attachment.
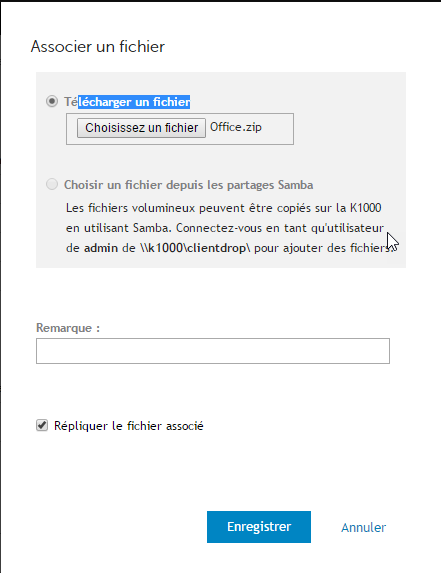
Associate the zip created in the previous step.
Distribution
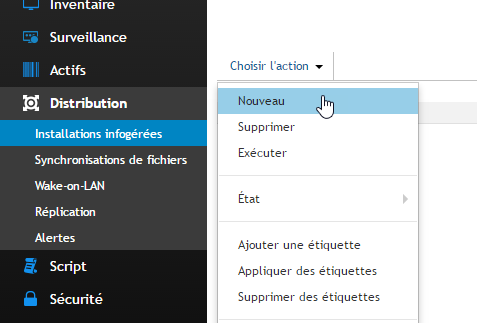
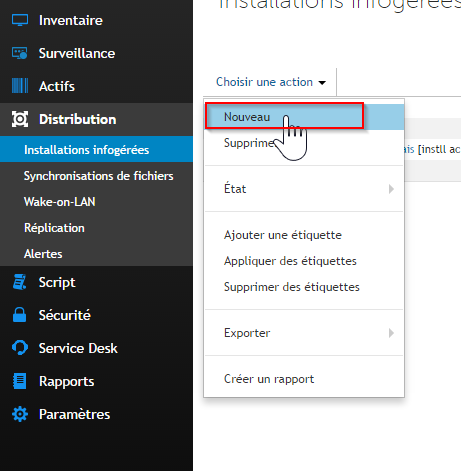
In Distribution, create a new “Managed Installation”.
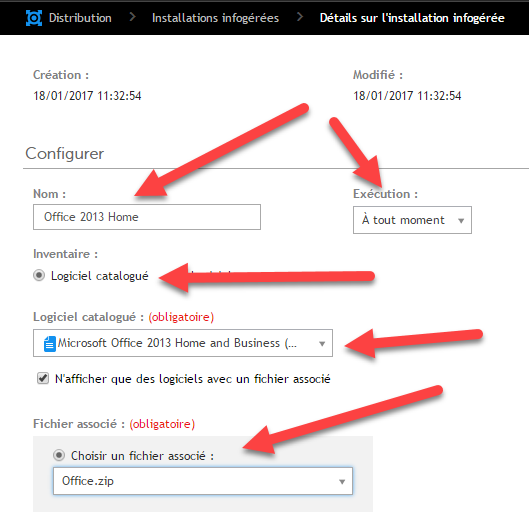
Specify:
The name
The execution
The cataloged software
The sources (the zip)
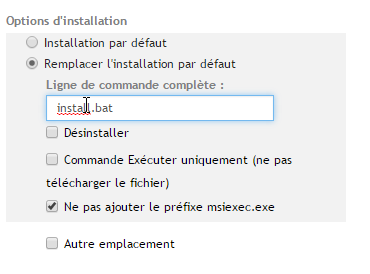
Then specify the installation command.
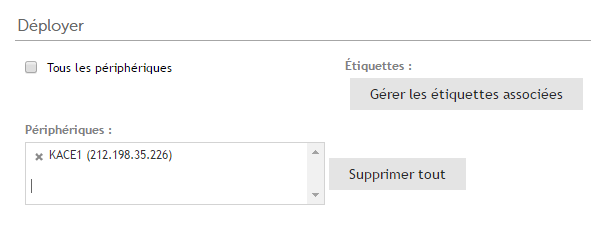
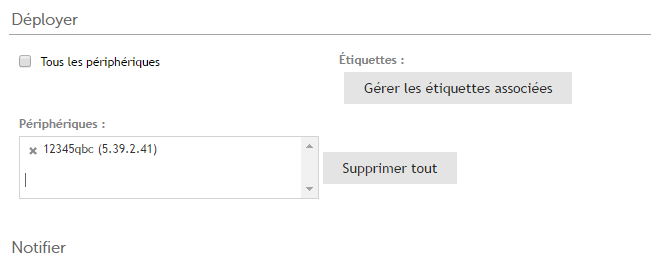
Specify the machine(s) where the application should be installed.
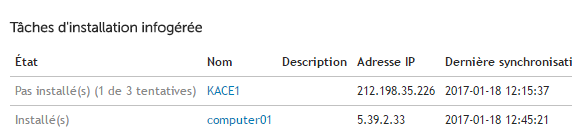
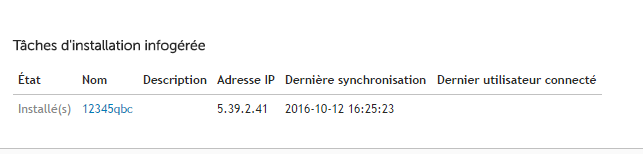
At the bottom of the page, you can see the deployment status.
Via the Software Inventory
Introduction
Deploy Applications Quest – For applications not present in the software catalog or if you want to manage a specific version.
Inventory
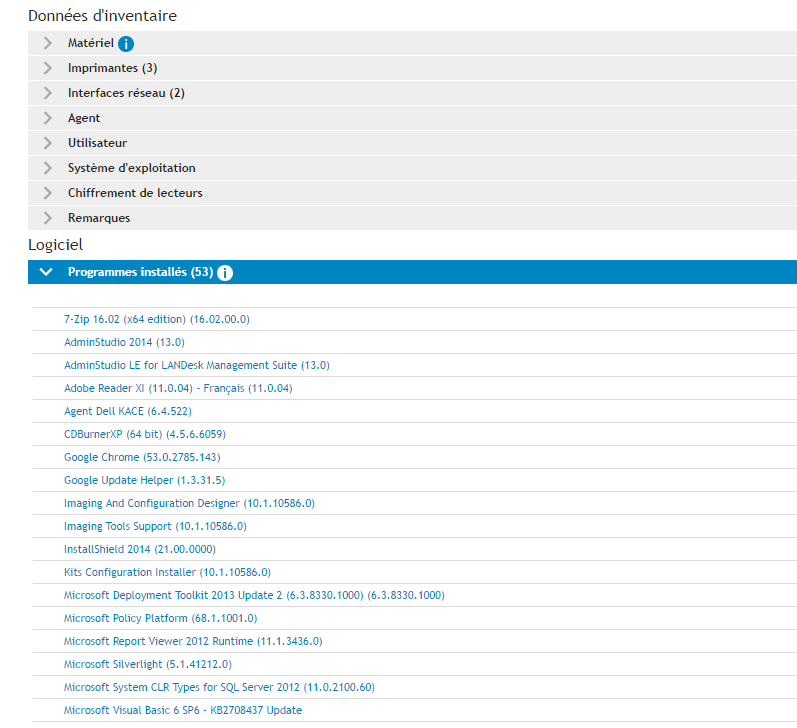
On a machine with the KACE agent, install the application and ensure it appears in “Add/Remove Programs”.
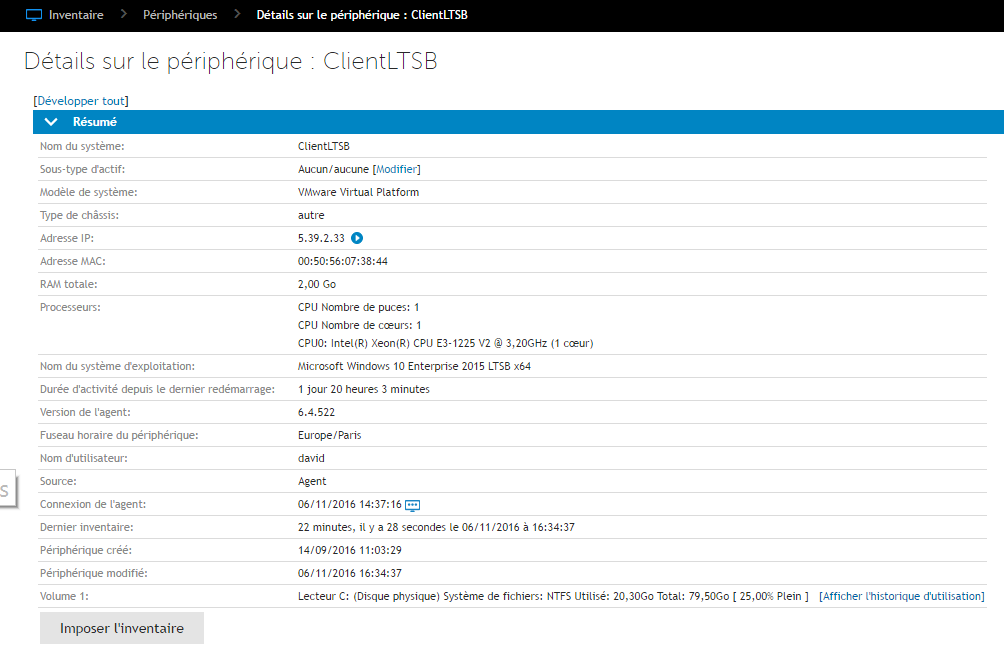
Then force the machine’s inventory from the KACE console using the “Force Inventory” button.
Once the inventory is complete,
Go to the machine’s inventory and search for the application in “Installed Programs”.
Click on the application (that you just installed).
Associate the zip containing the sources.
Also check the operating systems compatible with this application.
Distribution
This step allows the application to be deployed on the machines.
In the KACE interface, select “Distribution”, then create a new distribution.
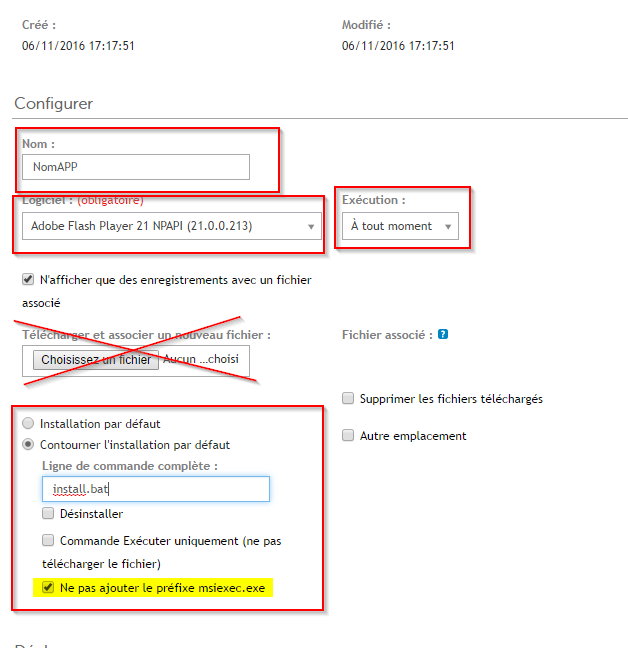
Deploy Applications Quest – Then specify:
The name of the application
The software (where you associated the zip file)
The execution time
The installation command (here install.bat)
Do not associate a file, as you have already done this earlier.
Specify the machine where you want to launch the installation, then save.
Once you have saved, you can return to the managed installation,
Then at the bottom of the page, click “View All”.
You can see the installation status on the machines.
Special Cases
Deploy Applications Quest – In some cases, the application might not appear in Add/Remove Programs.
Deploy Applications Quest – This might be the case:
For applications without installation
For “patches” for applications
For applications that may change version in Add/Remove Programs when patches are applied, such as Office
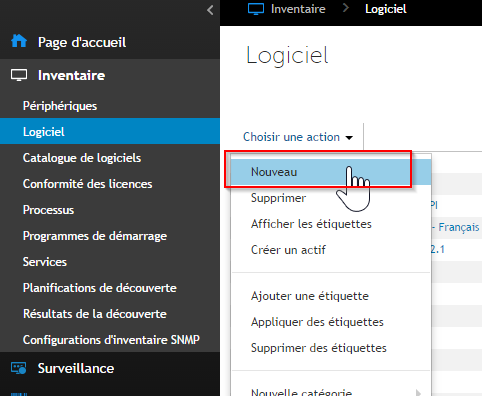
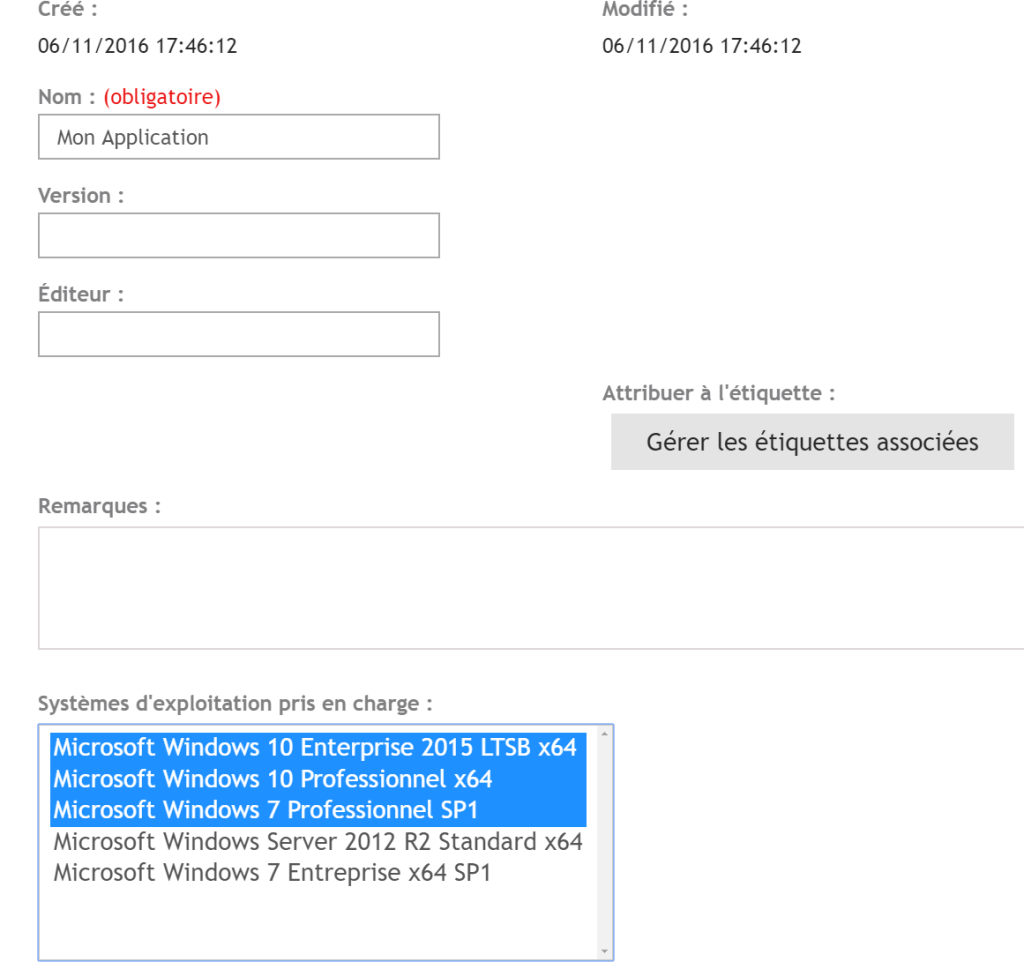
Deploy Applications Quest – In such cases, you will need to manually create an application in the KACE software inventory.
Specify the name of the application and the operating systems compatible with your application.
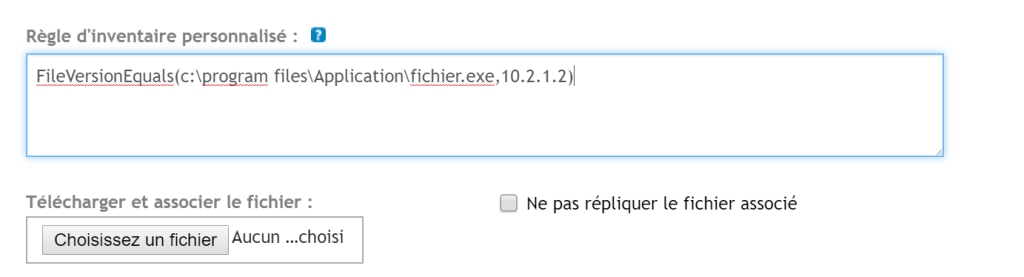
In “Custom Inventory Rule”, click on the “Question Mark” to see the inventory options.
Once the inventory rule is tested (by forcing inventory on a machine), you can use this inventory to deploy the application.