Introduction
Managing drivers by model is essential when dealing with a mix of old and new devices. In SCCM 2012, this can be challenging due to restrictions on integrating the same driver multiple times. This guide provides a solution to manage and duplicate drivers by model effectively.
Preparing the Driver Repository
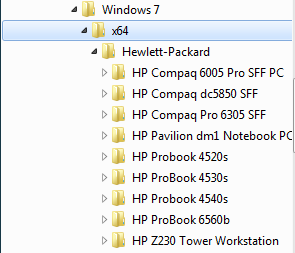
On the file server where the drivers are stored, create a separate folder for each model. This organization helps in managing and importing drivers in SCCM.
DriverRepository/
├── Model1/
├── Model2/
├── Model3/
└── ...

Creating Batch Files
In each model folder, create a batch file named after the model (e.g., HP_ProBook_4530s.bat) with the following content:
@ECHO OFF
for /f "tokens=*" %%G IN ('dir /ad /b /s') DO (
echo. > "%%G\%~n0.txt"
)

This script creates a unique TXT file in each subfolder, making SCCM think the drivers are different between models.
Running the Batch Files
Run the batch files from a command prompt, ensuring you are in the correct directory for each model. This will create the necessary TXT files in each subfolder.
Importing Drivers into SCCM
- Open the SCCM console and navigate to “Software Library”.
- Under “Overview”, go to “Operating Systems” and select “Drivers”.
- Create a folder for each model to keep the drivers organized.
- Import the drivers into SCCM and move them into the corresponding model folder.

Creating Driver Packages
- For each model, create a driver package.
- Include the drivers from the corresponding folder in each package.

Configuring Task Sequences
Add each driver package to the task sequence:
- Go to the “Software Library” workspace and select “Task Sequences”.
- Open the relevant task sequence and add a step to “Apply Driver Package”.
- Select the driver package for each model.
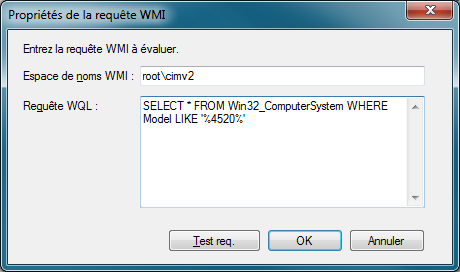
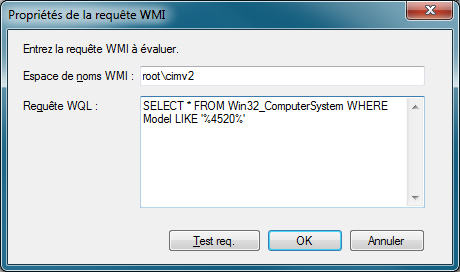
- Add a WMI filter to apply the driver package only to the associated model. For example, use the following query to filter by model:
SELECT * FROM Win32_ComputerSystem WHERE Model LIKE "HP_ProBook_4530s%"


0 Comments