Prerequisites
- A security group with your device administrators in Entra ID
Step 1: Access Microsoft Entra ID
- Go to the https://entra.microsoft.com/
- Sign in with your admin account.
Step 2: Create a Policy to Manage Local Administrators
- Navigate to Devices / All devices.
- Select Device Settings
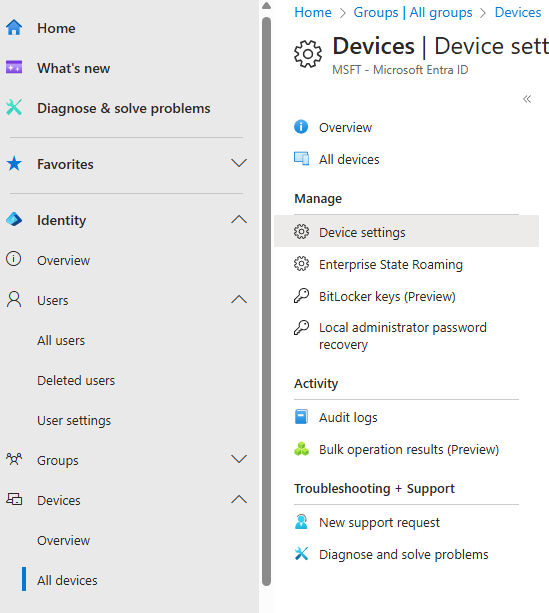
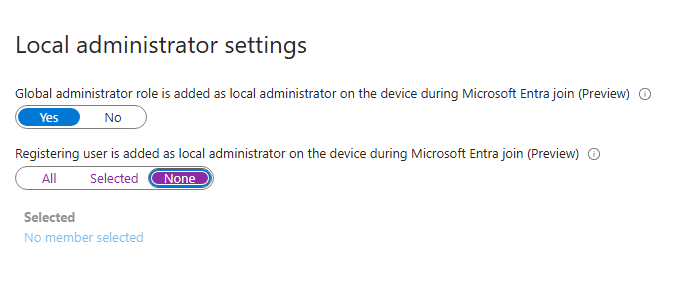
- Change Local Administrator setting
This option blocks the users’ enrollment from being added to the local administrators group.
Step 3: Access Microsoft Intune
- Go to the https://intune.microsoft.com/
- Sign in with your admin account.
Step 3: Configure the Local User Group Membership
- Select Endpoint Security
- Select Account protection
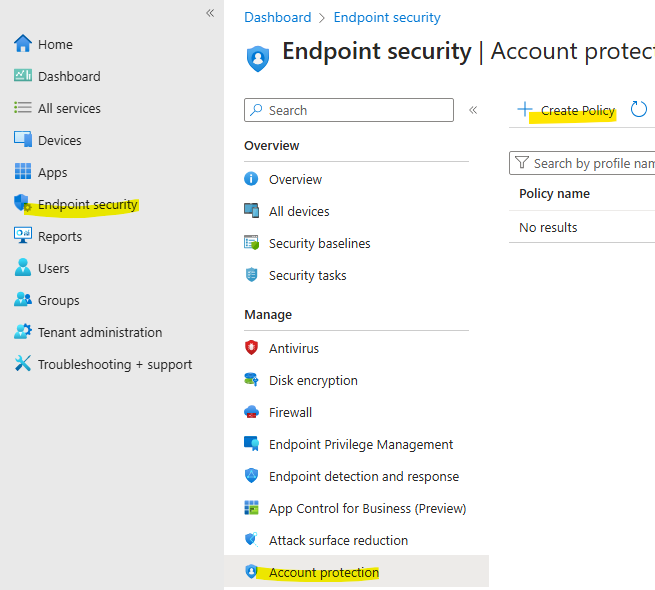
- Create Policy: Click on Create policy.
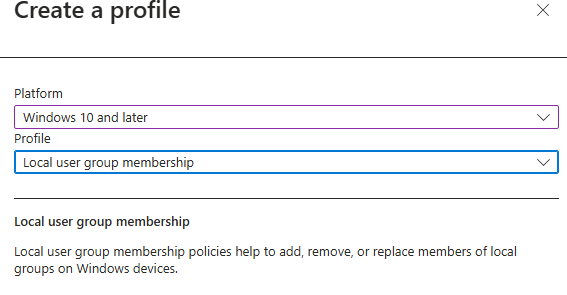
- Platform: Select Windows 10 and later.
- Profile type: Select Local user group membership
- Click Create
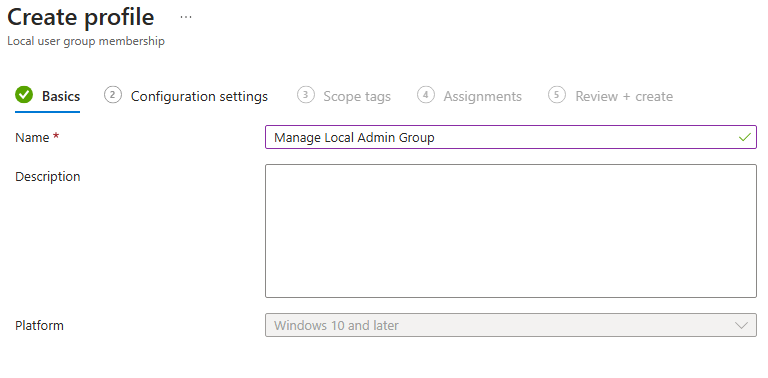
Tab Basics:
- Enter a Name for the profile, e.g., “Manage Local Admin Group”.
- Optionally, add a Description.
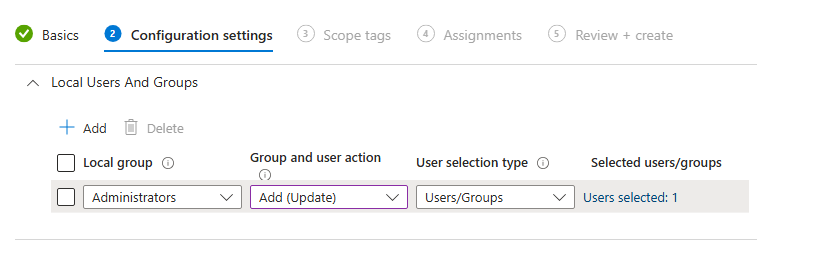
Tab Configuration settings:
- Select the group to modify: Choose Administrators.
- Members: Add the users or Azure AD groups you want to be members of the local Administrators group. You can use the user principal names (UPNs) or Azure AD object IDs.
Example:
- Enter
user1@yourdomain.comfor individual users. - Enter
group1@yourdomain.comfor groups.
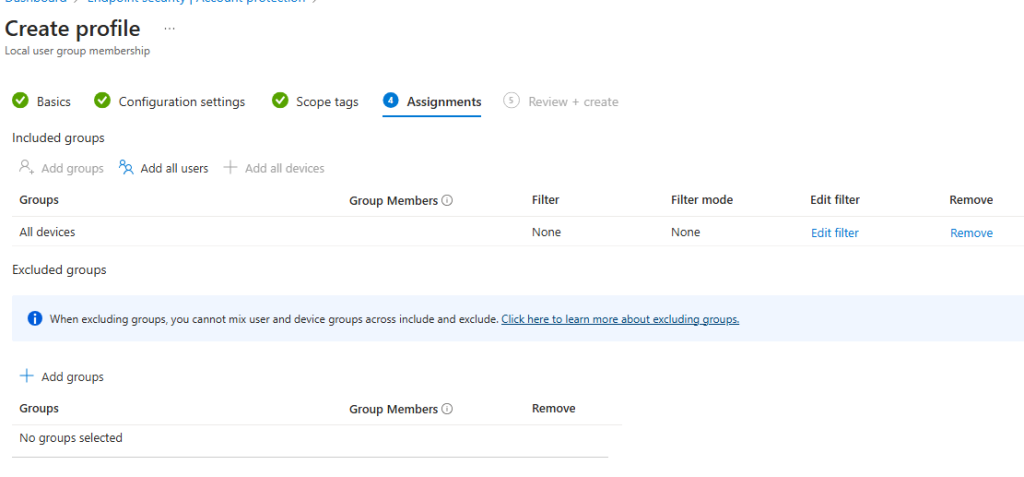
Assignments:
- Assign the profile to specific groups of devices or users that need this configuration. Click on Add groups and select the appropriate Azure AD groups.
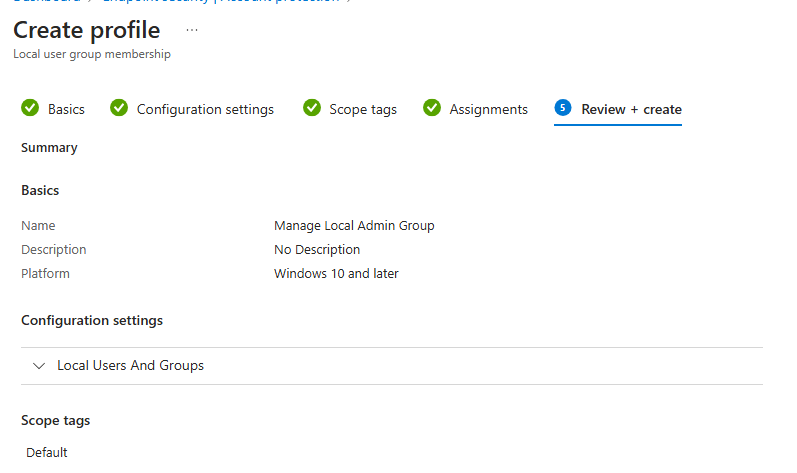
Review + Create:
- Review the settings and click on Create to create the profile.
Step 4: Monitor the Policy
- Navigate to Devices: Go back to the Devices section.
- Monitor: Under Monitor, select Per settings or Per device to see the status of the policy deployment.
- Ensure the policy is applied successfully to the target devices.
Troubleshooting Tips
- Policy Conflicts: Ensure there are no conflicting policies that modify the local Administrators group.
- Permissions: Verify that the users or groups specified in the policy have the correct permissions.
- Device Sync: Ensure that devices are syncing with Intune. Users can manually sync their devices by going to Settings > Accounts > Access work or school, selecting the account, and clicking Info > Sync.


0 Comments