
Move WSUS Integrated –
Move the WSUS Integrated SUSDB Database
Move WSUS Integrated – This guide explains how to move the WSUS integrated SUSDB database to another drive using SQL Server Management Studio or sqlcmd. The process stops WSUS and IIS, detaches the database, moves the files, fixes permissions, reattaches SUSDB, and restarts services.
Move WSUS Integrated – There are two methods: using SSMS or using sqlcmd.
Move WSUS Integrated Overview
- Install SSMS
- Stop the service WSUS and IIS
Stop-Service WSUSService, W3SVC
- Important: Launch ‘Microsoft SQL Server Management Studio 18’ as an administrator.
- Connect to .pipeMICROSOFT##WIDtsqlquery
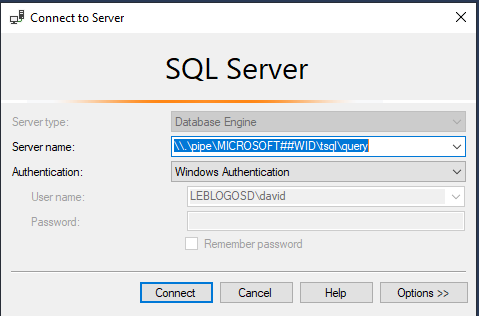
- Detach the SUSDB database
- Manually move the SUSDB*.* files from C:WindowsWIDData to New Destination“
- Grant the Read/Write (R/W) permissions to the group NT SERVICEMSSQL$MICROSOFT##WID.
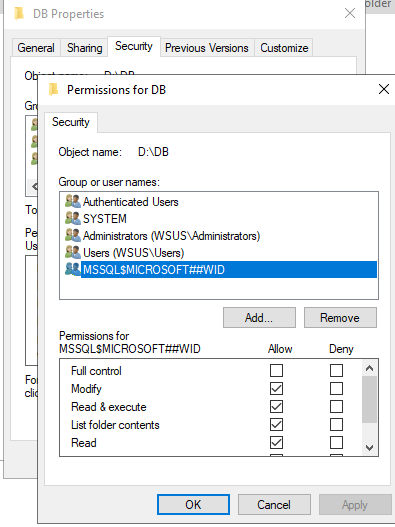
- Attach the SUSDB database from the new path
- Restart server
- Connect to WSUS to check that all are working properly
Move WSUS Integrated Overview
Move WSUS Integrated – Install tools :
- Download Microsoft® ODBC Driver 11 for SQL Server® – Windows from Official Microsoft Download Center
- Download Microsoft® Command Line Utilities 11 for SQL Server® from Official Microsoft Download Center
Move WSUS Integrated – Type the following commands (Administrator right)
Stop-Service WSUSService, W3SVC

sqlcmd -E -S np:.pipeMICROSOFT##WIDtsqlquery -Q "sp_detach_db 'SUSDB'

# Manually move the SUSDB*.* files from C:WindowsWIDData to New Destination"

sqlcmd -E -S np:.pipeMICROSOFT##WIDtsqlquery -Q "sp_attach_db @dbname=N'SUSDB',@filename1=N'D:DBSUSDB.mdf', @filename2=N'D:DBSUSDB_log.ldf'"

Start-Service WSUSService, W3SVC
- Grant the Read/Write (R/W) permissions to the group NT SERVICEMSSQL$MICROSOFT##WID.
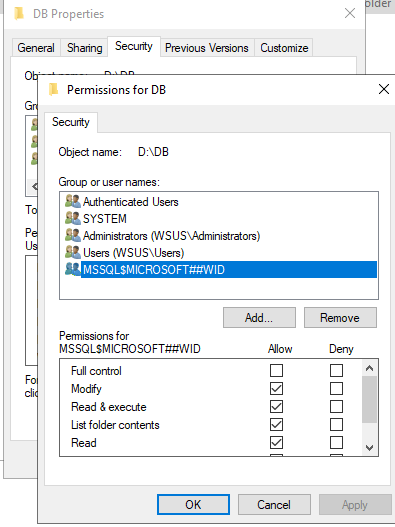
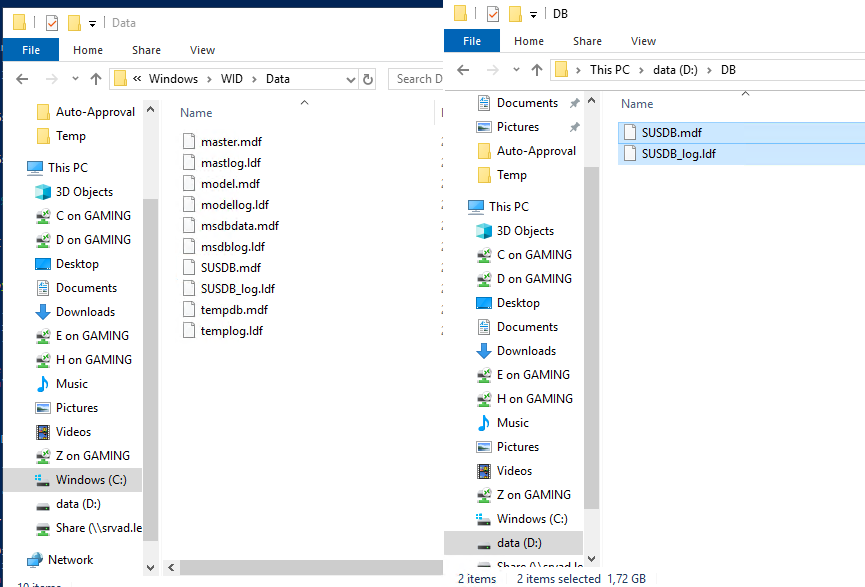
- Restart server
- Connect to WSUS to check that all are working properly
WSUS database connection and maintenance examples are available on GitHub: wsus/database.