The goal is to install a clean computer for Intune use or to reinstall a personal PC
A server or a computer with
- A share
- Windows ADK installed
- MDT installed
- A WDS server or a USB key for booting
- A DHCP server
Prerequisites
What you need
- A Windows 11 consumer or business ISO (do not use an ISO made with the Media Creation Tools)
- Installation of Windows ADK Windows 10 ou 11 ,
- Select the following options:
- For the Windows ADK module
- Deployment Tool
- USMT
- For the Windows ADK module
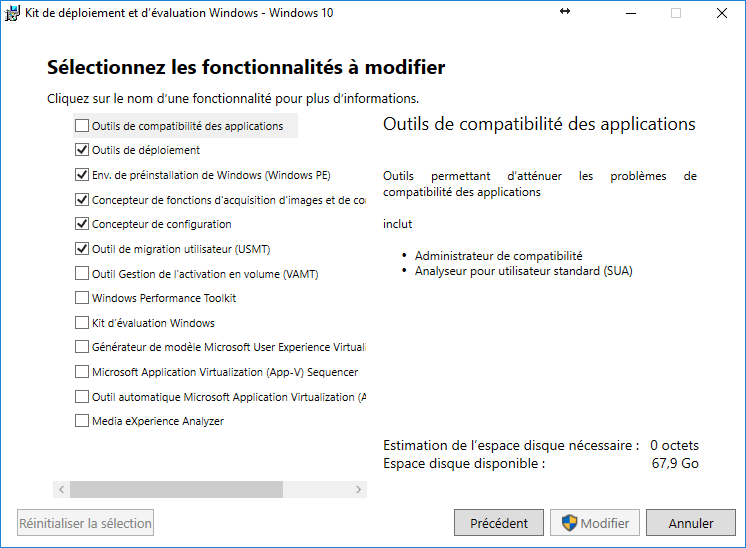
- For the additional PE Windows module for the Windows ADK
- WinPE
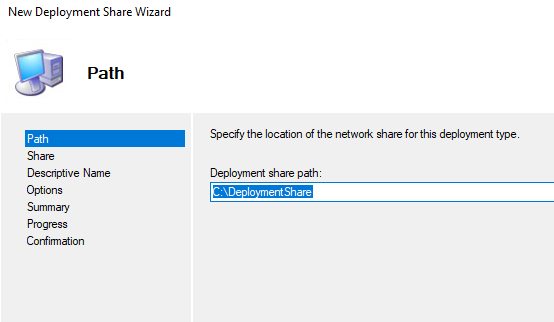
Creating the Deployment Share
- Launch MDT using the “Deployment Workbench” shortcut, then create a new “Deployment Share”.
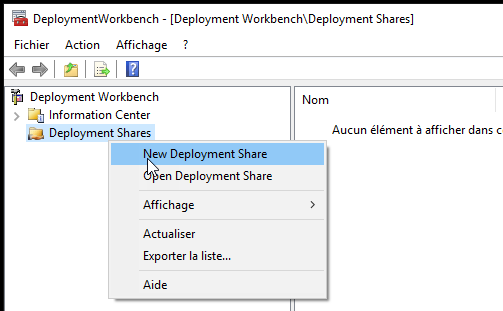
- Specify a local path and then validate the following screens (configuration will be done later) with the customsetting.ini and bootstrap.ini files.
Creating Boot Images
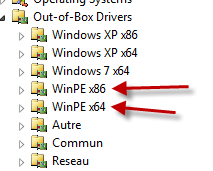
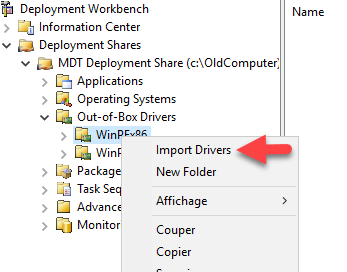
Manage Drivers
Create 2 directories in MDT that only manage WINPE drivers
- WinPEx86 => Used for 32-bit WinPE images
- WinPEx64 => Used for 64-bit WinPE images
Folder creation
- In “Out-of-Box Drivers”, create a new folder
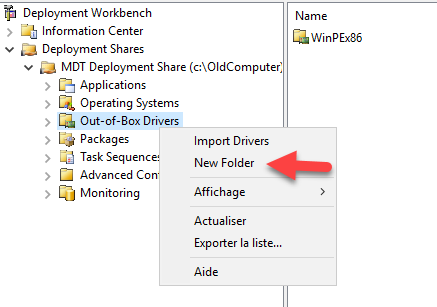
- Specify the folder name and validate

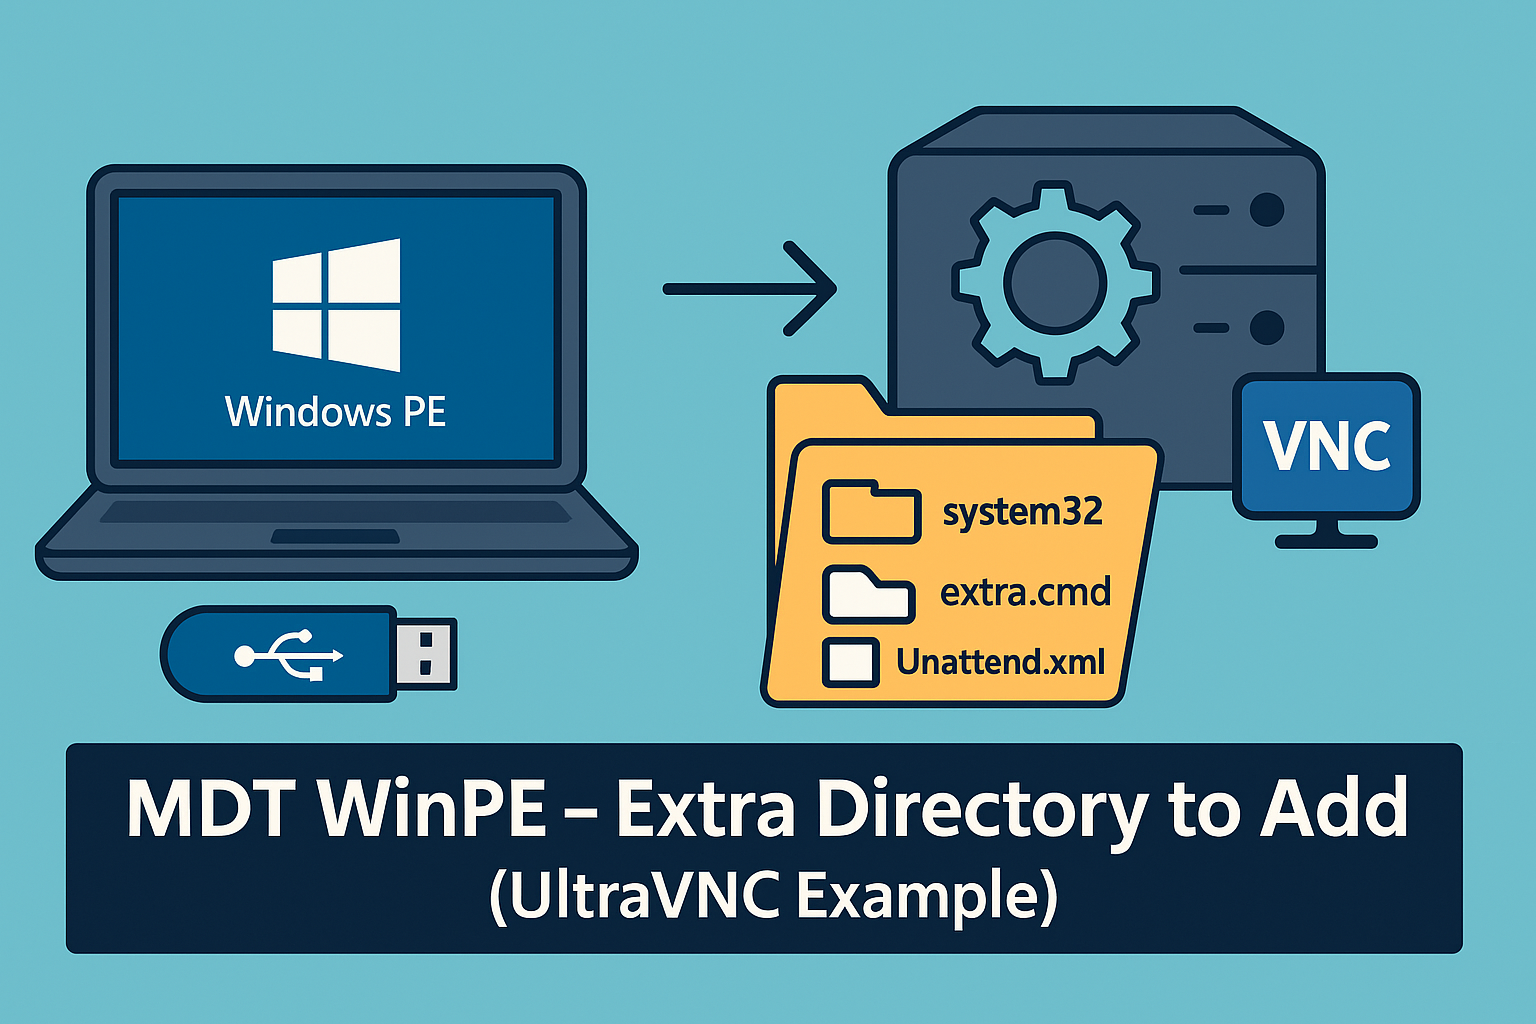
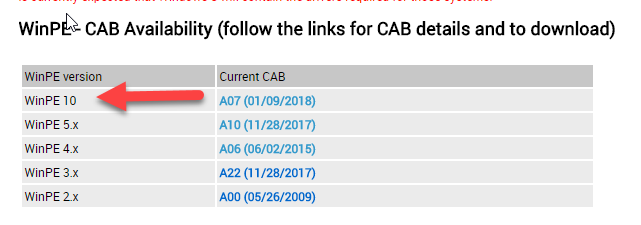
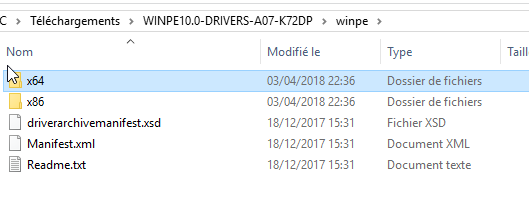
Downloading WinPE drivers
WinPE is based on Windows 10, you will need to download drivers for Windows 10
- You can use the Dell Driver pack : Download
- Extract the cab with 7zip (ignore the 7zip error)
Importing drivers
- In the WinPE folders of MDT, add the drivers
Creating profiles
- You then need to create 2 profiles in MDT
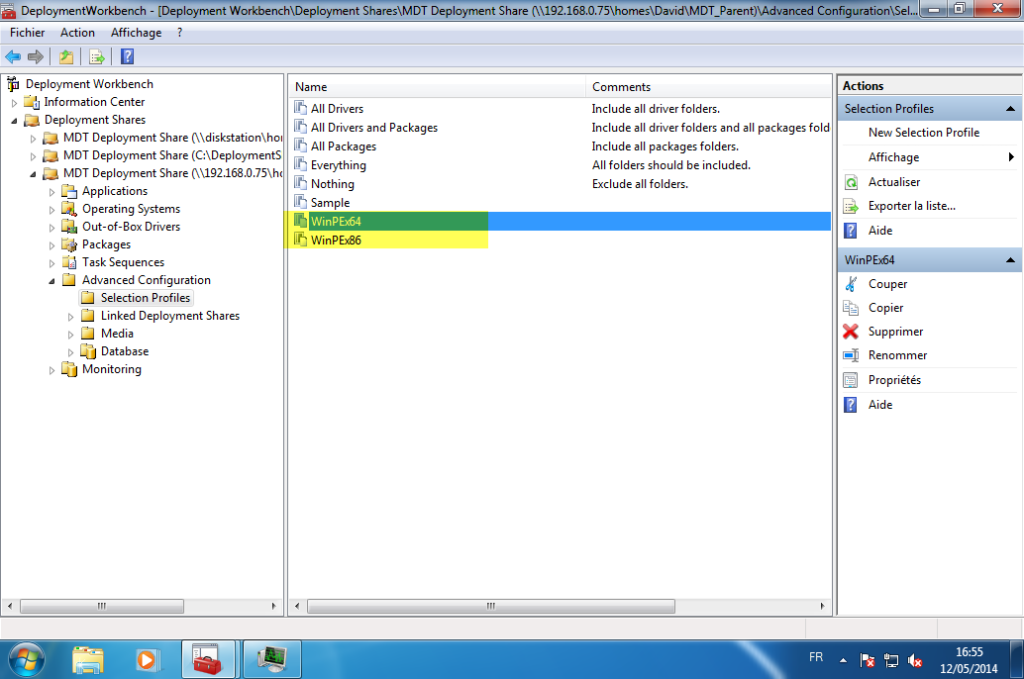
- The profiles will point to the corresponding WinPE driver folders
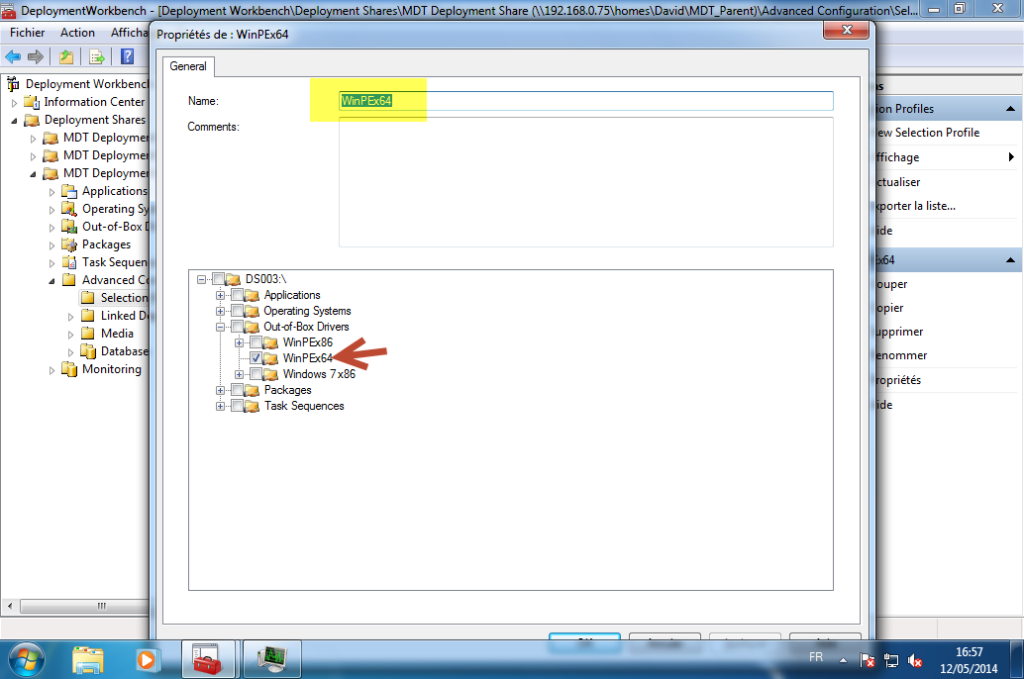
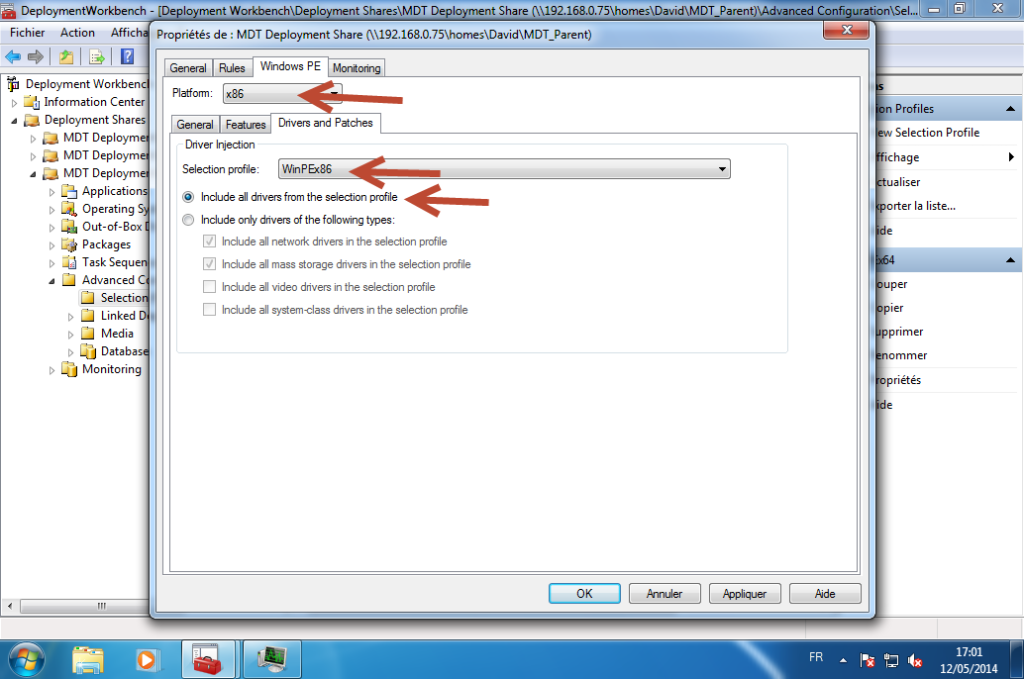
Associating profiles in WinPE
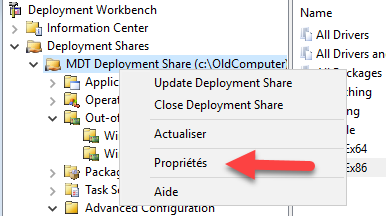
- In the properties of the DeploymentShare
- Select the WinPE driver profiles for x86 and x64
Bootstrap.ini
You can modify the bootstrap.ini file
- The path of the deployment share => DeployRoot
- The path of the deployment share => KeyboardLocalePE
- Authentication => UserID, UserDomain et UserPassword
If the authentication account is not specified, a popup asking for authentication will be displayed during deployment.
Exemple file
[Settings]
Priority=Default

[Default]
; Indiquez le chemin UNC de votre deploymentshare
DeployRoot=\\dc.leblogosd.lan\MDT

; N'affiche pas l'ecran de bienvenue
SkipBDDWelcome=YES

; Passe le clavier en francais
KeyboardLocalePE=040c:0000040c

; Si le compte n'est pas indiqué, il faudra renseigner un compte avec des droits sur le partage
UserID=UserMDT
UserDomain=leblogosd
UserPassword=Password1
Boot image
The boot images contain a WinPE with the tools to connect to the deployment share.
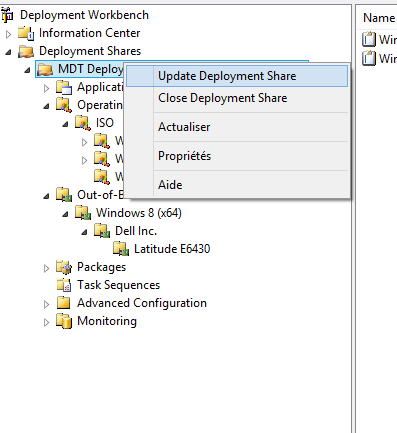
- To generate the WinPE, right-click on the deploymentShare, then select “Update Deployment Share”
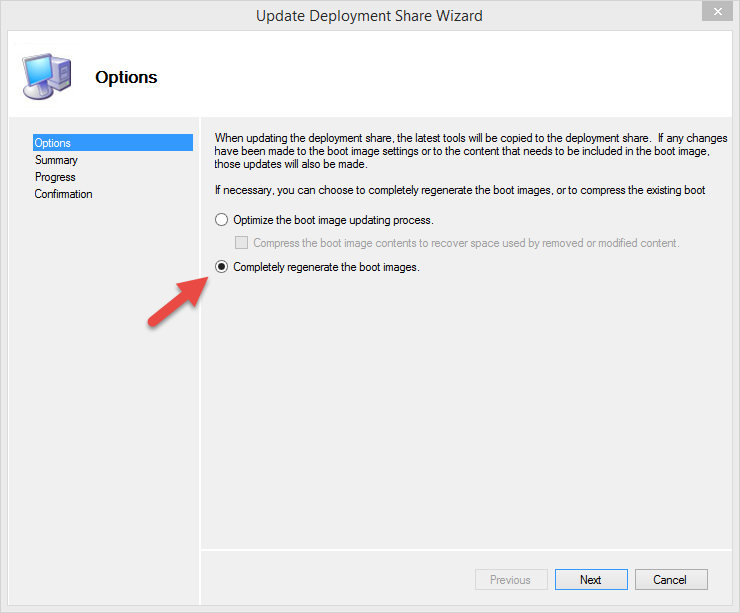
- Select “Completely regenerate the boot images” and validate.
- Once the images are generated, you can use them for deployment.
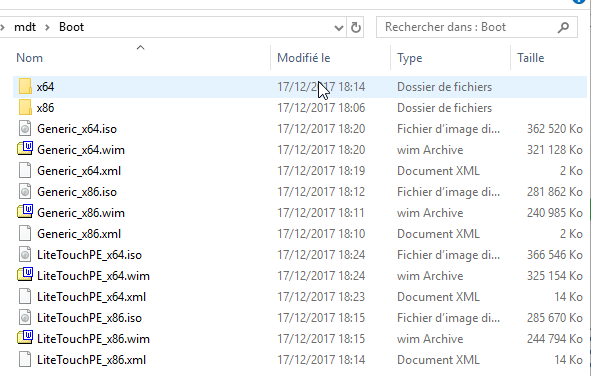
- You will need to use the ISOs or the LiteTouchPE WIMs.
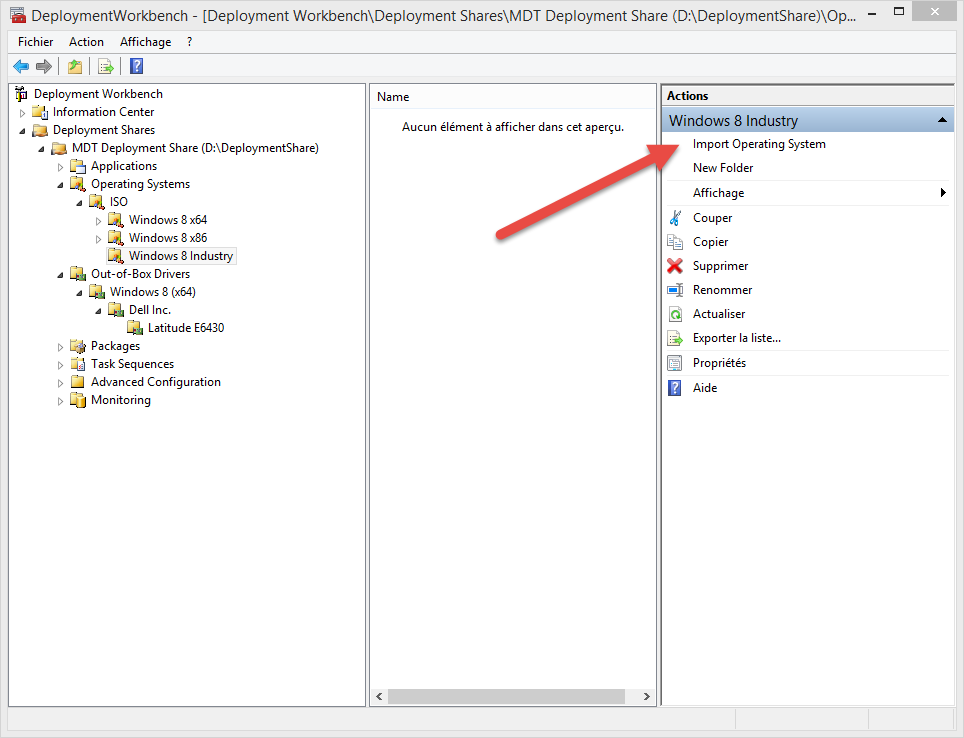
Adding Windows 11 Sources
- In “Operating Systems”, select “Import Operating System”
- Select “Full set of source files”
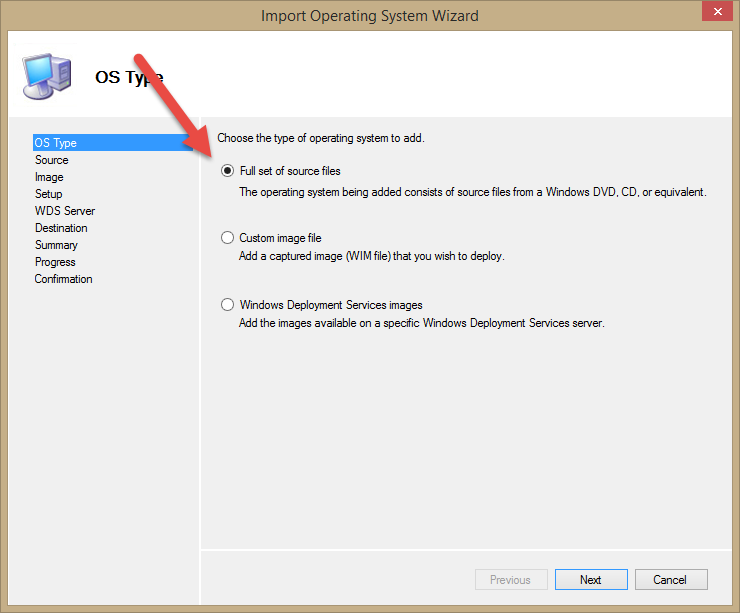
- Then select your drive (physical or virtual) containing Windows 7 or 10.
- Validate the following screens.
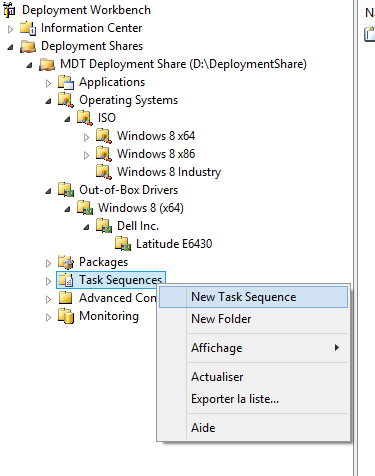
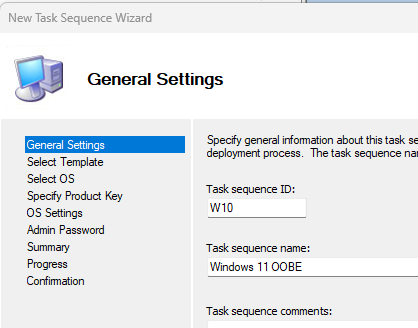
New Task Sequence
You will need to create a task sequence
- Right-click on “Task Sequence”, then select “New Task Sequence”
- Enter the ID (this will be used to create a folder in the control directory of your DeploymentShare).
- Enter the name.
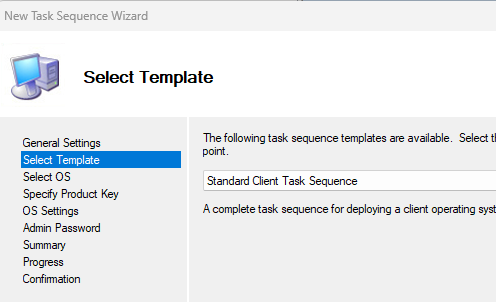
- Select “Standard Client Task Sequence”.
- Select the OS you want to install.
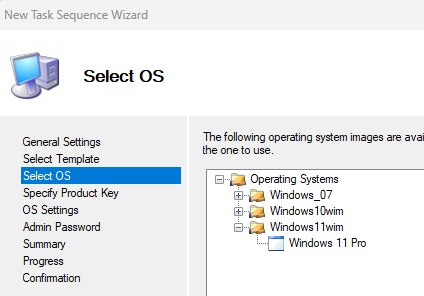
- The task is now available.
Drivers
- We will simply create a folder for each workstation model we will manage. Another article will detail a more comprehensive driver management.

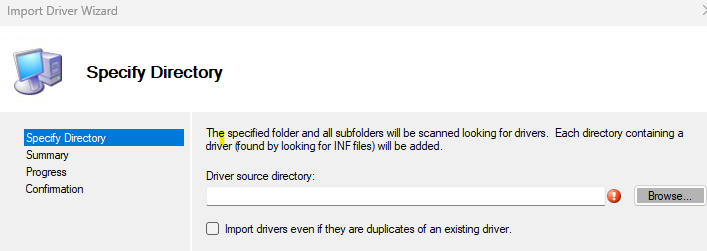
- Select “Import Drivers”.
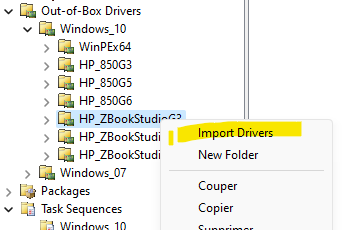
- Select “Import Drivers”.
CustomSetting.ini
The customsetting.ini file allows you to configure the MDT wizard and some deployment options.
The file is located in the control folder of your deployment share.

The customsetting.ini file I use
[Settings]
Priority=Default
Properties=MyCustomProperty

[Default]
OSInstall=Y
_SMSTSOrgName=%TaskSequenceName%
SkipTaskSequence=No
SkipComputerName=NO
OSDComputerName=%SerialNumber%
SkipDomainMembership=YES
SkipUserData=YES
DeploymentType=NEWCOMPUTER
SkipProductKey=YES
SkipCapture=Yes
SkipAdminPassword=Yes
AdminPassword=azerty
SkipPackageDisplay=Yes
SkipBitLocker=YES
SkipComputerBackup=Yes
SkipLocaleSelection=YES
SkipTimeZone=YES
TimeZone=105
TimeZoneName=Romance Standard Time
SkipRoles=YES
SkipApplications=NO
SkipAdminAccounts=YES
SkipSummary=NO
SkipFinalSummary=YES
FinishAction=SHUTDOWN
Applications
We will be able to manage 2 applications for this OOBE mode
- OOBE mode
- OEM Activation
https://github.com/DavidWuibaille/MDT/tree/main/Win10_OOBE
Application to OOBE Mode
La ligne de commande pour passer en OOBE sera la suivante
c:\windows\system32\sysprep\sysprep.exe /oobe /quit
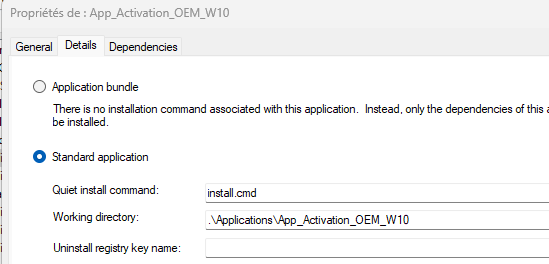
Application To OEM Activation
$ProductKey = (Get-WmiObject -Class SoftwareLicensingService).OA3xOriginalProductKey
cscript "c:\windows\system32\slmgr.vbs" -ipk $ProductKey
cscript "c:\windows\system32\slmgr.vbs" -ato
Create Application
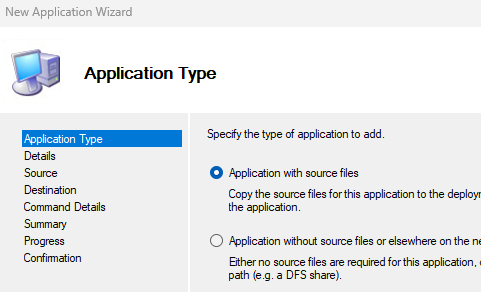
- To add applications, right-click on “Applications” then “New Application”.

- Select “Application with source files”.
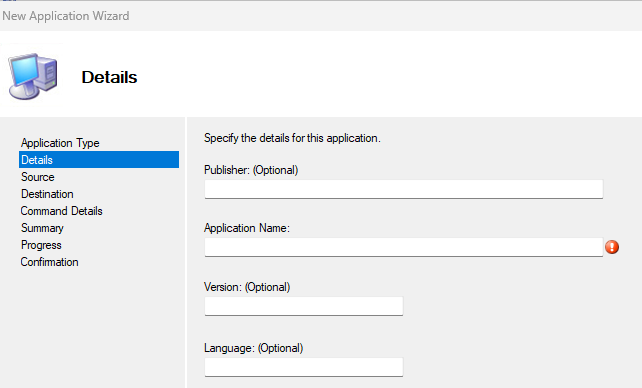
- Specify the Application Name (ModeOOBE ou ActivationOEM)
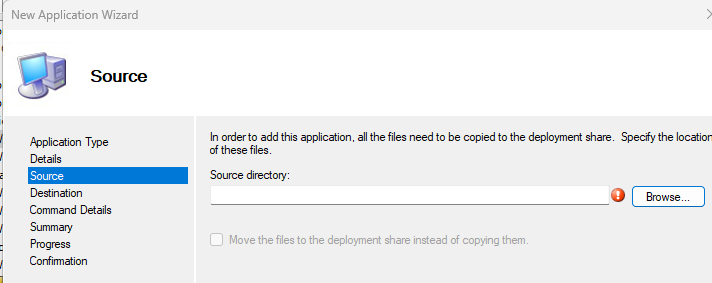
- Select the source directory of your application.
- Specify the command line for installing your application.
MDT is now ready to carry out installations in OOBE mode. You can use a boot USB key or a WDS to start your compute