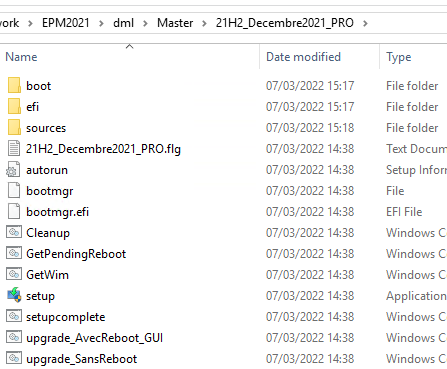
Copy Sources
The Windows 10/11 sources need to be copied to the repository.
Managing Unattend.xml
Unattend.xml Template
Get : IVANTI/unattend-xml/unattend.xml at main · DavidWuibaille/IVANTI
Import Unattend.xml
In the OS provisioning template:
- Click on “Install Scripts”

- Add the unattend.xml template
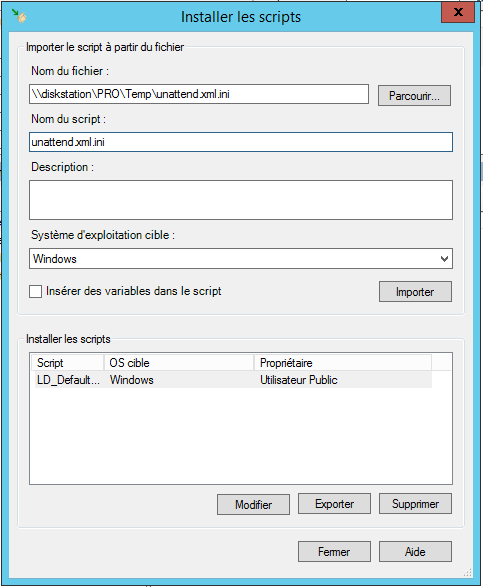
Check the option “Insert variables in the script”
- Click on Import
Provisioning Task
Creating the Task
Create the deployment template (the master)
- Create a deployment template
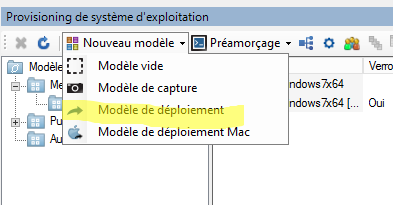
Select
- The Wim image (the one used for the capture)
- Your Windows agent
- The response file above
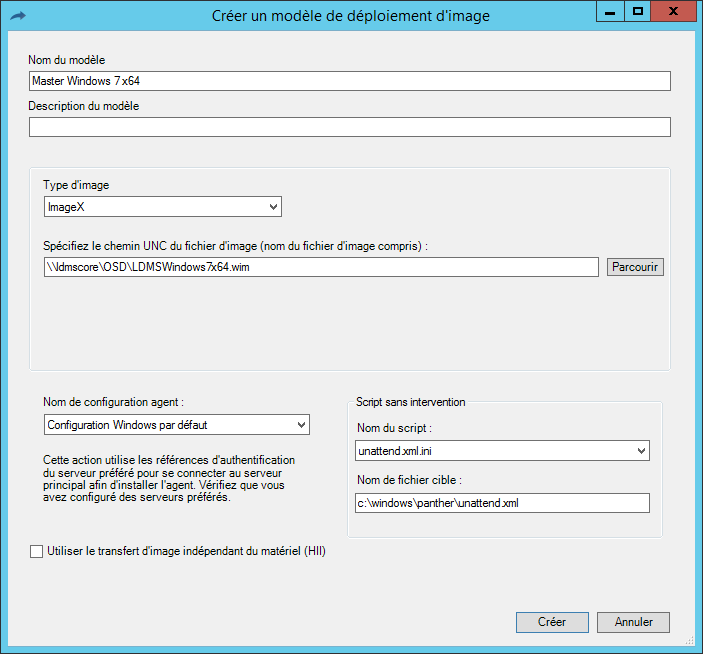
- Validate
Modification
With Windows 10 PRO, the c:\windows\panther folder does not exist, so it needs to be created. To do this, modify the template and add the folder creation.
Note: This operation no longer seems necessary with LDMS 2016.
- Creation of the panther folder
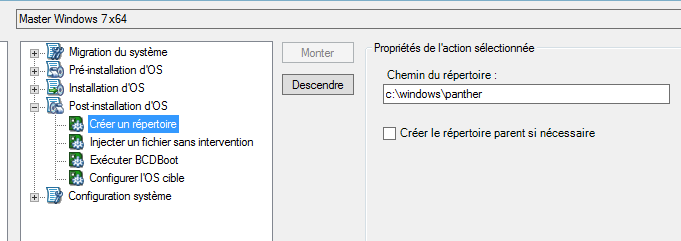
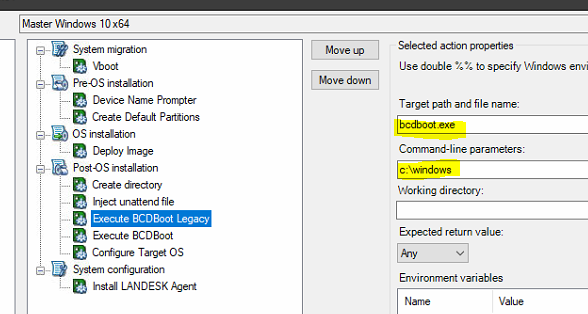
- Add Bcdboot for LEGACY BIOS
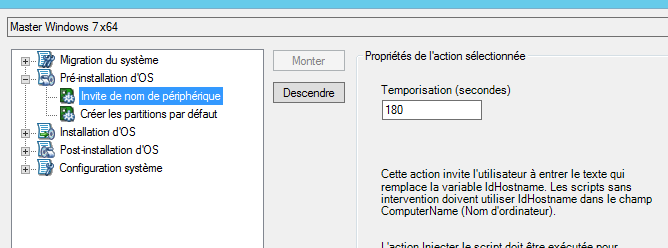
- Add the computer name prompt
This option allows you to add a prompt to replace the computer name. The workstation will have the same name as declared in LANDESK.
Public Variables
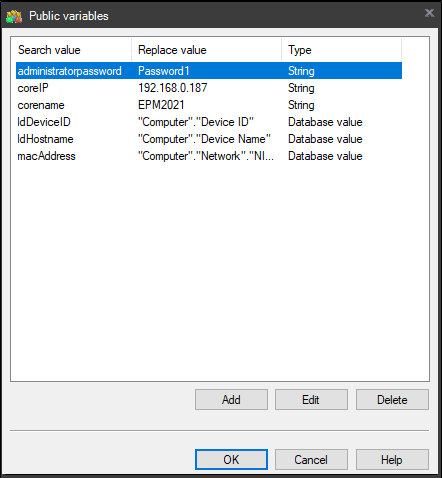
You can have variables that are common to all your provisioning tasks. In this case, they need to be declared as public variables.
- In public variables
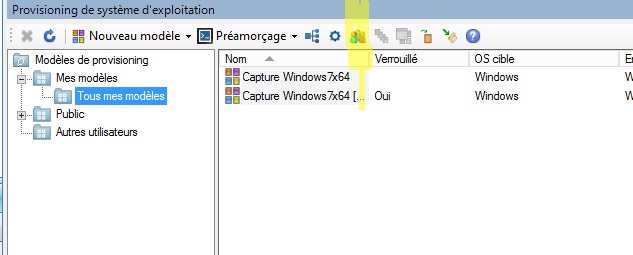
- Create the following variables
Warning: All variables present in the unattend must be declared in LANDESK: this is often a source of deployment errors.
If you use my unattend.XML template, here are the variables to declare as public.
administratorpassword=Password1
Variables in the Templates
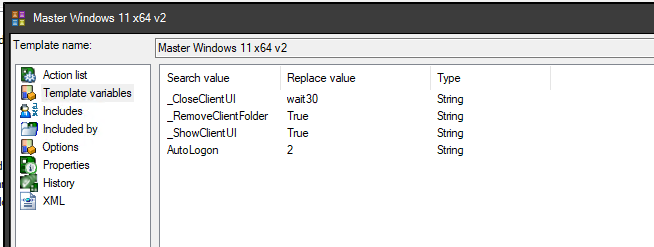
These are the variables that are specific to your provisioning task.
If you use my unattend.XML template, here are the variables to declare in the provisioning task.
AutoLogon=2
Patch Management
Note: Patch Management licenses are required to use this option.
This option is very convenient but significantly increases the deployment time. I do not use this option.
Step 1: Patch Management
The first step is to define the patches to be integrated during the OS deployment. For this:
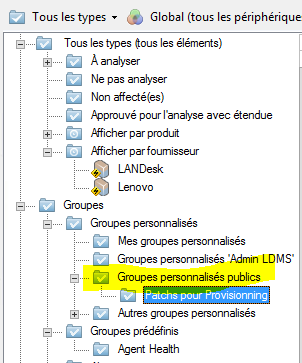
- Click on “Tools” \ “Security and Compliance” \ “Patch and Compliance”
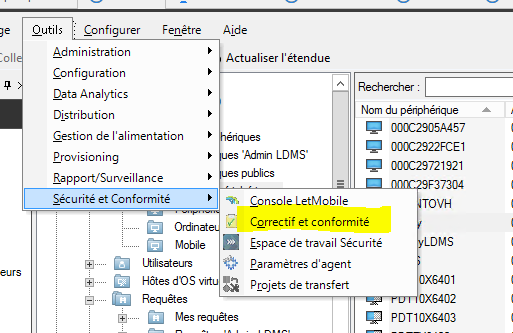
- Create a new custom group
- Drag the patches to be installed during provisioning into this new group
Step 2: Add the Patch Management Task
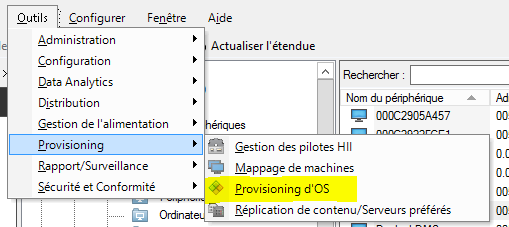
- Click on “Tools” \ “Provisioning” \ “OS Provisioning”
- Edit the provisioning deployment task
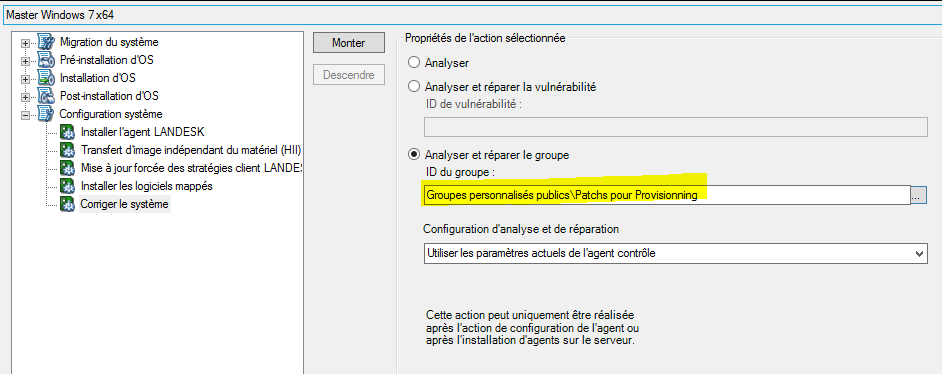
- Go to “System Configuration”
- Add a new action
- Select the “Fix System” task
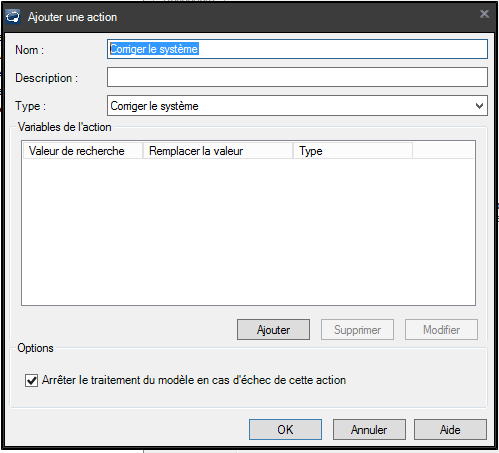
- Note: This step must be positioned after the agent installation
- Select “Scan and Repair Group” and choose the group created in step 1
A tutorial video: https://player.vimeo.com/video/114169154


