Configure Remote Access
- With UltraVNC
- With Remote Assistance
- Configuring Internet Explorer for VNC
With UltraVNC
UltraVNC Installation
Example of creating an UltraVNC package: silent-install-ultravnc
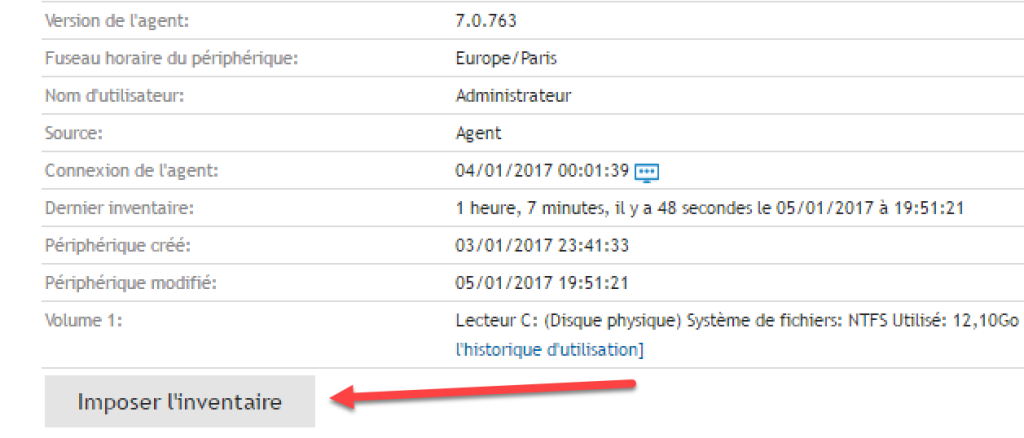
- Install UltraVNC on a computer then force an inventory update on the computer
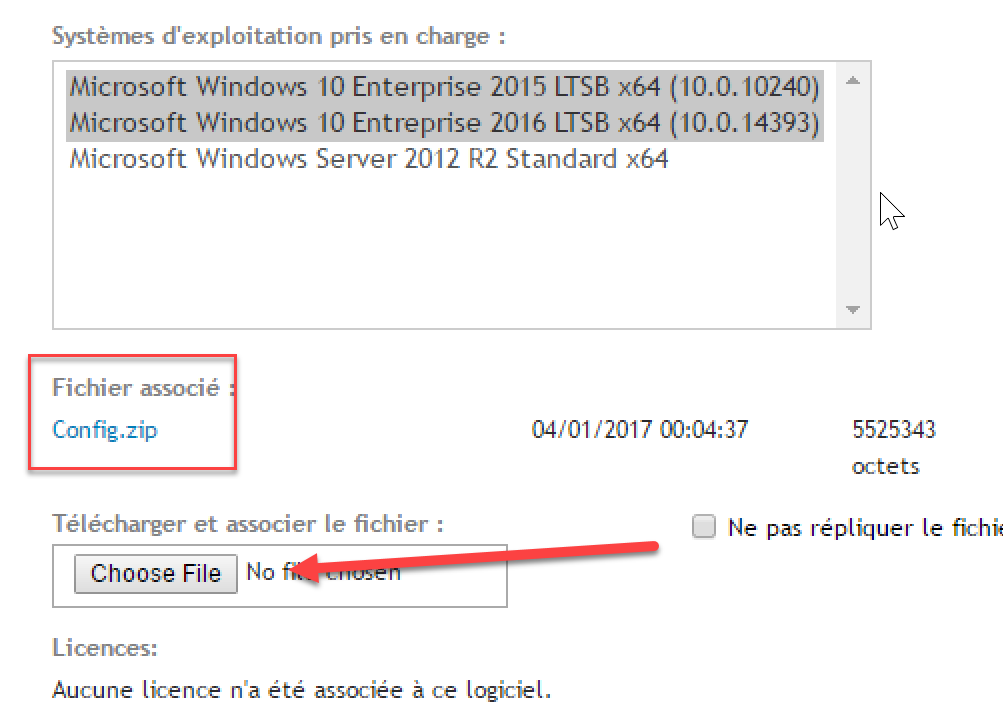
- In the inventory of the computer, search for UltraVNC in installed programs, then associate the zip containing the package sources
- Create a new managed installation
- Deploy UltraVNC to computers
Configure Action Buttons
- In general settings
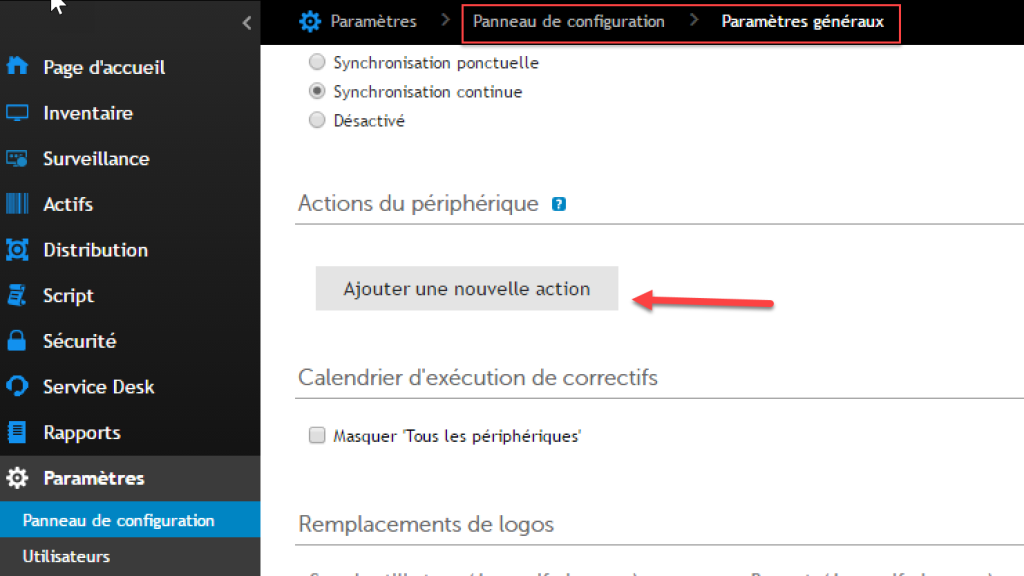
- Add a new action
"C:\\Program Files\\uvnc bvba\\ultravnc\\vncviewer.exe" KACE_HOST_NAME

Note: ensure that UltraVNC is installed on your computer with the viewer (C:\Program Files\uvnc bvba\ultravnc\vncviewer.exe)
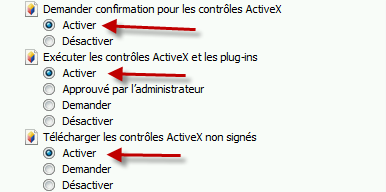
Configuring Internet Explorer for VNC
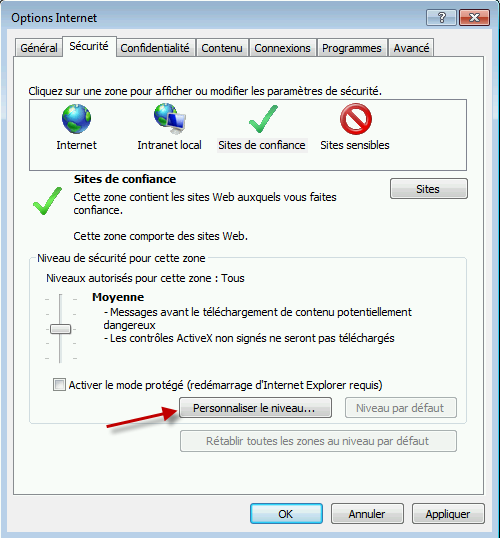
In Internet Options, select the Security tab.
- Click on “Trusted Sites” then on the “Sites” button
- Uncheck “Require server verification (https:)”
- Enter the address of your K1000 server and click “Add”
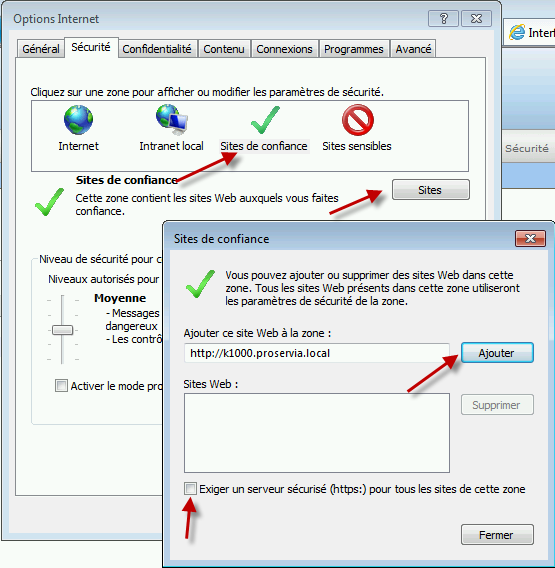
- Set the security level to “Medium”
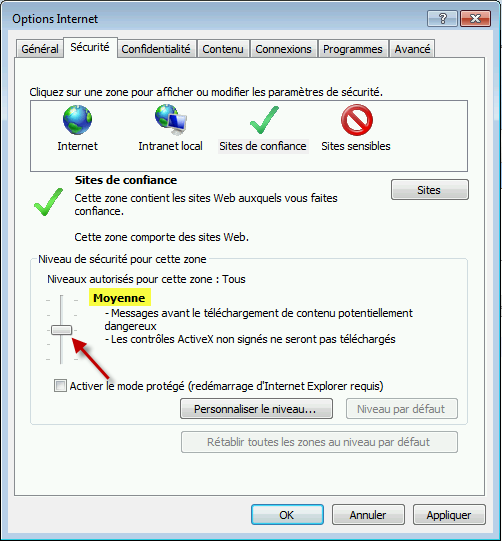
- Click on “Custom level”
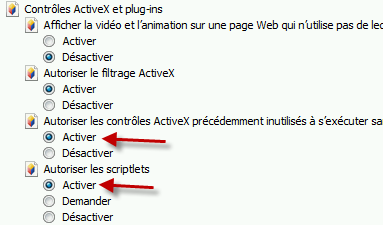
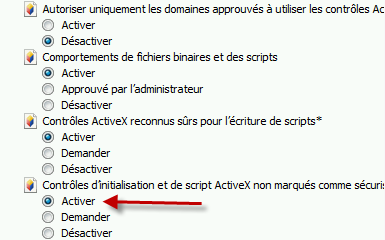
- Configure Internet Explorer as indicated in the screenshots

With Remote Assistance
Windows Remote Assistance is usually used with an email invitation to take control of a computer. This email is not mandatory! Here’s how to configure it for QUEST SMA
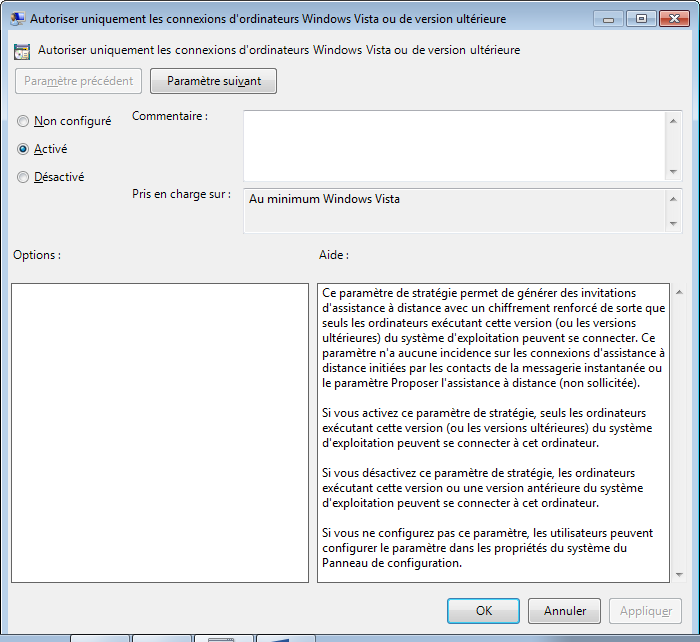
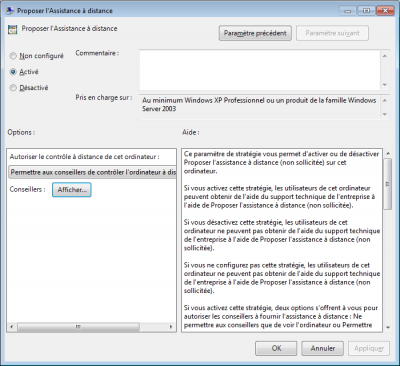
Creation of GPO
To enable remote assistance:
- Activate the following options
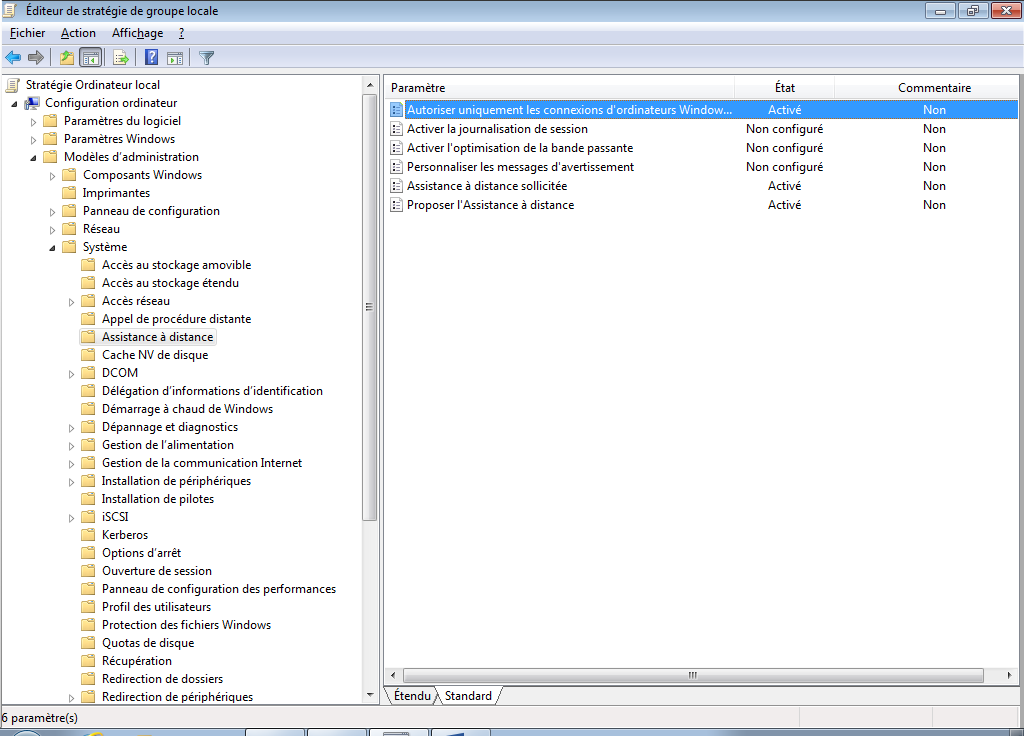
- Allow connections from Vista or later (secure connection)
- Allow solicited Remote Assistance (without sending an email)
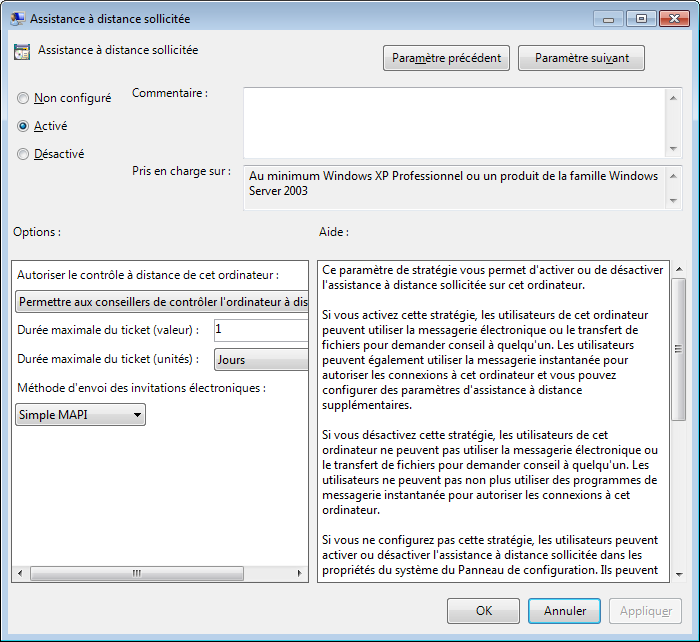
- Enable Remote Assistance
Specify the group that can take control of the computer
Command to Use
- In general settings

- Add a new action
c:\windows\system32\msra.exe /offerRA KACE_HOST_IP
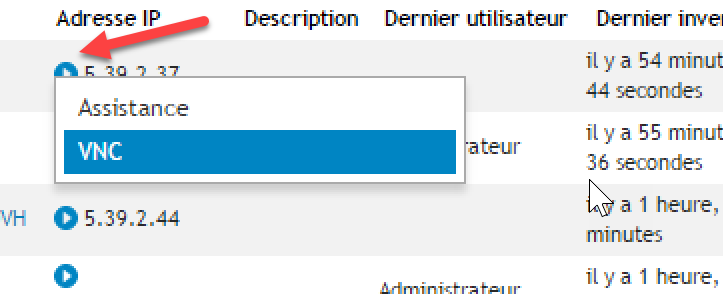
Result
- For remote access on a computer, click the arrow in front of the computer
- Here is the remote assistance request made on an XP machine (showing that it also works on XP)
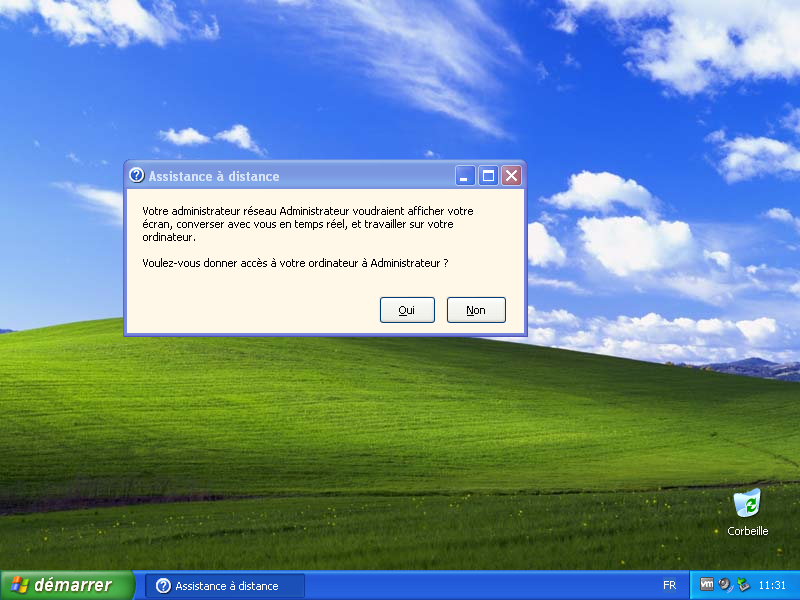
Caution: with Remote Assistance, an initial request must be made to see the user’s screen, and a second request to take control of the computer.
Note: Configure Internet Explorer in the same way as for VNC