Provisionning – Deployment of Windows 10 with Ivanti EPM
Provisionning Deployment Windows – Provisioning Windows with EPM: copy sources, manage unattend.xml, configure variables, create provisioning tasks, and optionally integrate patch management.
Copy Sources
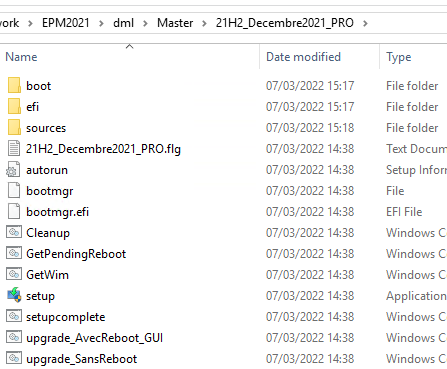
Provisionning Deployment Windows – The Windows 10/11 sources need to be copied to the repository.
Managing Unattend.xml
Unattend.xml Template
Provisionning Deployment Windows – Get : IVANTI/unattend-xml/unattend.xml at main · DavidWuibaille/IVANTI
Import Unattend.xml
Provisionning Deployment Windows – In the OS provisioning template:
- Click on “Install Scripts”
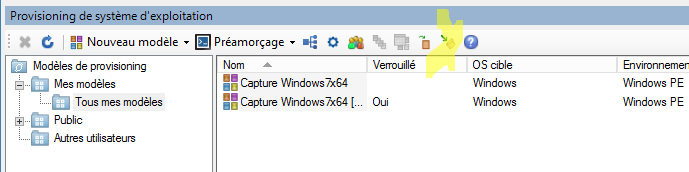
- Add the unattend.xml template
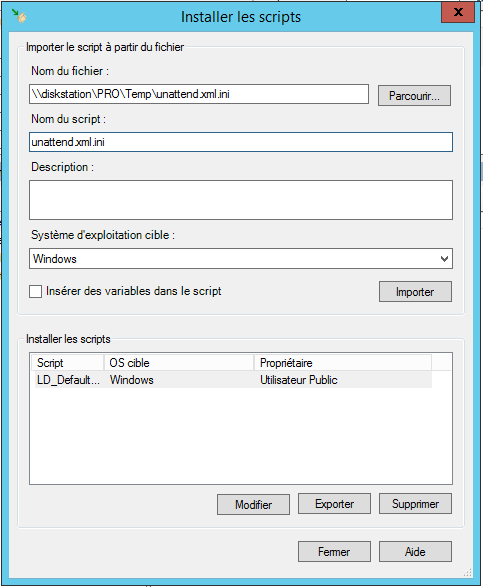
Provisionning Deployment Windows – Check the option “Insert variables in the script”
- Click on Import
Provisioning Task
Creating the Task
Provisionning Deployment Windows – Create the deployment template (the master)
- Create a deployment template
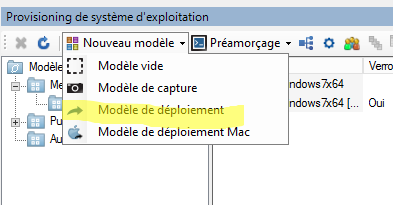
Provisionning Deployment Windows – Select
- The Wim image (the one used for the capture)
- Your Windows agent
- The response file above
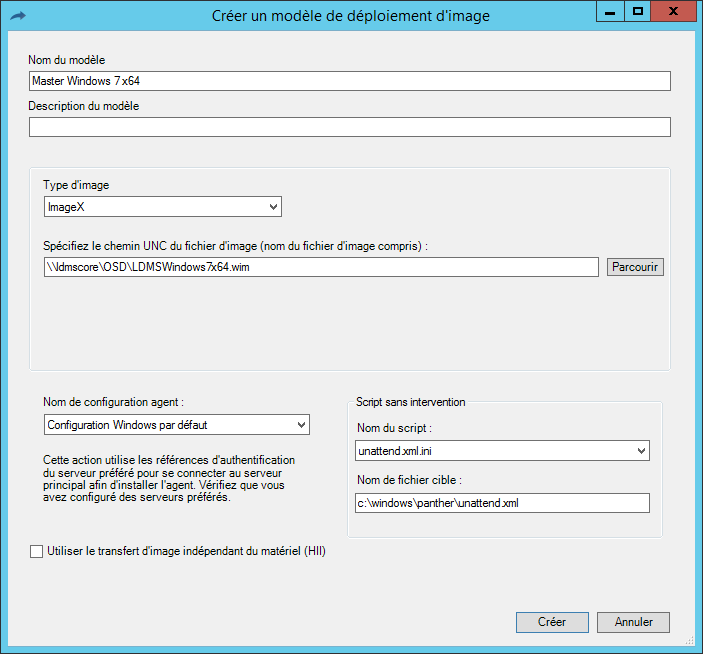
- Validate
Modification
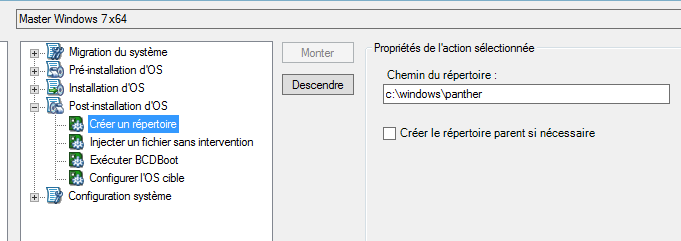
Provisionning Deployment Windows – With Windows 10 PRO, the c:windowspanther folder does not exist, so it needs to be created. To do this, modify the template and add the folder creation.
Provisionning Deployment Windows – Note: This operation no longer seems necessary with LDMS 2016.
- Creation of the panther folder
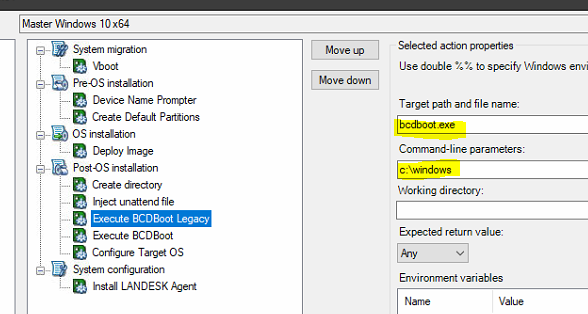
- Add Bcdboot for LEGACY BIOS
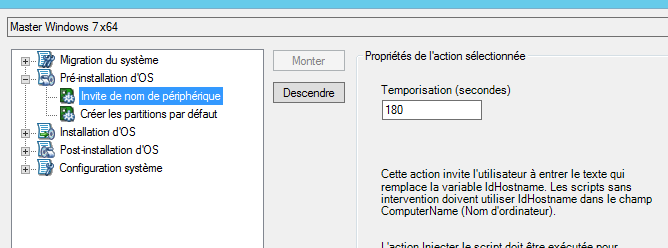
- Add the computer name prompt
Provisionning Deployment Windows – This option allows you to add a prompt to replace the computer name. The workstation will have the same name as declared in LANDESK.
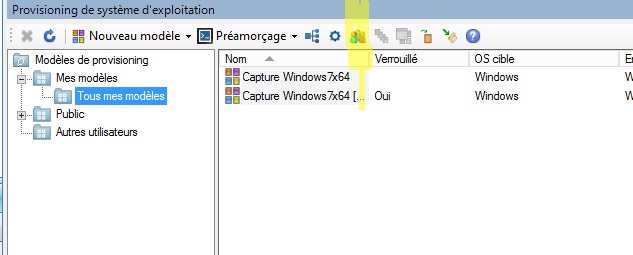
Public Variables
Provisionning Deployment Windows – You can have variables that are common to all your provisioning tasks. In this case, they need to be declared as public variables.
- In public variables
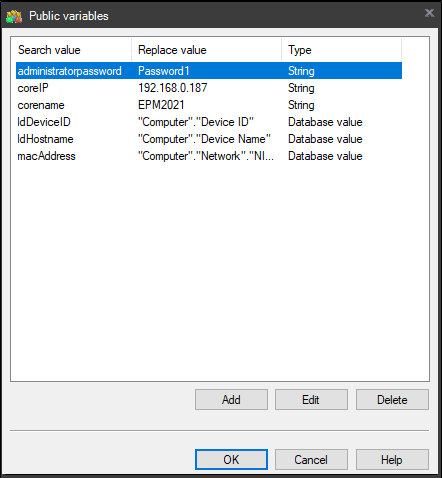
- Create the following variables
Provisionning Deployment Windows – Warning: All variables present in the unattend must be declared in LANDESK: this is often a source of deployment errors.
Provisionning Deployment Windows – If you use my unattend.XML template, here are the variables to declare as public.
administratorpassword=Password1
Variables in the Templates
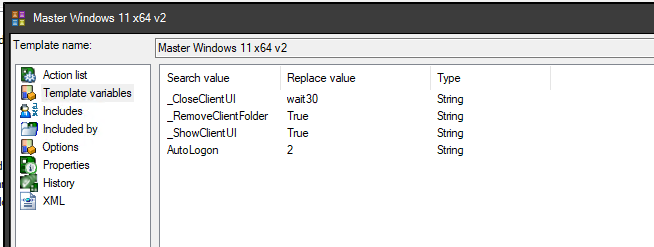
Provisionning Deployment Windows – These are the variables that are specific to your provisioning task.
Provisionning Deployment Windows – If you use my unattend.XML template, here are the variables to declare in the provisioning task.
AutoLogon=2
Patch Management
Provisionning Deployment Windows – Note: Patch Management licenses are required to use this option.
Provisionning Deployment Windows – This option is very convenient but significantly increases the deployment time. I do not use this option.
Step 1: Patch Management
Provisionning Deployment Windows – The first step is to define the patches to be integrated during the OS deployment. For this:
- Click on “Tools” “Security and Compliance” “Patch and Compliance”
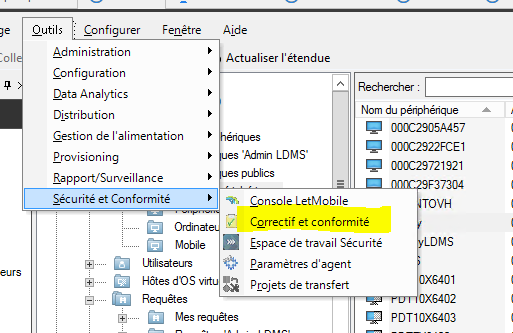
- Create a new custom group
- Drag the patches to be installed during provisioning into this new group
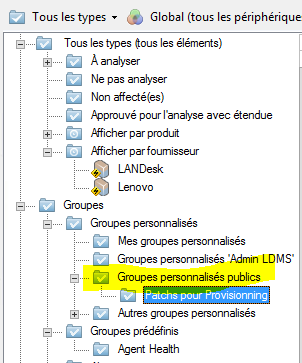
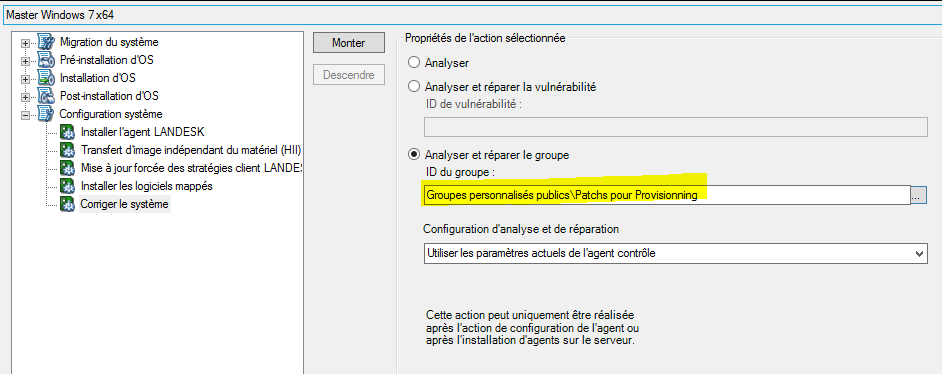
Step 2: Add the Patch Management Task
- Click on “Tools” “Provisioning” “OS Provisioning”
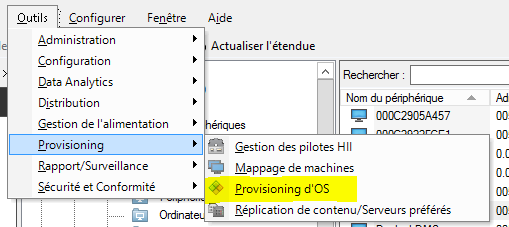
- Edit the provisioning deployment task
- Go to “System Configuration”
- Add a new action
- Select the “Fix System” task
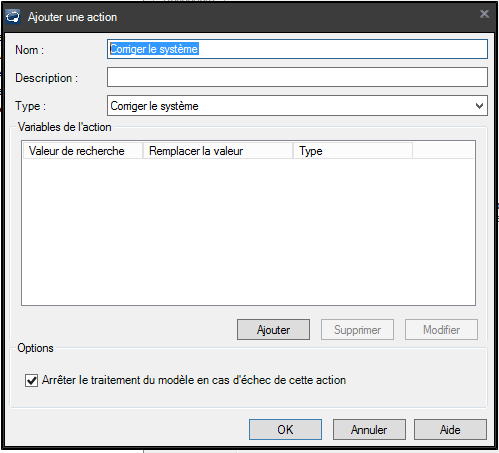
- Note: This step must be positioned after the agent installation
- Select “Scan and Repair Group” and choose the group created in step 1
Provisionning Deployment Windows – A tutorial video: https://player.vimeo.com/video/114169154
Provisionning Deployment Windows –