How to Manage Multilingual Installation Sources in Windows 10 with Windows Master Images
Manage Multilingual Installation – Learn how to create a multilingual installation source for Windows 10 1903 and later. This guide provides detailed steps to add language packs, local
Useful external reference: Microsoft Learn.
Introduction
Manage Multilingual Installation – Managing multiple languages in Windows 10 installations can be challenging, especially with changes introduced in version 1903.
Useful external reference: Microsoft Learn.
Creating a Multilingual Installation Source
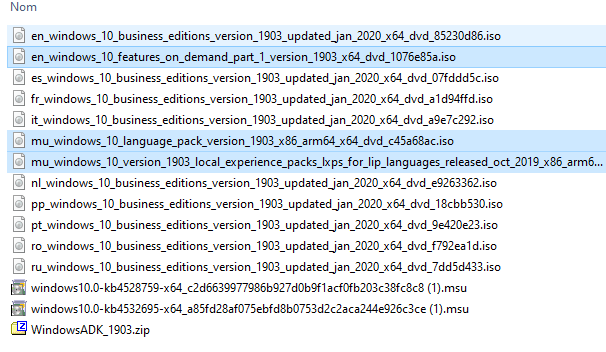
Manage Multilingual Installation – To create a multilingual installation source, follow these steps:
Useful external reference: Microsoft Learn.
WinPE Setup
Manage Multilingual Installation – Setting up the Windows Preinstallation Environment (WinPE) for multilingual support is straightforward and follows the same steps as before.
Useful external reference: Microsoft Learn.
Install.wim Setup
Manage Multilingual Installation – For the Install.wim file, start with an En-US ISO and then add the required language packs, local experience packs, and optional features.
Useful external reference: Microsoft Learn.
Adding Language Packs
Manage Multilingual Installation – Mount your Install.wim file and add the language pack using the following command:
Useful external reference: Microsoft Learn.
Add-WindowsPackage -Path "C:mount" -ScratchDirectory "C:Scratch" -PackagePath "PathToLanguagePack.cab"
Adding Local Experience Packs
Manage Multilingual Installation – Local experience packs can be found on the same ISO as the language pack or on a specific ISO. Use the following command to add them:
Useful external reference: Microsoft Learn.
Add-AppxProvisionedPackage -Path "C:mount" -PackagePath "PathToExperiencePack.cab" -LicensePath "PathToExperiencePackLicense.xml"
Adding Optional Features
Manage Multilingual Installation – To add optional features available in the “Optional Features” ISO, use the following script:
Useful external reference: Microsoft Learn.
$InstallFeature = Get-WindowsCapability -Path "C:mount" | Where-Object {$_.Name -like "Language.*fr-fr*"}
Foreach ($Install in $InstallFeature) {
    $FullNameFeature = $Install.Name
    Add-WindowsCapability -Path "C:mount" -Name $FullNameFeature -Source "DriveLetterOfMountedISO"
}
Steps to Execute the Script
- Mount the Windows 10 ISO and copy the
Install.wimfile to a working directory. - Mount the
Install.wimfile:
DISM /Mount-Wim /WimFile:C:PathToInstall.wim /index:1 /MountDir:C:mount
- Add the language pack, local experience pack, and optional features as described above.
- Unmount and commit the changes:
DISM /Unmount-Wim /MountDir:C:mount /Commit