
Use SSH Keys with PuTTY and WinSCP for TanOS
SSH Keys PuTTY – This guide explains how to generate SSH keys with PuTTYgen, add the public key to TanOS users, connect with PuTTY, and transfer files with WinSCP using key-based authentication.
Use SSH Keys with PuTTY and WinSCP for TanOS
SSH Keys PuTTY – Generate the SSH key with PuTTYgen, add the public key to the TanOS user, then use the private key in PuTTY or WinSCP.
Choose the User
- tanadmin: admin shell access
- tancopy: file transfer with SFTP / WinSCP
- recovery: recovery access if this user exists on the appliance
SSH Keys PuTTY – Create one key per user if you want clean separation between admin access and file transfer.
Generate the Key with PuTTYgen
Install PuTTY and PuTTYgen
- Download: https://www.putty.org
- Install both PuTTY and PuTTYgen on the admin workstation.
Create the Key
- Open PuTTYgen.
- Use Ed25519. If you need old compatibility, use RSA 4096.
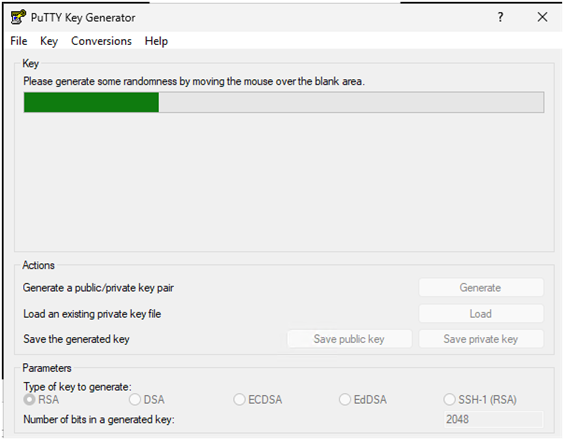
- Click Generate and move the mouse to create randomness.
Save the Private Key and Copy the Public Key
- Click Save private key.
- Store the
.ppkfile in a safe location. - Use a passphrase if possible.
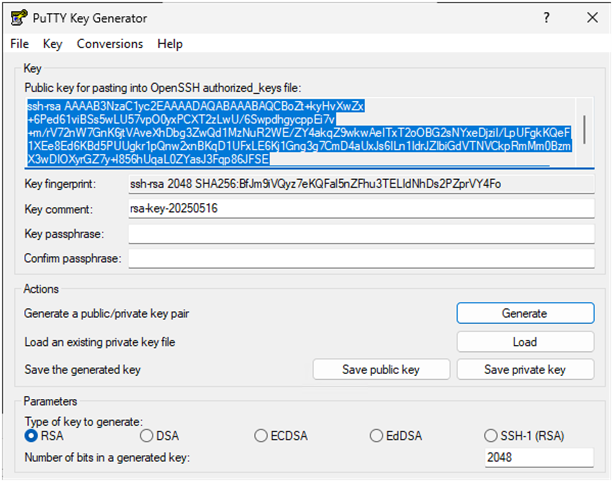
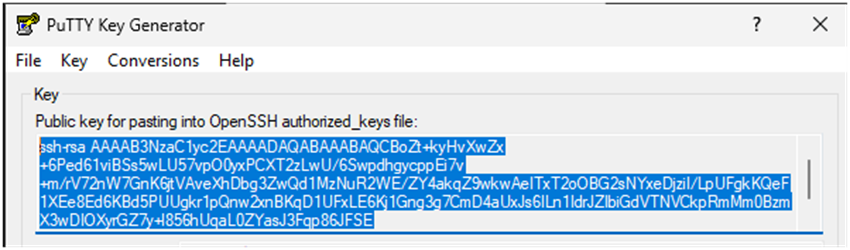
- Copy the public key from the top box in PuTTYgen.
- Paste this public key in the SSH key field of the TanOS user account.
SSH Keys PuTTY – Tip: Use Pageant if you want to cache the key and avoid typing the passphrase many times.
Connect with PuTTY
Configure the Session
- Open PuTTY.
- In Session, enter the TanOS host name, IP, or FQDN.
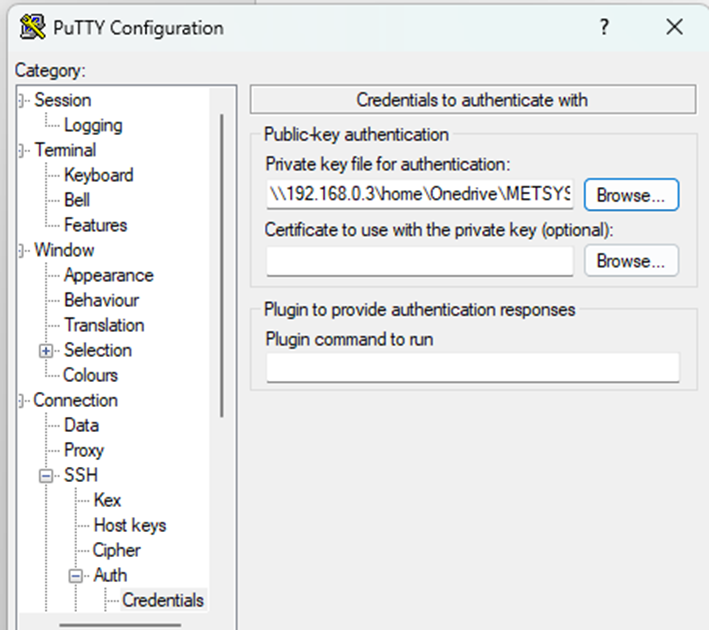
- Go to Connection > SSH > Auth.
- Set the Private key file for authentication to the correct
.ppk.
Save the Session
- Go back to Session.
- Enter a name, for example Tanium-Server1.
- Click Save.
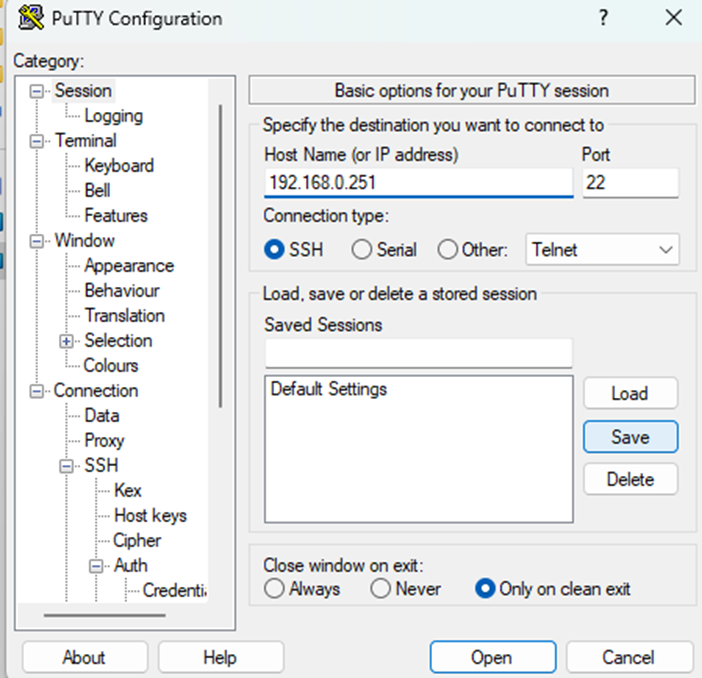
Open the SSH Session
- Click Open.
- At first connection, check and accept the server host key fingerprint.
- Enter the user name linked to the key: tanadmin, tancopy, or recovery.
- If the key matches, no password is needed.
Transfer Files with WinSCP
Create the Session
- Open WinSCP.
- File protocol: SFTP.
- Host name: TanOS IP or FQDN.
- User name: tancopy.
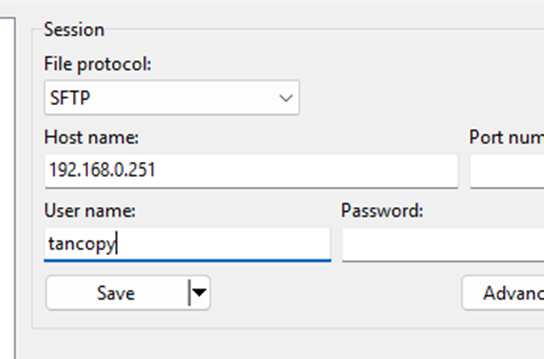
Select the Private Key
- Click Advanced.
- Go to SSH > Authentication.
- Set the Private key file to the
.ppkfor tancopy. - Click OK to return to the main screen.
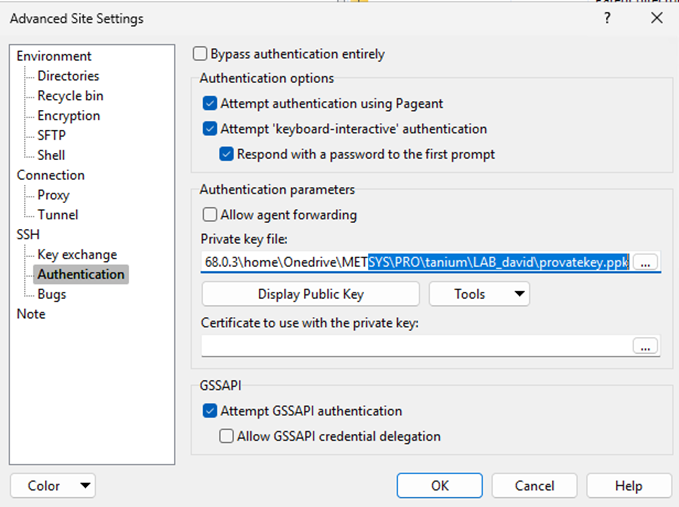
Save and Connect
- Click Save if you want to keep the session.
- Click Login to connect.
- If the key has a passphrase, WinSCP asks for it unless Pageant already has the key loaded.
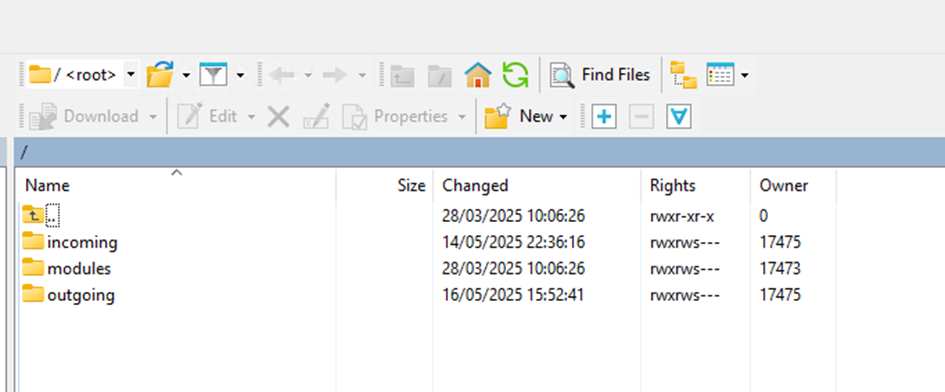
Good Practices
- Use Ed25519 when possible.
- Use a strong passphrase for private keys.
- Do not store private keys on shared drives.
- Use one key per user or per admin if you want better access control.